Make your artwork look like they're from an alternate universe. These Cyberpunk presets work with Photoshop (via the Camera Raw filter) and Lightroom. Download all 788 presets for 90% off.
This tutorial will lead you through the steps of creating a children’s book illustration that can be edited and changed when the author you are working with wants minor changes made to the art. And when using this kind of layout, the changes will be easy and generally painless for you, as the artist.
Preview of Final Results

Children’s Book Illustration Photoshop Tutorial
- Program: Photoshop 7
- Difficulty: Beginner-Intermediate
- Estimated Completion Time: 30 minutes
Note: This tutorial was meant to be completed using a pen tablet. If you are using a mouse, the brush sizes will be irrelevant. However, a good estimate for brush sizes when using a mouse is about 1/3 the size of the brush I am using.
Step 1
To begin, it is a good idea to start with the publishing standard 8 x 10 illustration size. You want to make sure that there are enough pixels per inch to allow you to have a good amount of work space, so the basic pixels/inch I go to is 300.
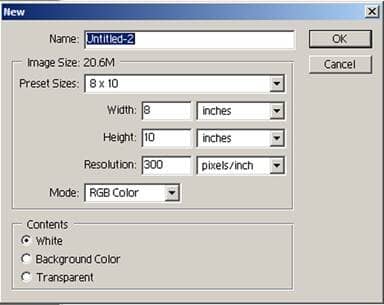
Step 2
Using the paint bucket tool, fill in the background with color # 346900. This is a great background color that I often use for outdoors scenes, just because it offers a very good color scheme.

Step 3
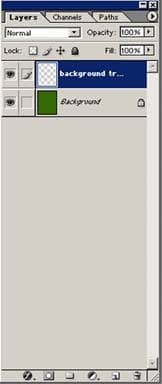
Create a new layer above the background and title it background trees. This will begin to create depth in the picture, and will provide a backdrop for the scene.
Step 4
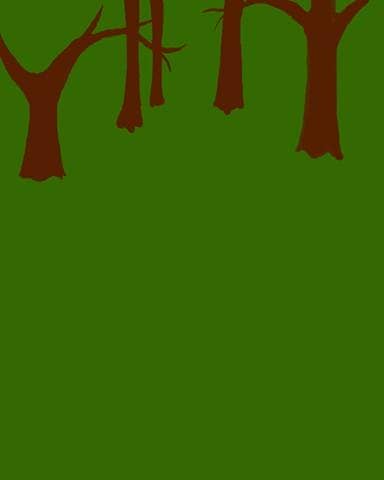
Now time to begin laying out the trees. Using color # 551F01 and a small round brush* block in a few trees in the top third of the drawing. Do not make them disappear into the background however, as this will make the camera look like it is peering downward at a very sharp angle.
Step 5
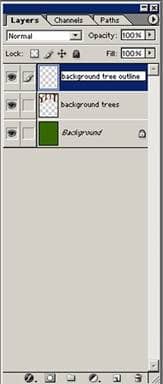
Make a new layer above this and title it background tree outline.
Step 6
Using color #262626, outline the trees. By using a grey rather than black, it will soften the edges, and keep the picture from looking too harsh.
Do not outline the bottom of the tree. By leaving it, the tree will look like it is growing out of he ground rather than like it is pasted onto the background.
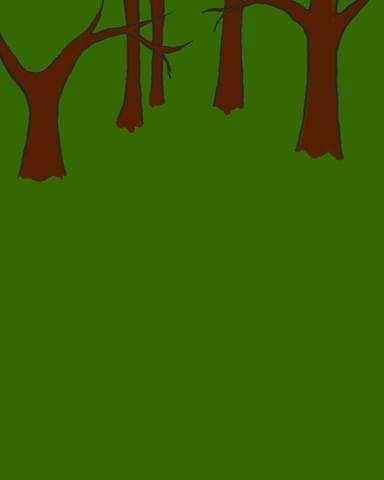
Step 7
Next, create two or three wavy lines running vertically up the tree trunks. Do not create more, or it will look to line-y. This will give the impression of tree bark.
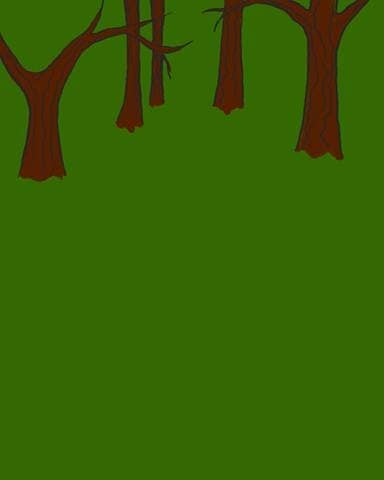

Step 8
Using the same color and brush as before, outline brushes that are surrounding the trees. It may appear awkward looking at this stage, but it will allow the picture to have a solid background, and by leaving the background very green, will make the forest appear very dense.


10 comments on “Create a Children’s Book Illustration Part I: The Background”
love the step by step tutorials!! I'll have to get at it this weekend!
I HATE EVERYTHING ABOUT THIS TUTORIAL. IT DIDNT HELP ONE BIT.
Confusing what application do U use like paint??
It was good tutorial, I am learning magic of Photoshop, thanks.
Digital imaging is such a grind. But Mr. Grey is an OG.
Photoshop sux
Nice tutorial
Nope.
Nice tutorial! I appreciate the steps and various explanations of brush settings.
No it wasn't good