Luminar AI lets you turn your ideas into reality with powerful, intelligent AI. Download the photo editor and see how you can completely transform your photos in a few clicks.
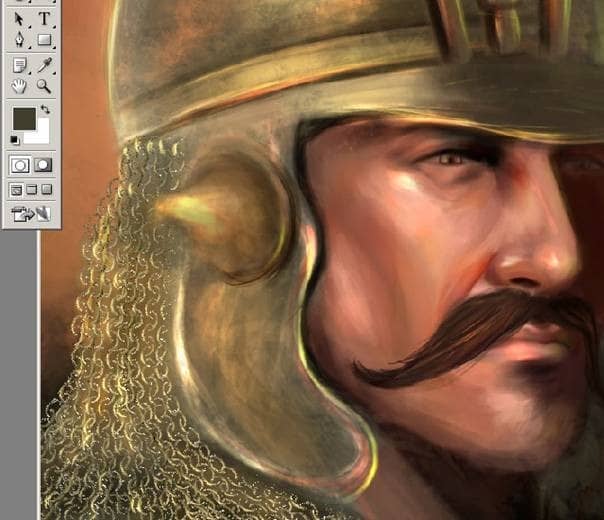
Here I have added some details for his helmet too and as you noticed I add some strokes with the smudge tool . The feather can be created with the same technique as the one used for the face. You'll be using the smudge tool for smoothing.
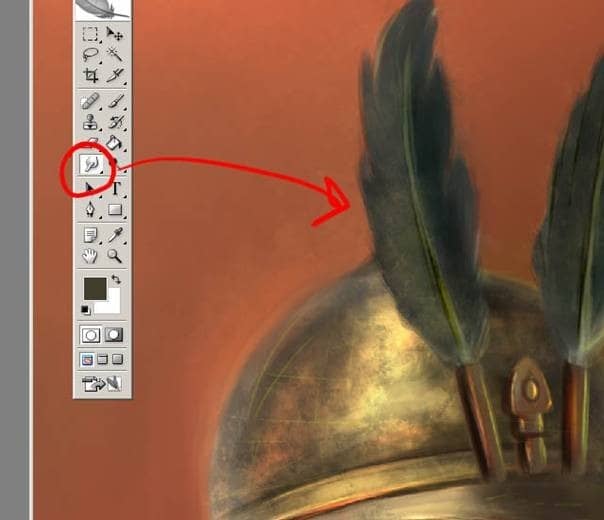
Using the smudge tool, continue to paint the rest of the feather and also add some light colors. As you can see in below image. I am using the Smudge tool at 30% strength for the feathers. Then I finish it with the Dodge and Burn tool to create shadows and highlights.
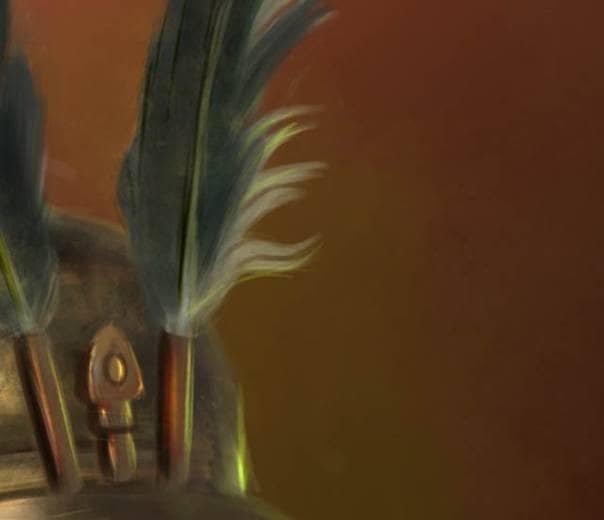
Step 6: Final Adjustment
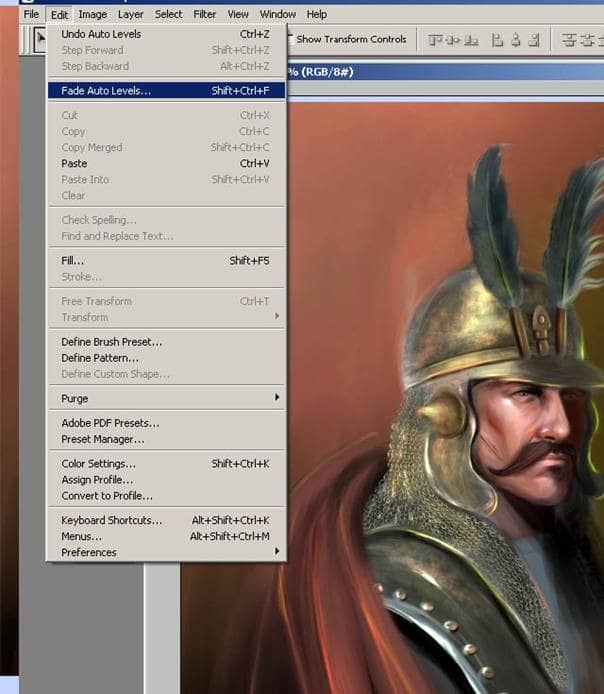
Also I am going to add some Adjustment/Auto Levels though the last merged layer.
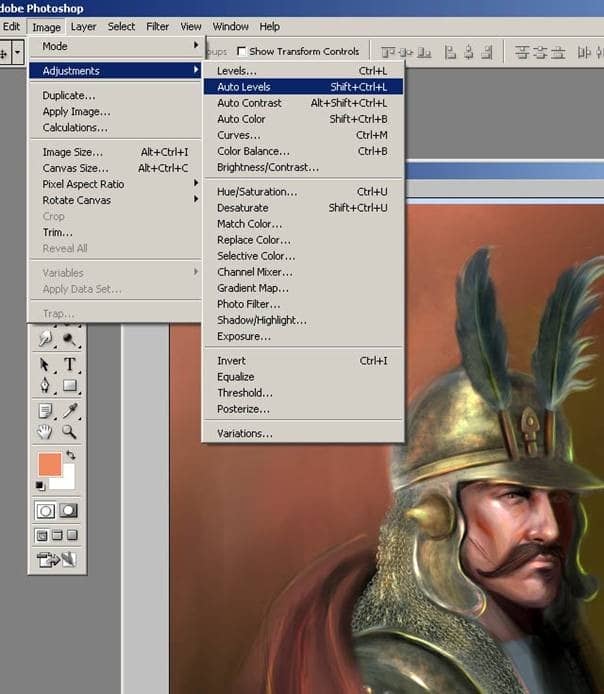
After you select Adjustment/Auto Levels then go to Edit click on Fade Auto Levels.
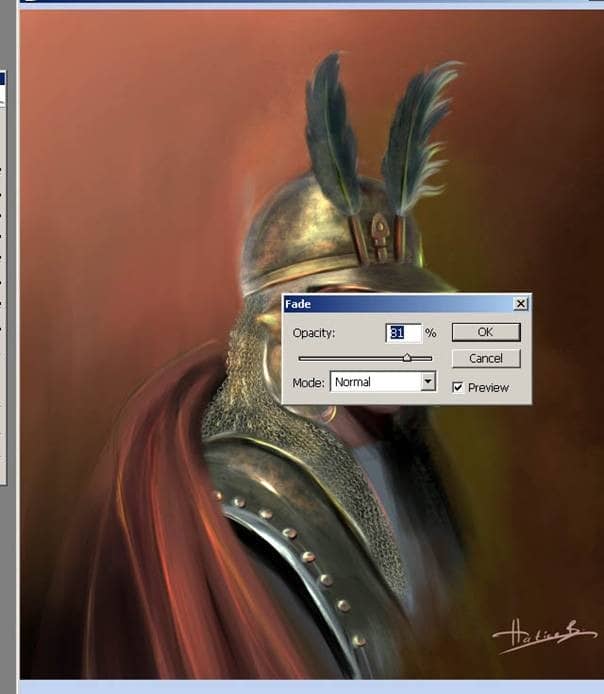
And make the opacity 82 or 81.
Final Results
After all these steps are completed here's the final image, I hope you found this "Portrait of Sipahi Warrior" interesting. Thank you for reading.
![image023[1] image023[1]](https://cdn.photoshoptutorials.ws/images/stories/4062ff6481ea_10EDD/image0231.jpg?strip=all&lossy=1&quality=70&webp=70&avif=70&w=1920&ssl=1)


3 comments on “Create a Painting of “Sipahi” in Photoshop”
wow! Thanks for sharing i ve some issues. What tools can i use to sketch in photoshop. How do i achieve a sketch like yours in photoshop i like more can u suggest tutorials to help do that
thanks for sharing this tutorial. But i ve some issues. How do u sketch and what tools can i use in photoshop to achieved such sketch? Thanks i do appreciate your feedback
Photoshop Lessons on the other hand are the online teacher that show various ways of using the Photoshop program to create interesting and exclusive picture miracle of the own.