My name is Hatice Bayramoglu and I am a 3D artist and illustrator from Turkey. You remember me maybe by my first 3Dtutorial about human head modeling (‘Head modeling with 3dsmax’ by Hatice Bayramoglu ) and I will do a simple 2D painting tutorial for you.
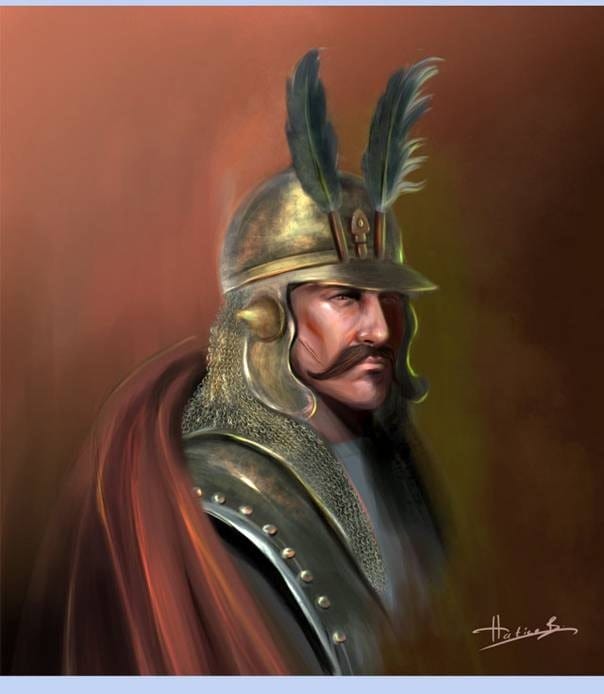
Preview of Final Results

Portrait of Sipahi Photoshop Tutorial
For this tutorial I will be using Adobe Photoshop and Wacom Tablet to create the finished result. I will also be using techniques and methods that I feel most comfortable with when coloring. I suggest that after following this tutorial, you find out what works best for you.
Step 1 Sketching and Opening a new File
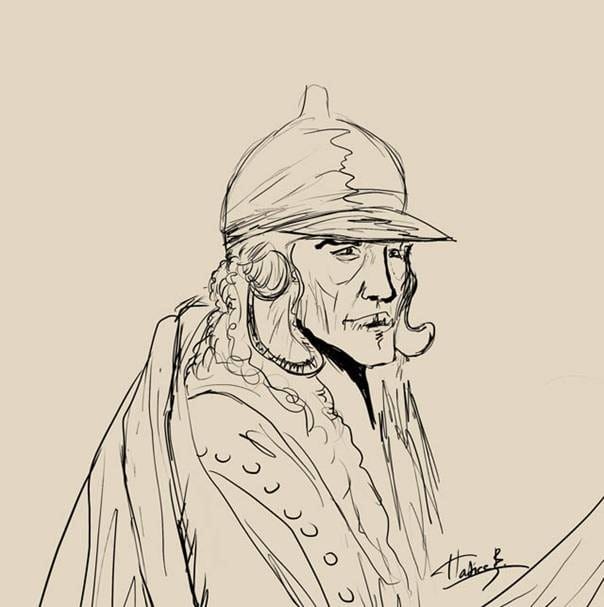
First step is to open a new file with the size 800×828. But of course it is up to your wish if you would like to make a different file size you can change the file via the help of Image/Canvas Size. Maybe I can change it later if I don’t like the canvas size. The first step of the final image is the drawing. I started with some quick sketches to get a feeling for my character. Here is a simple sketch work I did with Photoshop. I don’t go too much into details. I’m just trying to find out how I want him look like.

Step 2 Color Palette
The second thing here you to choose color scheme. I decide for background a some brown colors and Other colors are for the character face and his clothing.

Step 3: Choosing brush
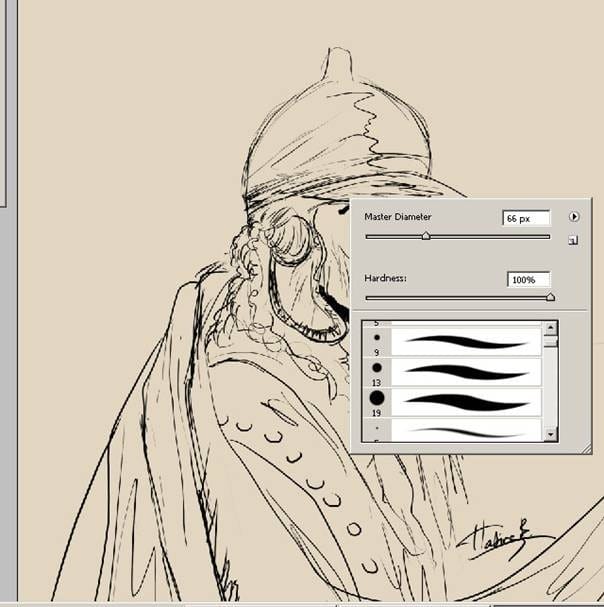
The next step is choosing the brush. For my character I use only standard brushes with some different pen pressure settings.

After that from brush panel choose “Other Dynamics” and make the setting as seen on the below picture. When painting, it is very helpful to have these settings for your pen.

Now I draw some brush strokes to see my new brush. I do think this brush setting will do very good painting work .

Step 4: Coloring the Sketch work
Now I start coloring and give the basic tone coloring to the sketch. I put some colors for the background. I try with some colors for to get more quicker result how the character face is going to look.

Here is the result. Since I already decided upon the colors, now I can start to add details. The light is from background and a little red color . I’ll now begin to detail the face. The cloth need to be worked on too. You don’t have too over detail everything for now. I just add some basic detail for my character at this step.
3 responses to “Create a Painting of “Sipahi” in Photoshop”
-
wow! Thanks for sharing i ve some issues. What tools can i use to sketch in photoshop. How do i achieve a sketch like yours in photoshop i like more can u suggest tutorials to help do that
-
thanks for sharing this tutorial. But i ve some issues. How do u sketch and what tools can i use in photoshop to achieved such sketch? Thanks i do appreciate your feedback
-
Photoshop Lessons on the other hand are the online teacher that show various ways of using the Photoshop program to create interesting and exclusive picture miracle of the own.


Leave a Reply