How to Create a Sony Xperia Ad in Photoshop

How to Create a Sony Xperia Ad in Photoshop

Create a professional Sony Xperia Ad using the tools in Photoshop. This tutorial will show you how to create a Sony Xperia phone from scratch then use it to create an advertisement.


Preview of Final Results

final

Download the PSD

Xperia Ad.zip | 1.09 MB

Download from FileSonic
Download from Website

Xperia Icons.zip | 0.15 MB

Download from FileSonic
Download from Website


Sony Xperia Ad Photoshop Tutorial


Resources


Step 1 - Create a new document.

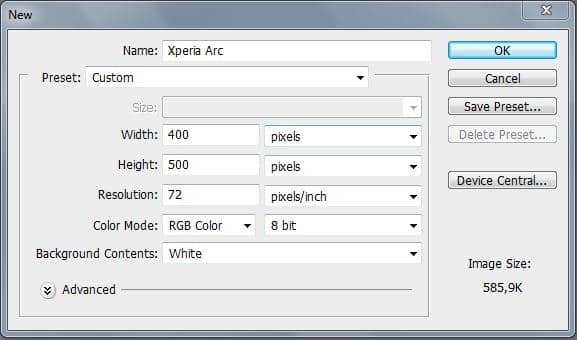
Start by making a new image(File->New) with these settings :

  • Width : 400 pixels
  • Height : 500 pixels
  • Resolution : 72 pixels/inch
  • Background Contents : White
1

Step 2 - Shape of the phone

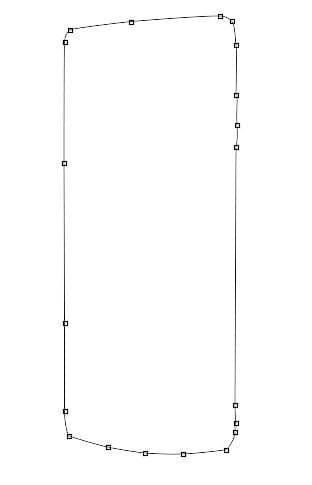
Make a new layer(Ctrl+Shift+N or you can go to Layer->New->Layer). Rename the layer to "Base". You can rename a layer by pressing right click on it , then selecting "Layer properties" option and in the "Name" box you can enter what name you prefer. From the Tools menu select Pen Tool (P key) and make a path like in the picture below
2a

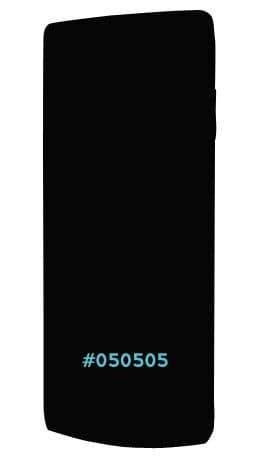
Fill the path created at the step 2A with a dark gray color , I used #050505
2b

Step 3

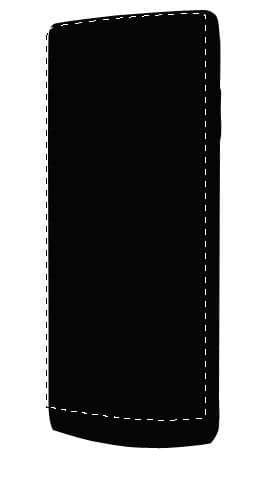
Use a selection tool ( Lasso Tool , Polygonal Lasso Tool , Pen Tool ) to make a selection like in the next picture
3a

Fill the selection created above with next color: #52c1d0
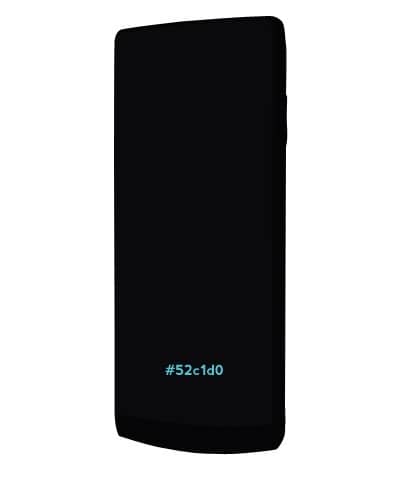
3b

Step 4 – Highlights

Make next selection using a selection tool
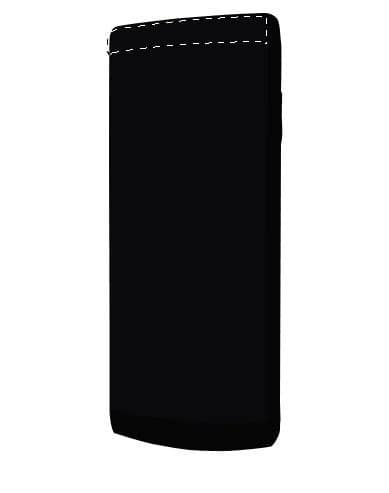
4a

Add from left to right some highlights using Dodge TOol (O)
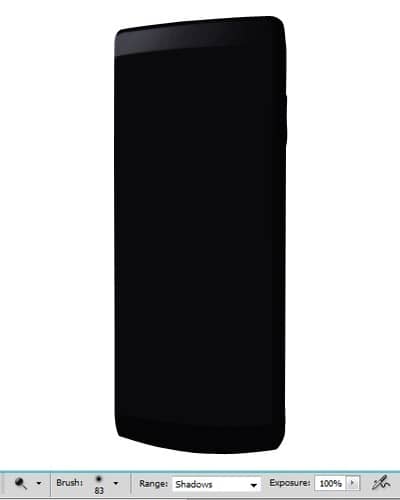
4b

Step 5

Make a new layer(Ctrl+Shift+N or you can go to Layer->New->Layer) or you can press the indicated button in the picture below ). Rename the layer to "Stroke1". You can rename a layer by pressing right click on it , then selecting "Layer properties" option and in the "Name" box you can enter what name you prefer. From the Tools menu select Pen Tool (P key) and make a path like in the picture below
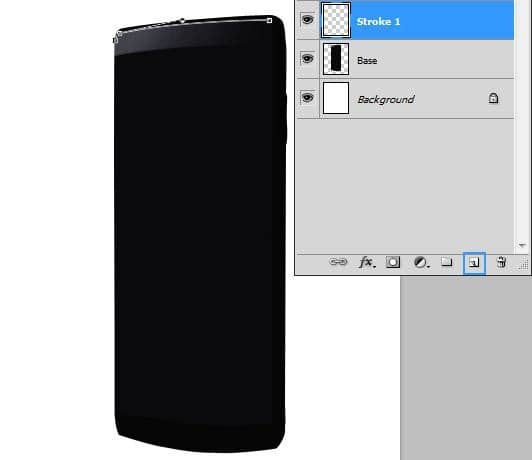
5a

Add a 1 pixels white stroke(right click on the path -> stroke path)
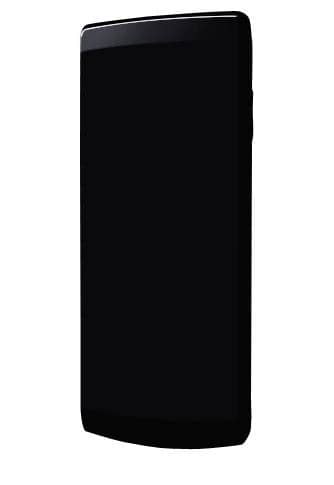
5b

Then using Eraser Tool (E key) erase over the stroke to give a plus of realism
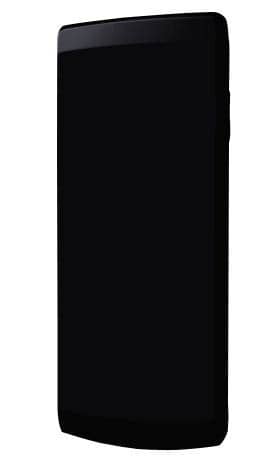
5c

Step 6

Make another new layer (Ctrl+Shift+N) , rename it "Glossy part" then using Pen Tool (P) make a path like in the picture below
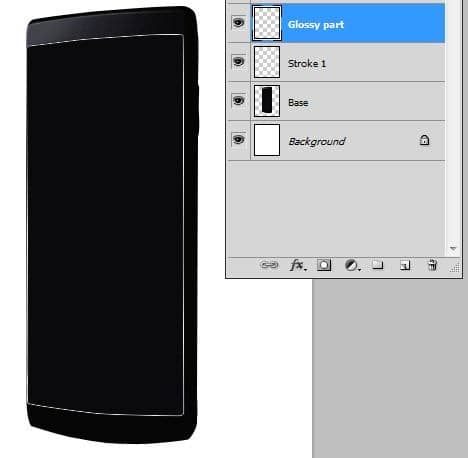
6a

Fill the path created abobe with #030305
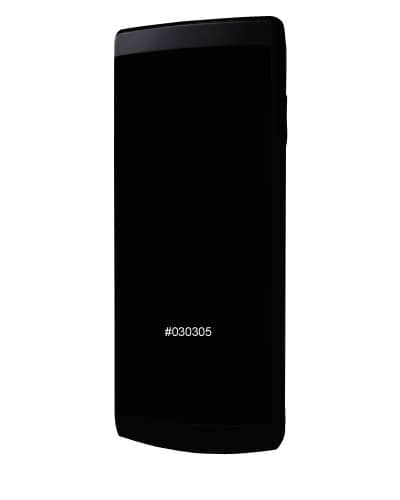
6b

Step 7

Into a new layer called "screen" make a square using #080808
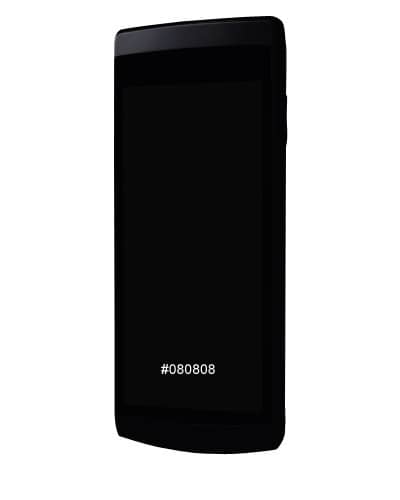
7a

Now make another path using Pen Tool (P)
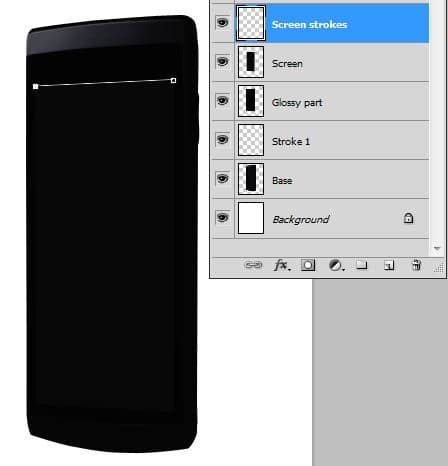
7b

Add a 1 px white stroke(right click on the path -> stroke path) like in the picture below
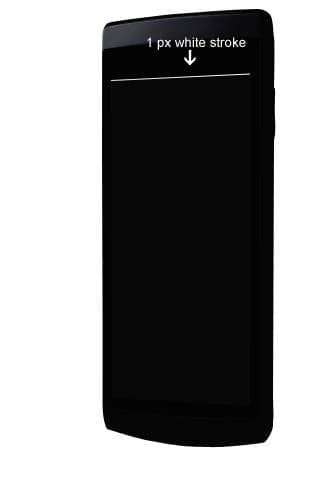
7c

Decrease the opacity of the strokes created at the step 7C to about 20%

7d


Step 8

Make next selection using one of next tools (Pen Tool , Lasso Tool or Polygonal Lasso Tool )

8a

Add some highlights using Dodge Tool (O) in the indicated places

8b

Step 9

: Make a new layer(Ctrl+Shift+N or you can go to Layer->New->Layer) or you can press the indicated button in the picture below ). Rename the layer to "Stroke2". You can rename a layer by pressing right click on it , then selecting "Layer properties" option and in the "Name" box you can enter what name you prefer. From the Tools menu select Pen Tool (P key) and make a path like in the picture below

9a

Turn on the option "Simulate pressure" then press OK

9b

Now using Eraser Tool (E) erase over the stroke to give a plus of realism

9c

Step 10

Make a new layer(Ctrl+Shift+N or you can go to Layer->New->Layer) or you can press the indicated button in the picture below ). Rename the layer to "Metal Part" and make next selection using Polygonal Lasso Tool (L)

10a

Fill the selection created above with a grey color, I used #b1b1b1

10b

Step 11

Make next selection using Polygonal Lasso Tool (L) over the Metal part

11a

Add some highlights in the selection using Dodge TOol (O) the create another selection a little bit to right and add highlights again

11b

Step 12

Use Pen Tool (P) to create a path like in the next picture

12a

Fill the path created above using a dark grey color, I used #141416

12b

Add in the left part of the layer some highlights using Dodge Tool

12c

Step 13

Make a new layer(Ctrl+Shift+N or you can go to Layer->New->Layer) then rename the layer to "Stroke3". You can rename a layer by pressing right click on it , then selecting "Layer properties" option and in the "Name" box you can enter what name you prefer. In this layer add a 1 px stroke like in the picture below

13a

Erase over the stroke to look real

13b

Add 2 square holes over the layer create at the step 12A like I did

13c


Step 14

Make another new layer and using Pen Tool create a path like in the next picture

14a

Add a 2 px black stroke over the button

14b

Step 15

Select the „metal part „ layer and add some highlights over it using Dodge Tool (O)

15a

Step 16

Make a new layer(Ctrl+Shift+N or you can go to Layer->New->Layer) then rename the layer to "Black Stroke". You can rename a layer by pressing right click on it , then selecting "Layer properties" option and in the "Name" box you can enter what name you prefer, then add a "skinny" black stroke like I did

16a

Make another new layer and add a shape like in the picture below using a grey color (#626166)

16b

Use same technique like at the step 11 to obtain a nice metal effect

16c

Step 17

Select the „base" layer and using Dodge Tool (O) add some highlights at the bottom of our Xperia phone

17a

Step 18

Use same technique (highlights/shadows) to add the bottom buttons, then create a new path using Pen Tool (P)

18a

) Add a 2 pixels white strke like I did in the next image

18b

Step 19

Pick up Custom Shape Tool (U) and add next symbol above the bottom buttons (fix it better using warp/disort function) then decrease the opacity of the layer to ~75%

19a

Add and the other symbols on the phone

19b

Step 20

Now we going to create the wallpaper, into a new layer apply a black color on screen

20a

Using Brush Tool (B) apply 2 blue colors like in the next picture

20b

Go to Filter->Noise->Add Noise and make next settings

20c

Now go to Fiter->Blur->Motion Blur and move the indicator for "Distance" options at the maximum right

20d


Step 21

Go to Image->Adjustments->Brightness/Contrast and make next settings then press Ok

21a

Make a new layer(Ctrl+Shift+N or you can go to Layer->New->Layer) then rename the layer to "Overlay", into this layer using Brush Tool add some white color on our screen

21b

Go to Filter->Blur->Gaussian Blur and make the settings below

21c

Set the blending mode for this layer to Overlay

21d

Step 22

Into a new layer called Highlight make next path using Pen Tool (P)

22a

Fill the created path with the white color like I did in the next picture

22b

Decrease the opacity of the Highlight layer to 20% to give a plus of realism to our screen

22c

Step 23

Make a new layer(Ctrl+Shift+N or you can go to Layer->New->Layer) then rename the layer to "Stroke5" then with Pen Tool create next path

23a

Add a 2 px white stroke at the top of our screen

23b

Now erase using Eraser Tool (E) the white stroke to look more real

23c

Step 24

I forgot to create a hole for our bottom buttons, so I`ll do it now, create a new layer, make next path using Pen Tool (P)

24a

Fill the path with a black color

24b

Step 25

Make another new layer, and using Pen Tool (P) create next path

25a

Add a 1 px black stroke(right click on the path -> stroke path) like I did in the picture below

25b

Duplicate the layer with the black stroke (you can duplicate a layer by selecting it and pressing Ctrl+J)

25c

Make the stroke white and move a little to the left then decrease the opacity of it to ~17%

25d


Step 26

Use Rounded Rectangle Tool (U) to add a dark grey rounded shape

26a

) Use Pen Tool (P) to add a white stroke (Simulate pressure on) to give a highlight effect)

26b

Inside the grey rounded shape, into a new layer add a grey point

26c

Decrease the opacity of the layer with the point to 40%

26d

Step 27

Make another new layer and using Pen Tool (P) make next path

27a

Fill the path created above using a grey color

27b

Now press right click on the layer ->Blending Options and make next settings for the Stroke and Inner Shadow options

27c
27d

Step 28

Use Rounded Rectangle Tool (U) and make a black rounded shape like in the next picture

28a

Fix the rounded shape using Free Transform in the layer created at the step 27

28b

Erase the excess using Eraser Tool (E)

28c

Then select the layer created at the step 27 and add some shadow in the indicated places using Burn Tool (O)

28d

Step 29

Into a new layer add a 1 px black stroke in the indicated place

29a

Make it look better using Eraser Tool (E)

29b


Step 30

With the Base layer selected, pick up a selection tool and make next selection at the bottom of the phone

30a

With the next settings for Dodge Tool(O) add some highlights (reflections) in the selection created above

30b
30c

Step 31

Now we`ll create the shadow for our phone… Make a new layer(Ctrl+Shift+N or you can go to Layer->New->Layer or you can press the indicated button in the picture below ). Rename the layer to "shadow". You can rename a layer by pressing right click on it , then selecting "Layer properties" option and in the "Name" box you can enter what name you prefer then make next selection using Eliptical Marquee Tool (M)

31a

Fill the selection using a black color #000000

31b

Go to Filter->Blur->Gaussian Blur & Motion Blur and make the settings below

31c
31d

Fix the shadow under the phone using Transform options

31e

Step 32

Let`s create the advertisement for our Xperia Phone, make a new image(File->New) with these dimensions :

  • Width: 600 pixels
  • Height: 500 pixels
  • Resolution: 72 pixels/inch
  • Background Contents: White
32a

Fill the background layer with #1f7a8d color the go to Filter->Noise->Add noise and make the settings from the next image

32b

Now go to Filter->Render->Lighting Effects and make the settings below

32c

Image->Adjustments->Hue/Saturation

32d

Step 33

With Pen Tool (P) into a new layer (Ctrl+Shift+N) make next shape at the bottom of our image

33a

Drag our Xperia phone in this image

33b


Step 34

Into a new layer (Ctrl+Shift+N) make next path using Pen Tool (P)

34a

Right click on the path ->Stroke Path (Simulate pressure ON) using #3da9a9

34b

Duplicate the stroke created at the step above (Ctrl+J) and use Skew option to move up from the right part

34c

Make same thing 3 times more

34c[1]

Step 35

Use Custom Shape Tool (U) and add some circles like in the next picture

35a

Make next settings in Blending Options

35b
35c

Step 36

Duplicate the layer with the circles (Ctrl+J) Flip it vertically and place it at the top of the image

36a

Add some text using Nevis font (you can download it using the link from the beginning of the tutorial

36b

Add some effects to the text

36c
36d

Step 37

Pick up Single Row Marquee Tool and make next selection

37a

Create a new layer, increase the size of Brush Tool (B) and press one time inside the selection

37b
37c

Duplicate the line created at the step 37B and place it at the bottom of the text

37d

Step 38

Into a new layer, fill with white like in the picture below

38a

Set the blending mode for this layer on Overlay and decrease the opacity of it to ~10%

38b

Final Results

final[1]

Authors Comment

profileMy name is Pintilei Adrian, I`m 17 and I`m from Botosani, Romania. At the moment I`m studying at the National COllege A.T Laurian Botosani, here I hope to open my own Graphic Design Business!You can visit my blog here ->www.pintileiadrian.com Enjoy!

- Pintilei Adrian

90% Off Cyberpunk Preset Bundle
Sponsored

Make your artwork look like they're from an alternate universe. These Cyberpunk presets work with Photoshop (via the Camera Raw filter) and Lightroom. Download all 788 presets for 90% off.

One comment on “How to Create a Sony Xperia Ad in Photoshop”

Leave a Reply

Your email address will not be published. Required fields are marked *

cross