Turn any photo into a dot grid artwork with these Photoshop actions. You'll get great results with dots that change size. They get larger in brighter areas and smaller in darker areas. Free download available.

Step 63
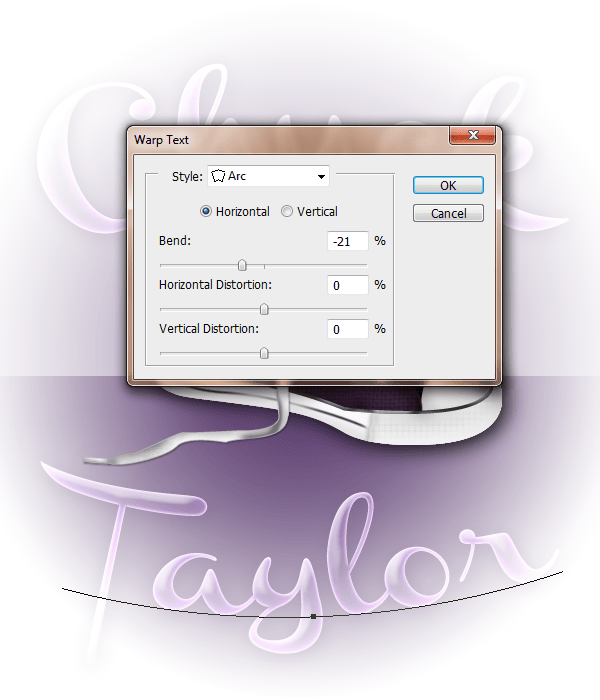
Then click the warp text icon and add this setting
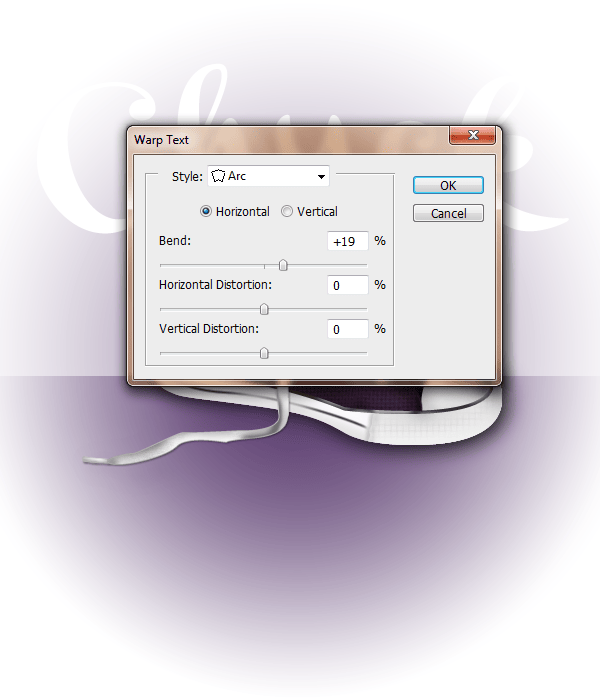
Step 64
Change this layer to 'Soft Light' and a Fill of 0% and add these layer styles
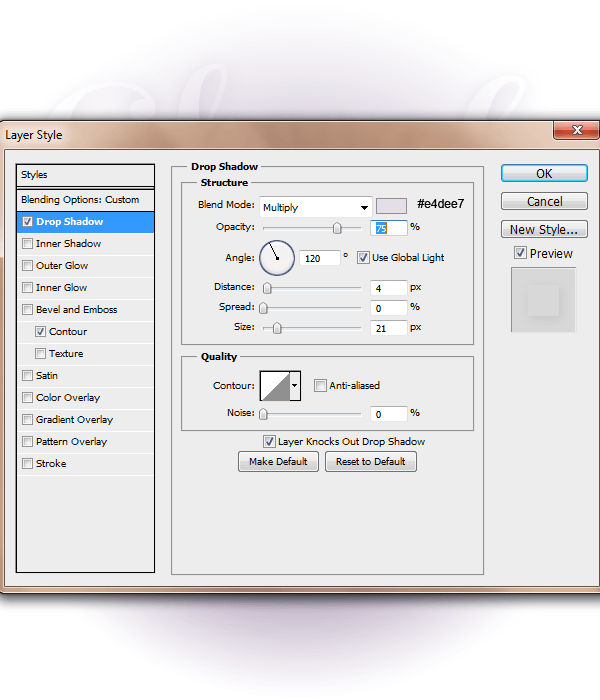
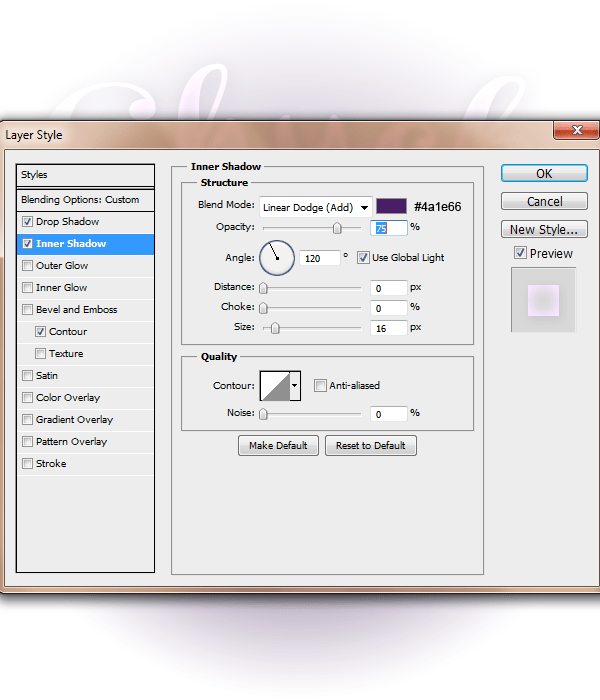
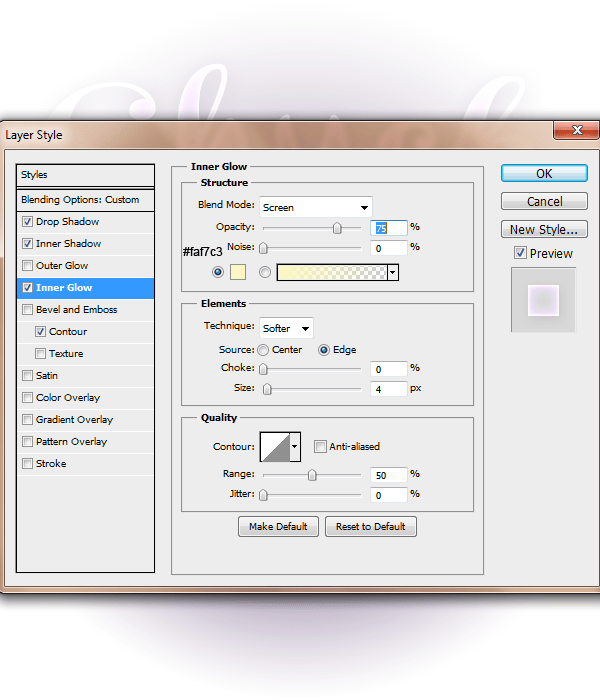
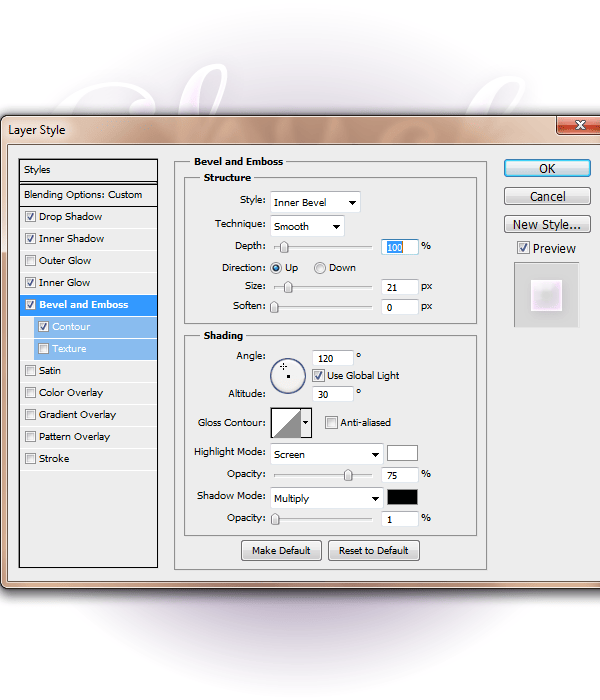
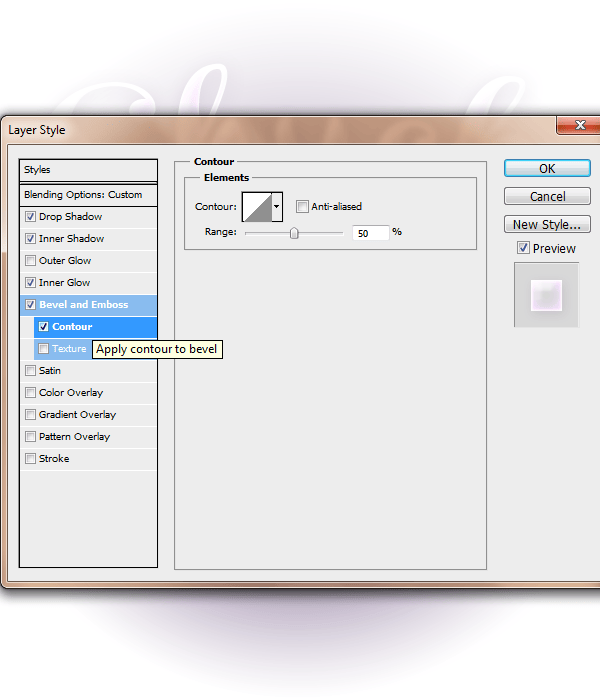
Step 65
Repeat these same steps and layer styles for the word 'Taylor'. The only thing to change is the 'warped text'
Step 66
Create a new layer adn with a 8px soft round paint brush #5b3c70 paint along the edges of the word.

Step 67
Change this layer to Divide

Final Results
![final-results[1] final-results[1]](https://cdn.photoshoptutorials.ws/images/stories/13e6e2eead33_118E1/final-results1.png?strip=all&lossy=1&quality=70&webp=70&avif=70&w=1920&ssl=1)

 I hope you enjoyed it!
2 comments on “How to Draw a Converse “Chuck Taylor” Shoe in Photoshop”
Awesome I love it so much :D
so nice