Learn how to draw this Adidas sneaker in Photoshop. You’ll learn how to create the shape with the Pen tool and use different techniques for coloring and shading.
Preview of Final Results

How to Draw an Adidas Sneaker from Scratch Photoshop Tutorial
Step 1
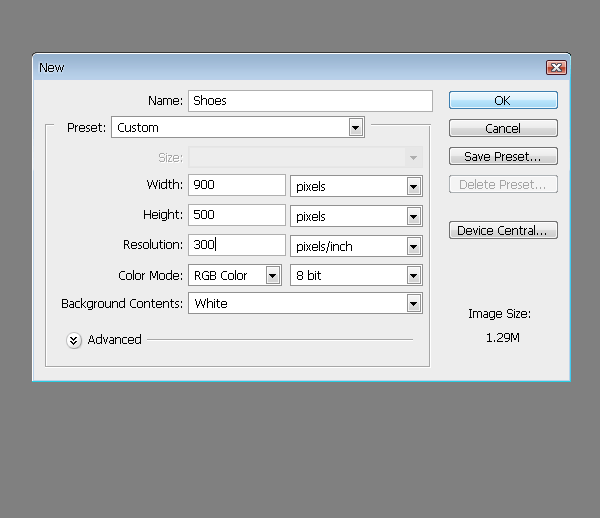
First thing first: create a new image (File > New) with these dimensions.
- Width: 900 pixels
- Height: 500 pixels
- Resolution: 300 pixels/inch
Step 2
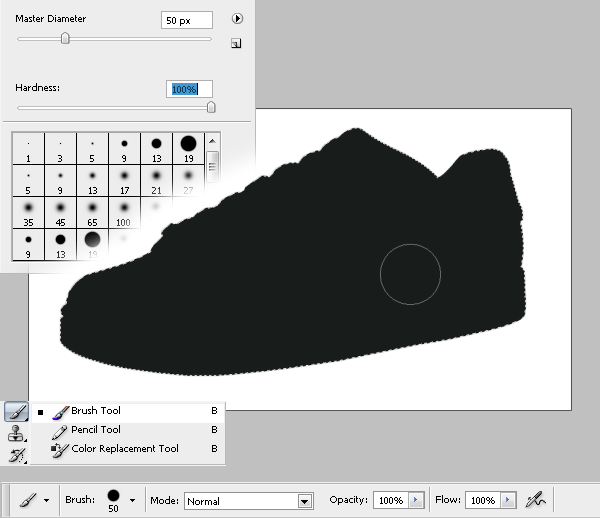
Use the Pen Tool (P key) to make a path as what you see in the picture below. Then right click on it and choose “Make Selection”.

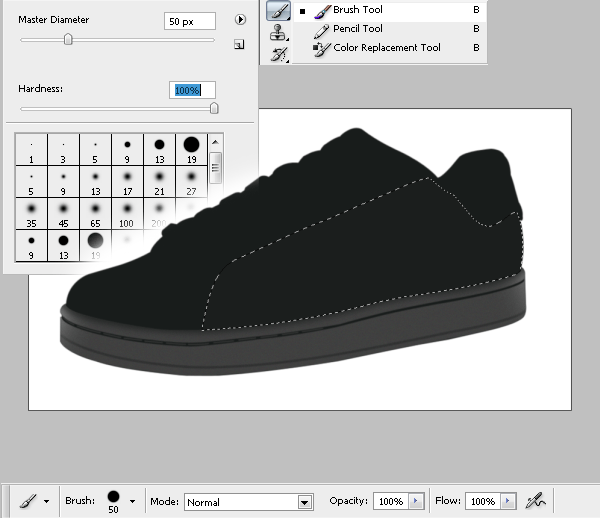
Use the Brush Tool (B Key) with the settings below, and fill the selection we just created with a dark gray color such as #181c1b.
Step 3
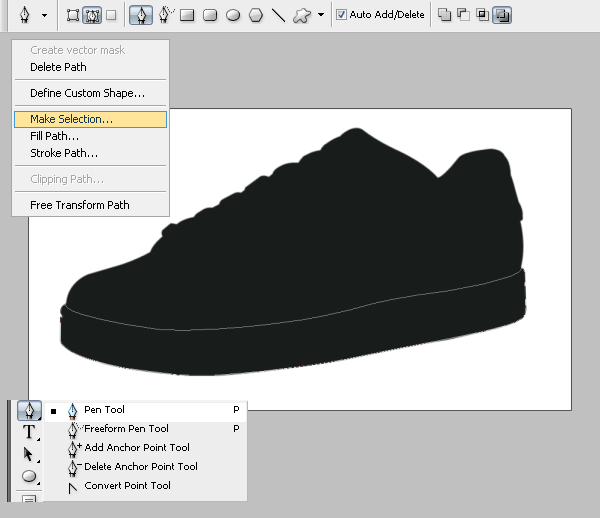
Use the Pen Tool (P key) to create a path. Right click on the path, and select “Make Selection”.
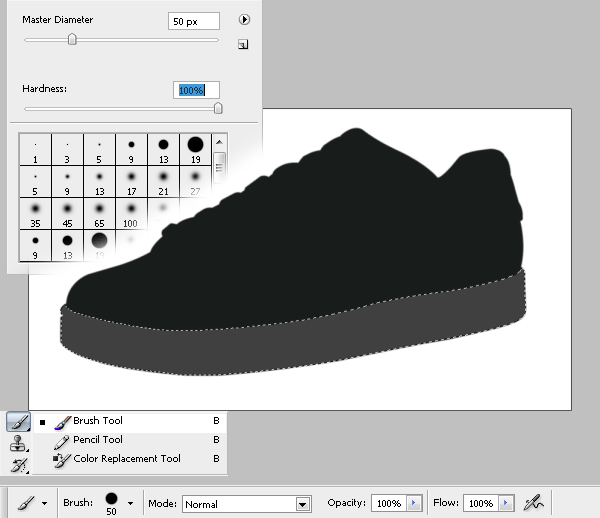
Fill the selection with a gray color #3d4444.
Step 4
In a new layer (Ctrl+Shift+N), make a path as in the picture below with the Pen Tool (P key). Right click on it and select “Stroke Path”.
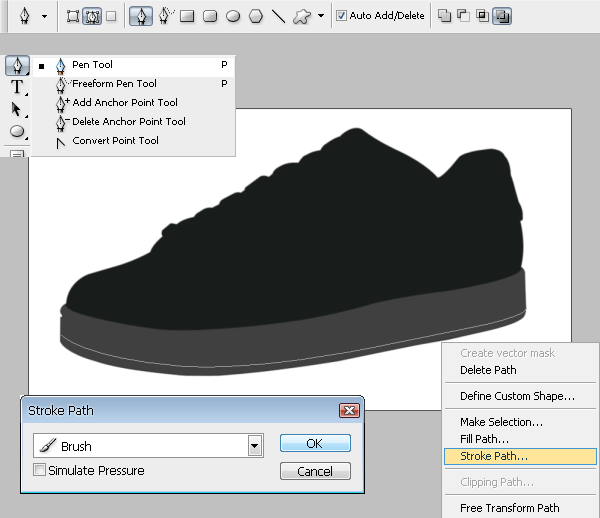
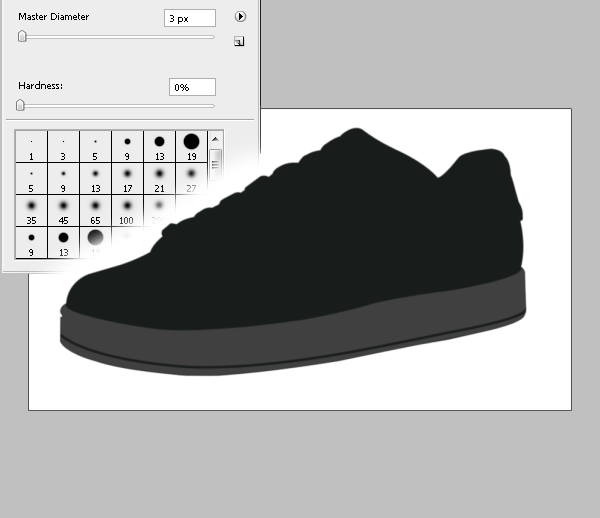
Use these Brush Tool settings for the stroke:
- Master Diameter: 3 px
- Hardness: 0 %
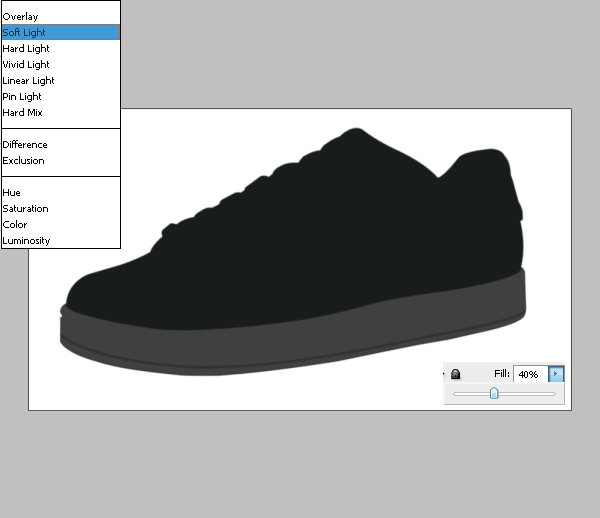
Set the blending mode for the layer on “Soft Light” and decrease the “Fill” option to approx. 40%.
Step 5
Again use the Pen Tool (P key) to create a path, then right click on it and choose “Make selection”.
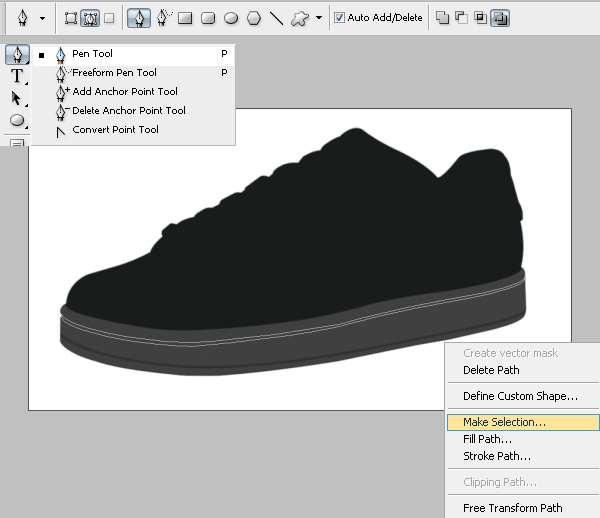
Fill the selection utilizing the Brush Tool (B key) in a dark gray color #181c1b.
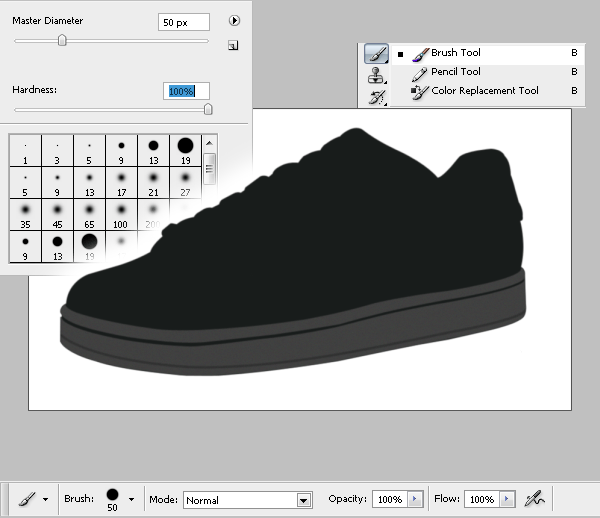
Step 6
Create paths with the Pen Tool (P key), then right click and select the “stroke path”.
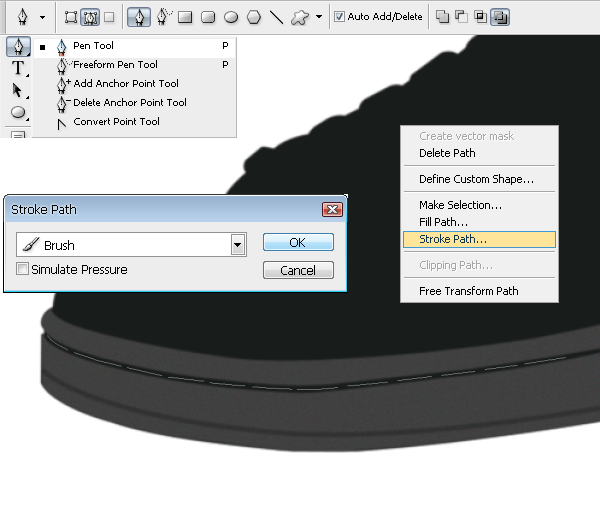
Use a 2px #2f3030 for the stroke.
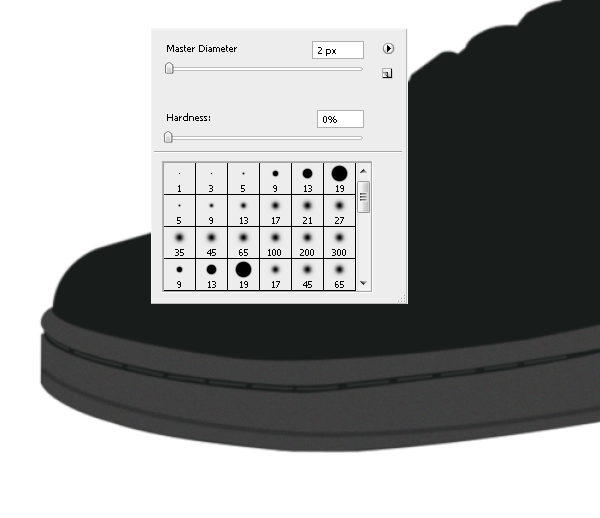
Step 7
Make a selection with a 5px Feather.
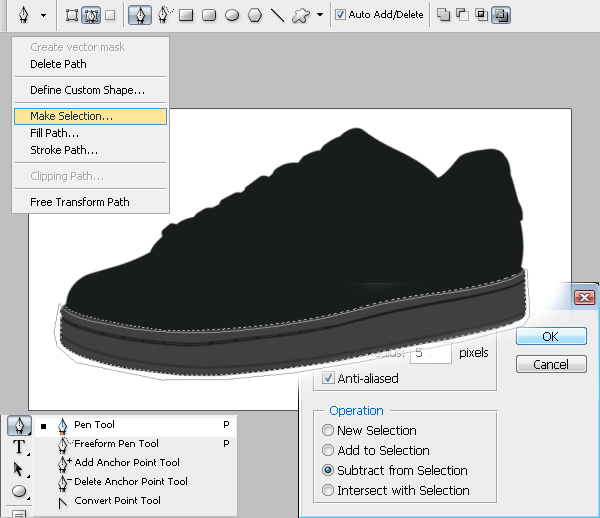
In a new layer (Ctrl+Shift+N), fill the selection with a dark gray color #181c1b,
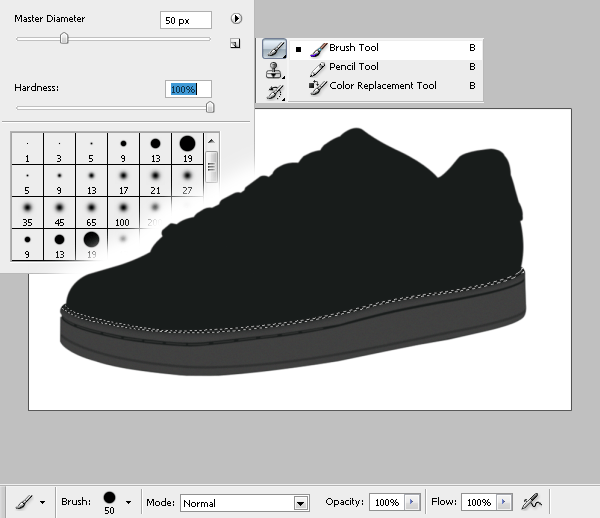
then decrease “Fill” to 70%.

Step 8
Make the next selection with the Lasso Tool (L key) with a 0.5 px Feather.
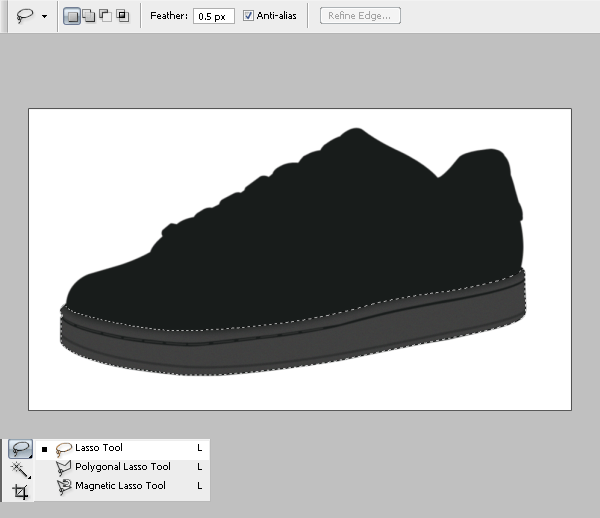
Use the Brush Tool (B key) with a huge Diameter such as 150px, and add some highlights in white in the designated places.
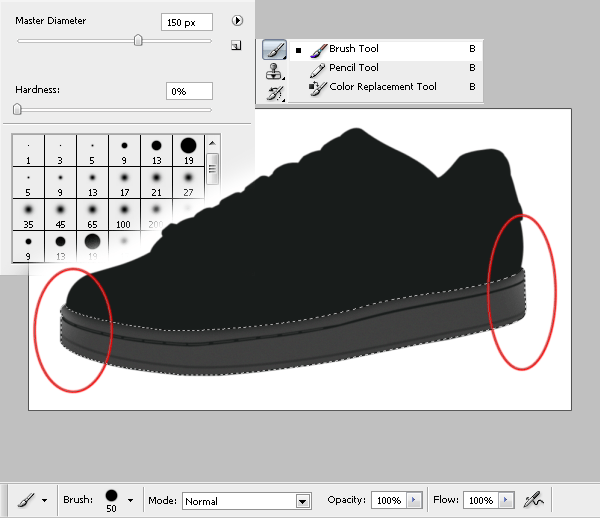
Step 9
Use the Pen Tool (P key) to make a path, then right click on it and choose “Make selection”.
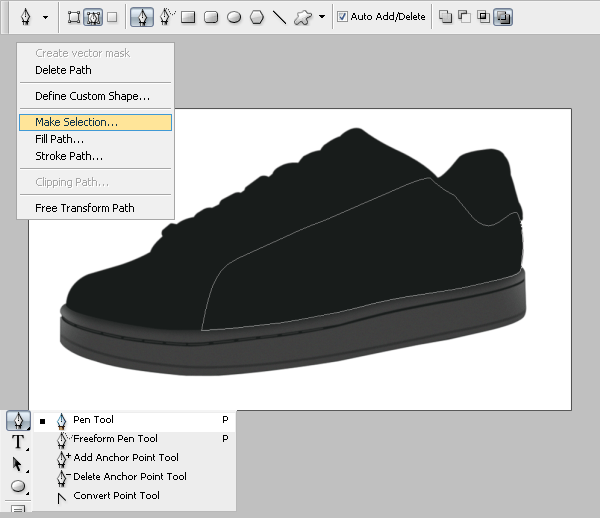
Fill the selection with color #1b1e1d with the Brush Tool (B key).
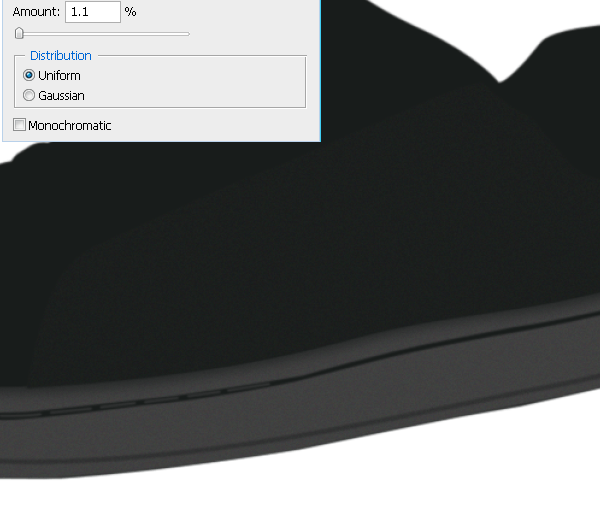
Go to Filter > Noise > Add Noise and enter 1.1 % for Amount.
Step 10
Create a new layer (Ctrl+Shift+N). Make some paths with the Pen Tool. Then right click and select “Stroke Path”.
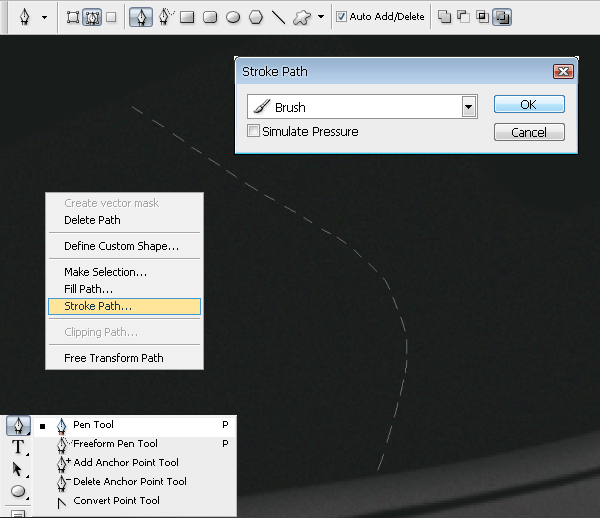
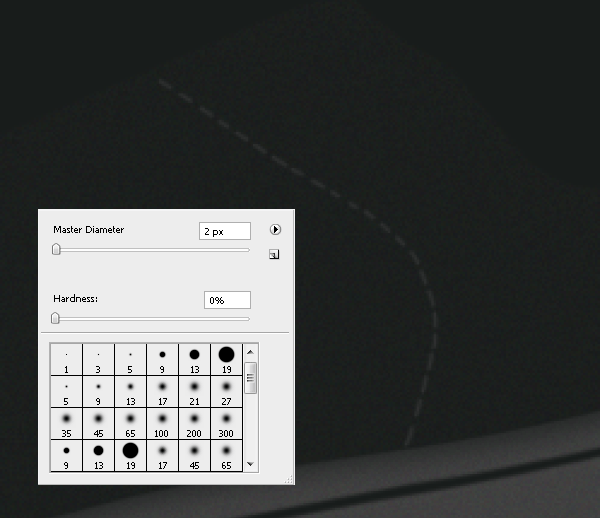
Add a 2px gray #2f3030 stroke on the side.
Now right click on the layer we just created > Blending Options > Drop Shadow, and enter these settings:


Leave a Reply