Download Lightroom presets and LUTs, absolutely free. Use the presets to add creativity and style to your photos.
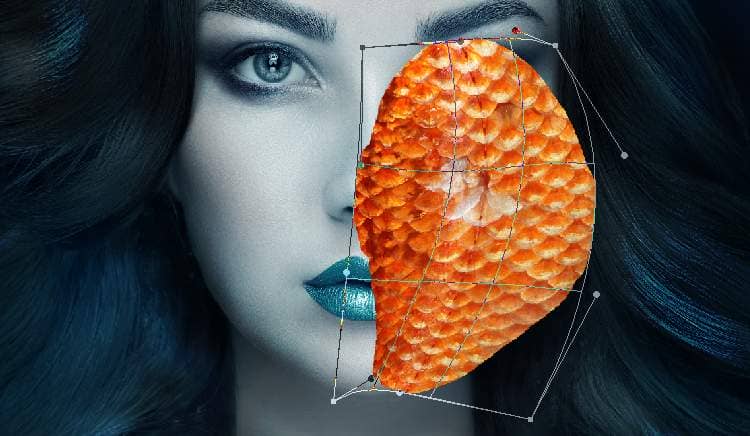
Change this layer mode to Overlay 100% and add a mask to this layer. Use a soft black with varied opacities to remove the hard edges and reduce the visibility on the cheek.
Step 9
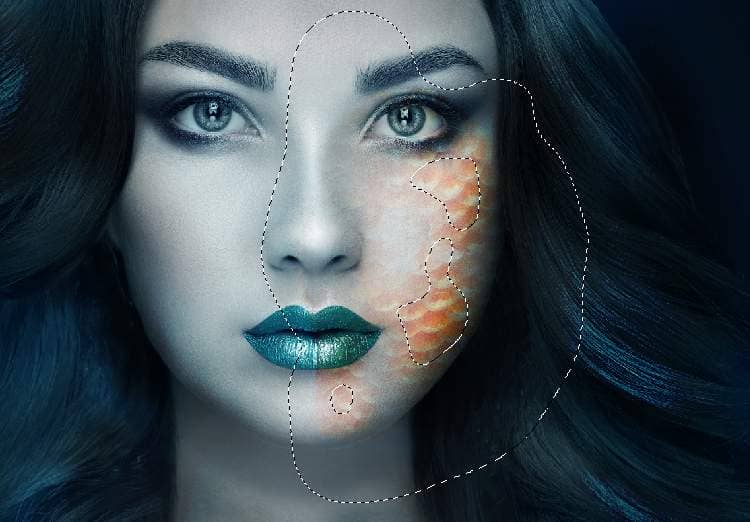
Use the Lasso Tool to select different parts from the original fish image to fill in the face and neck and change these layers' mode to Overlay 100%. Use Ctrl+T with the Warp mode to resize and tweak them into different forms. Add a mask to each of these layers to erase the hard edges and blend these parts with the existing skin.


Step 10
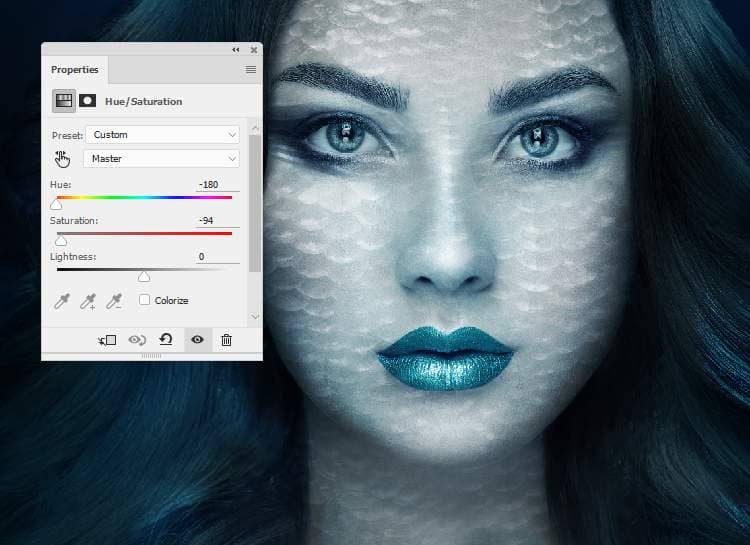
Select all the fish 1 layers and press Ctrl+G to make a group for them. Change the group's mode to Overlay 100% and add a Hue/Saturation adjustment layer to desaturate the fish parts.
Step 11
Create a Color Balance adjustment layer to give the fish's fin some cyan/blue.
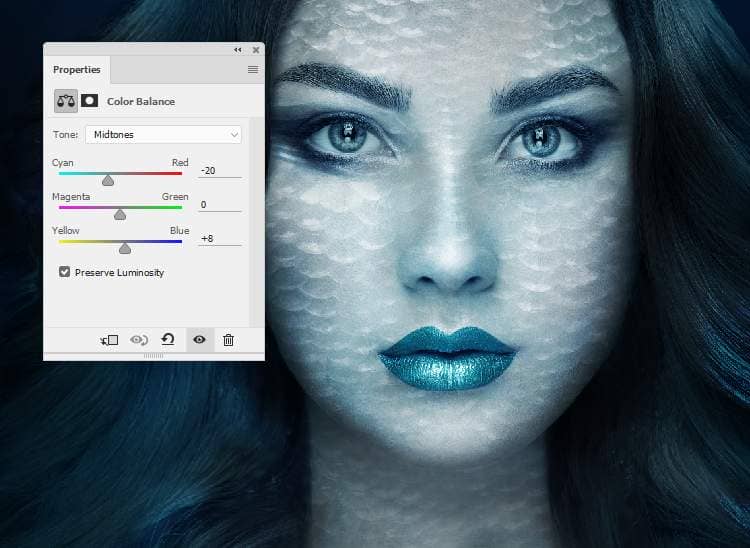
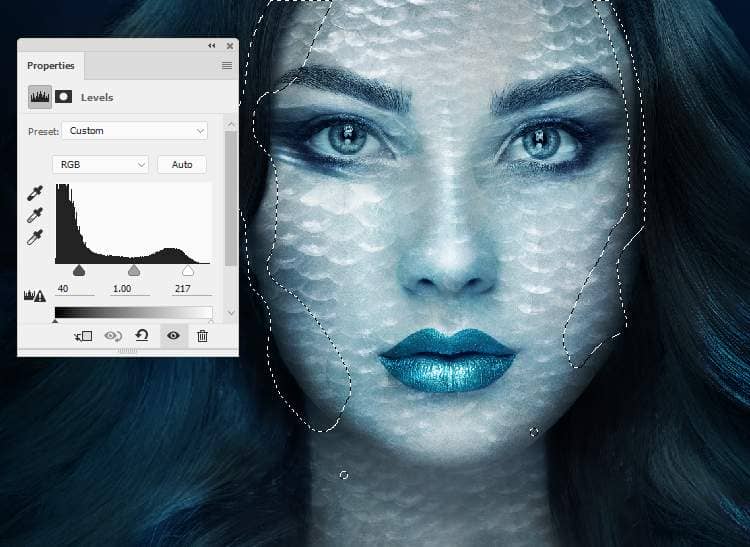
Make a Levels adjustment layer to increase the visibility of the fins on the face. On this layer mask, paint on the shadow of the cheeks to keep its contrast.
Step 12
Add a mask to this group and use a soft black brush to erase some areas on the face and neck to make the effect appear more natural.

Step 13
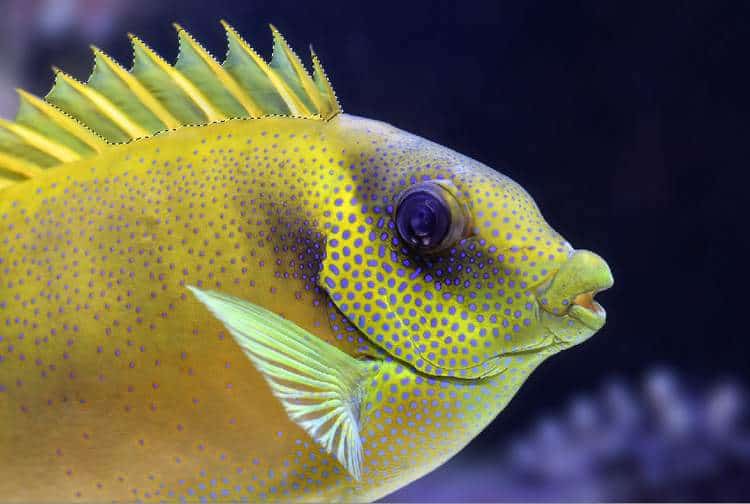
Open the fish 2 image and use the Quick Selection Tool (W) to select the fin and add to the top right of the model head (from the viewer). Convert this layer to a Smart Object and use Ctrl+T with the Warp mode to rotate and tweak the fin as shown below:
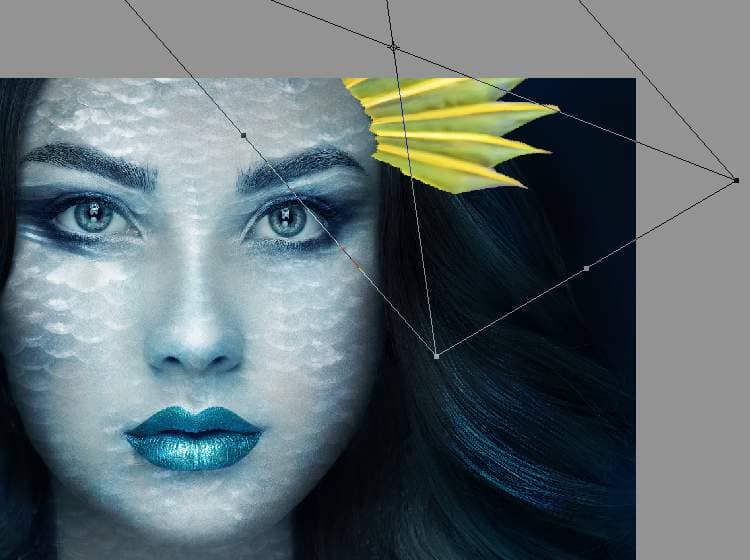

Add a mask to this layer to blend the fin with the head.

Step 14
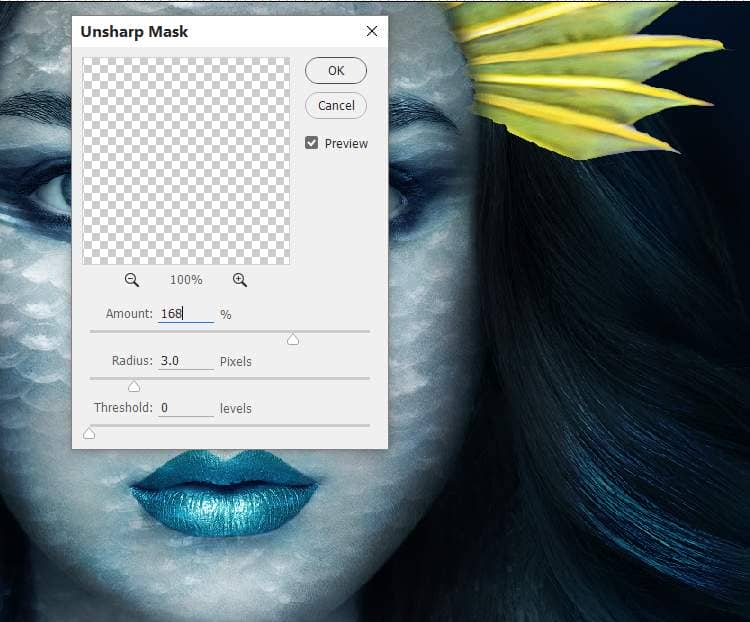
Go to Filter > Sharpen > Unsharp Mask to make the fin sharper and more clearly.
Step 15
Duplicate this layer and move it to another side of the head. Flip it horizontally (Edit > Transform > Flip Horizontal) and refine the mask if needed.

Step 16
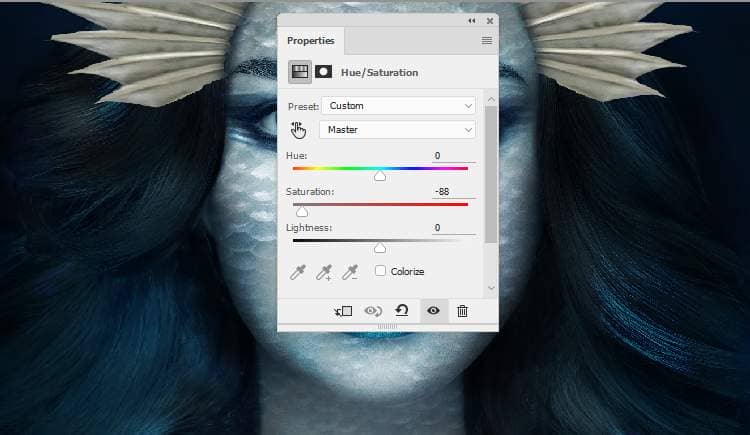
Make a group for these fin layers and add a Hue/Saturation adjustment layer to desaturate the fins:
Step 17
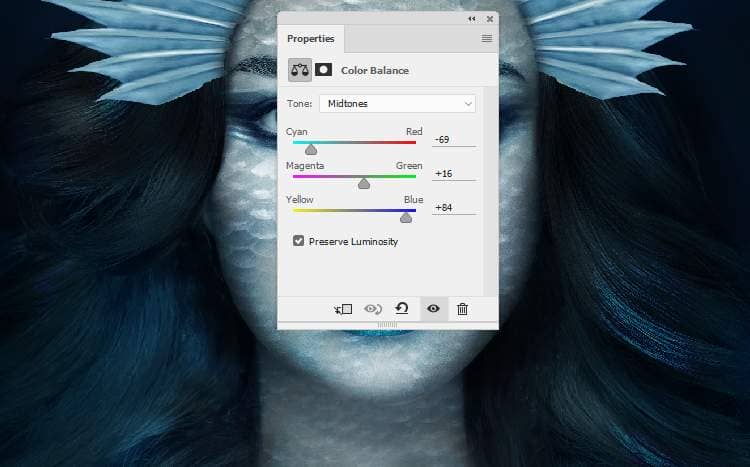
Create a Color Balance adjustment layer and alter the Midtones settings:
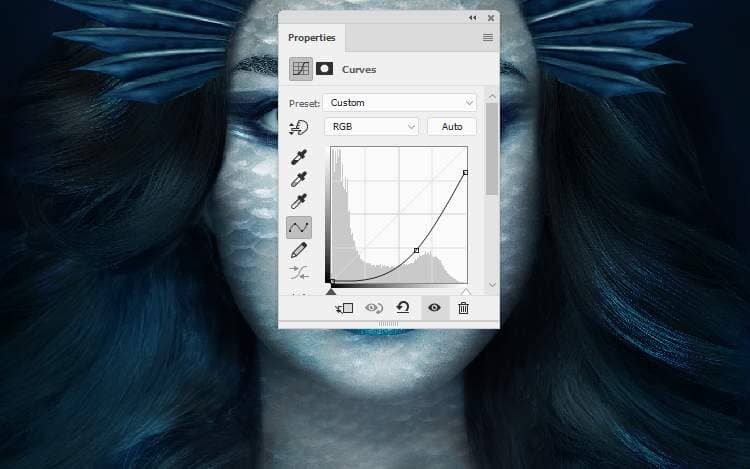
Add a Curves adjustment layer and reduce the lightness:
Step 18
Come back to fish 2 image and use the Lasso Tool (L) to select the top of the fish's body to add to the top middle of the model. Use Ctrl+T with the Warp mode to rotate and bend this part as the screenshot below shows:


2 comments on “How to Create a Fantasy Sea Woman Portrait Photo Manipulation with Adobe Photoshop”
Beautiful thank you
Muchas gracias por el tutorial y el Psd. ES un excelente y magnifico trabajo que has realizado y hermoso resultado, excelente. Felicidades, enhorabuena.
Thank you very much for the tutorial and the Psd. It is an excellent and magnificent job that you have done and a beautiful result, excellent. Congratulations, congratulations.