Turn any photo into a dot grid artwork with these Photoshop actions. You'll get great results with dots that change size. They get larger in brighter areas and smaller in darker areas. Free download available.
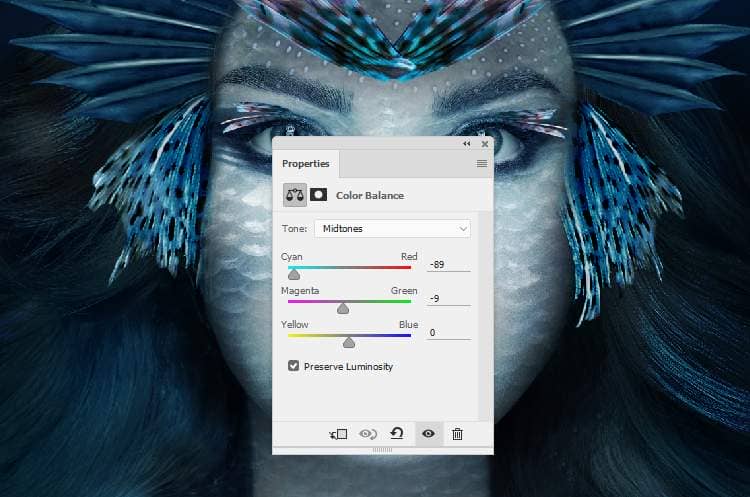
Add a Curves adjustment layer to darken the fins. On this layer mask, paint on the top of the fins on the forehead to remove the dark effect there.
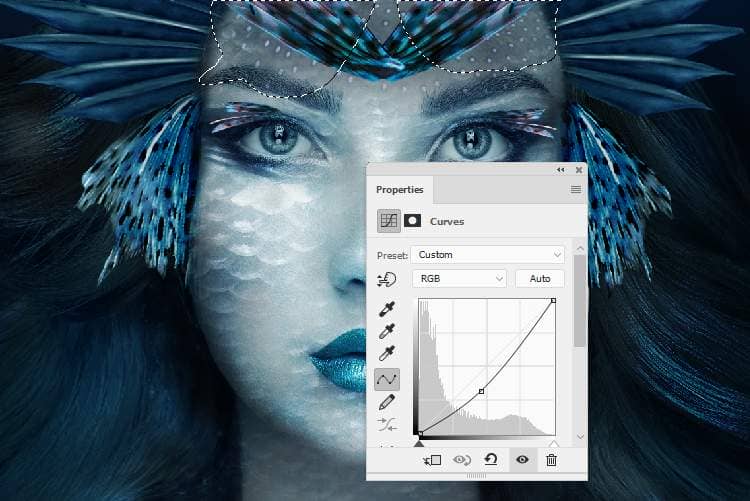
Step 26
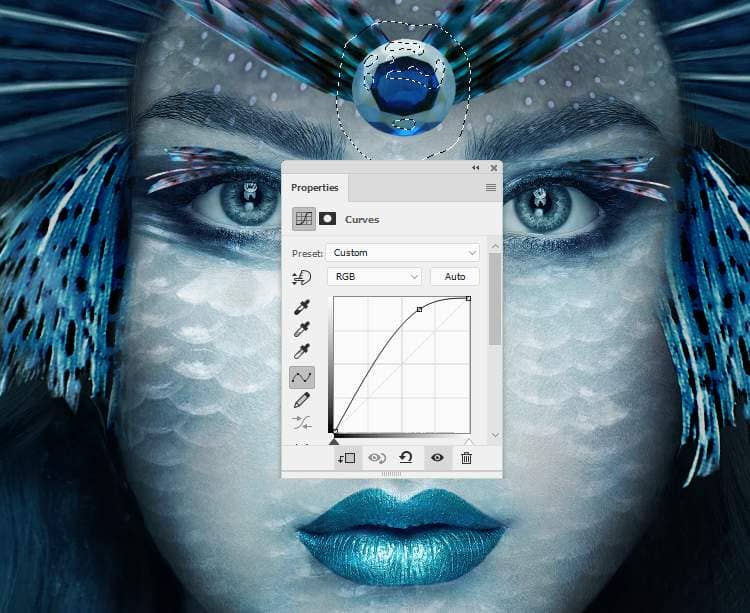
Open the jewelry image and select the jewelry to add to the middle of the forehead. Use Ctrl+T to make the jewelry rounder.
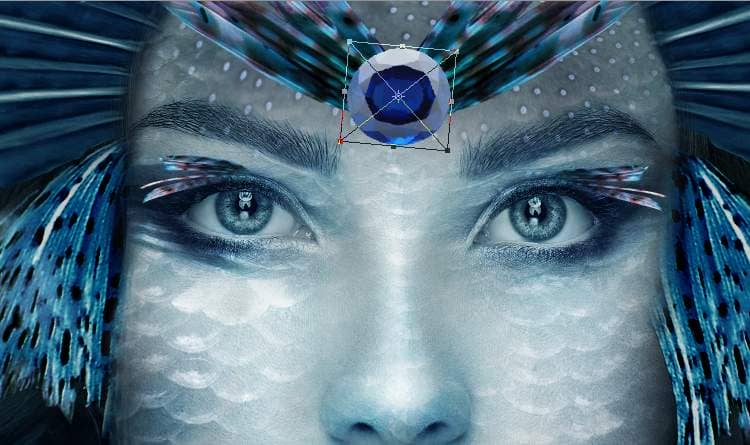
Make a Color Balance adjustment layer and alter the Midtones settings:
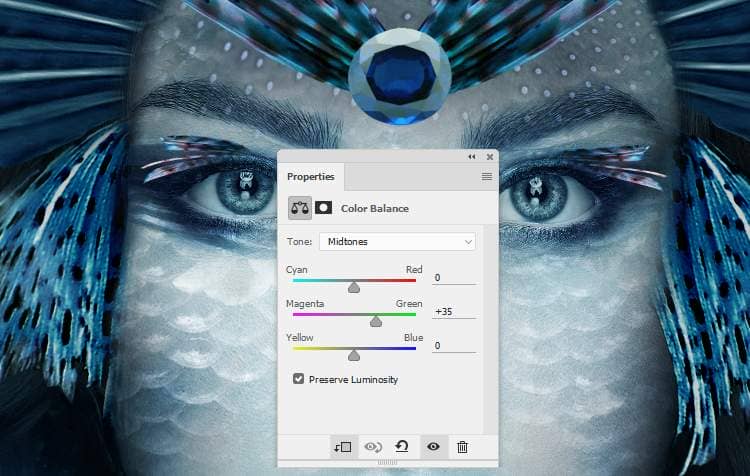
Step 27
Create a Curves adjustment layer and increase the lightness. On this layer mask, paint on the lower and both sides of the jewelry to keep its shadow and contrast.
Step 28
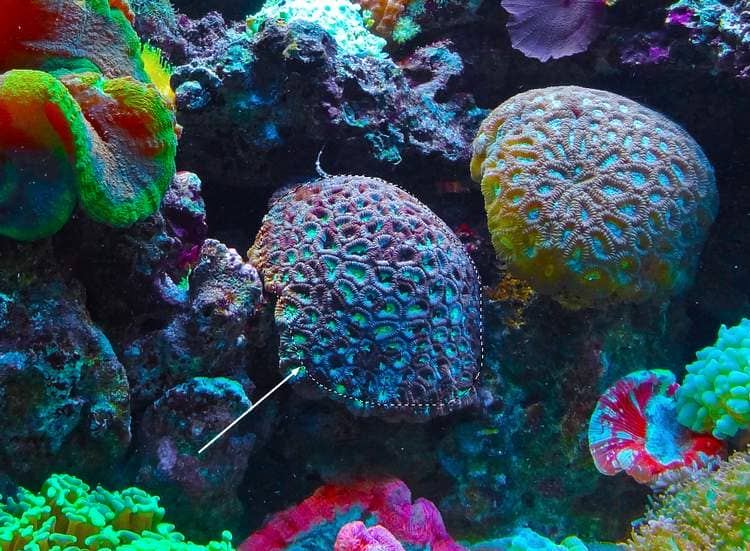
Open the coral 1 image and use the Lasso Tool to select the blue coral in the middle to add to the jewelry

Step 29
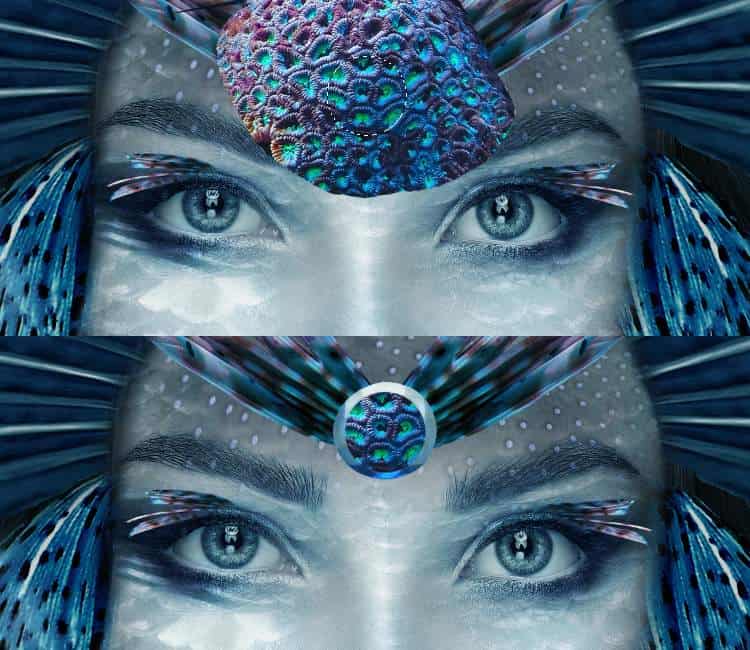
Use the Elliptical Marquee Tool to draw a circle inside the jewelry and click the Add layer mask icon and you should have a similar result like below:
Step 30
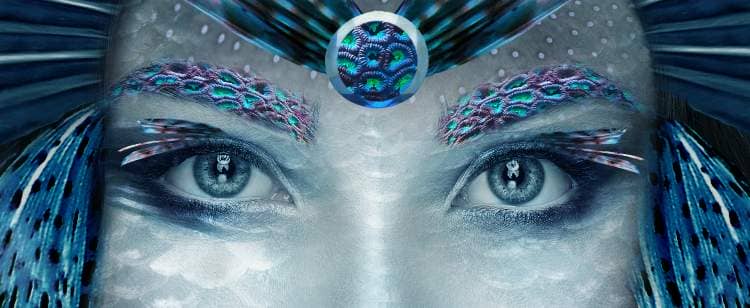
Duplicate this layer and move it to the right eyebrow (from the viewer) and use Ctrl+T with the Warp mode to bend this part to fit the form of the eyebrow. Continue duplicating this layer and flip it horizontally. Move it to another eyebrow.
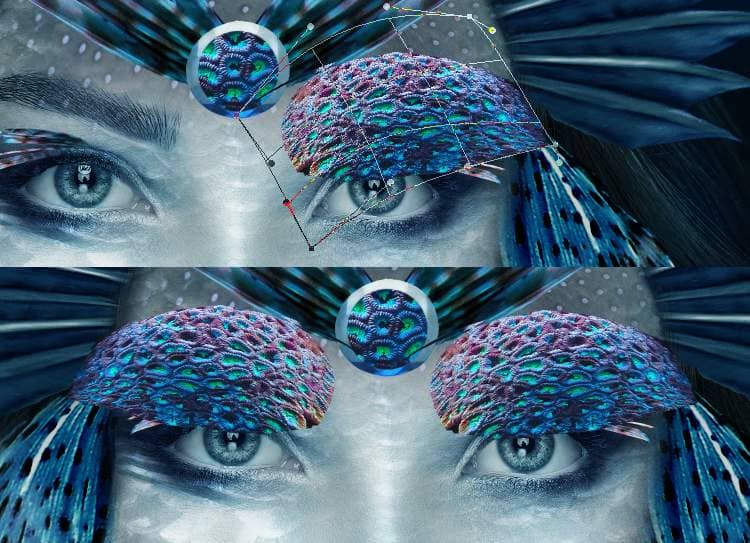
Add a mask to each of these layers to remove the parts outside the eyebrows
Step 31
Create a group for the coral layers and make a Curves adjustment layer to increase the lightness on the middle of the eyebrows and the jewelry. Paint on the rest to keep its shadow and contrast.
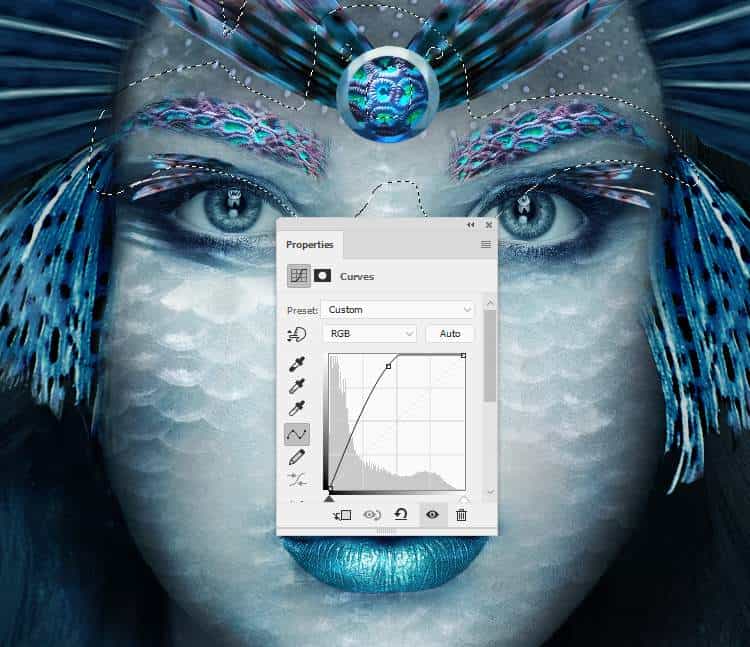
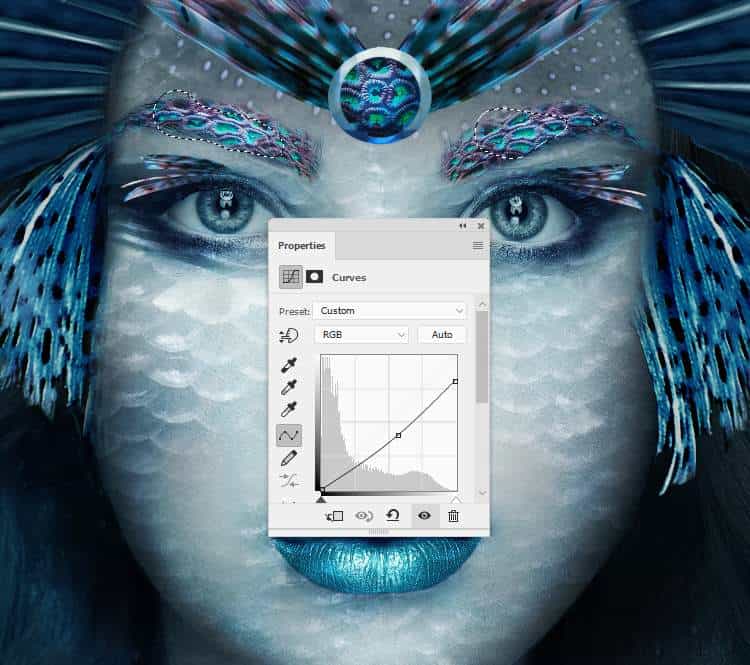
Make another Curves adjustment layer to darken both sides of the eyebrow and on the jewelry part. The selected areas show where to paint on the layer mask.
Step 32
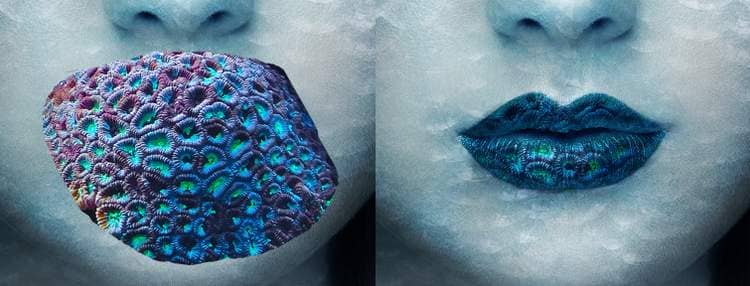
Come back to the coral 1 image and continue selecting this coral part to add to the model's lips. Change this layer mode to Multiply 100% and add a mask to this layer. Use a medium-hard back brush to remove the part outside the lips.
Step 33
Make a Curves adjustment layer to bring more light to some details on the lips. Paint on the rest to keep its lightness.
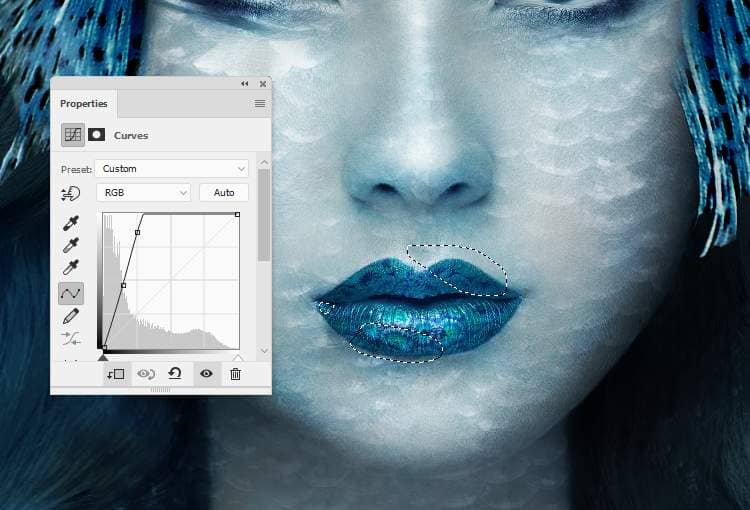
Step 34
Open the jellyfish 1 image and use the Lasso Tool to select it to add to the left of the main canvas. Change this layer mode to Screen 100% and use a layer mask to soften the hard edges.
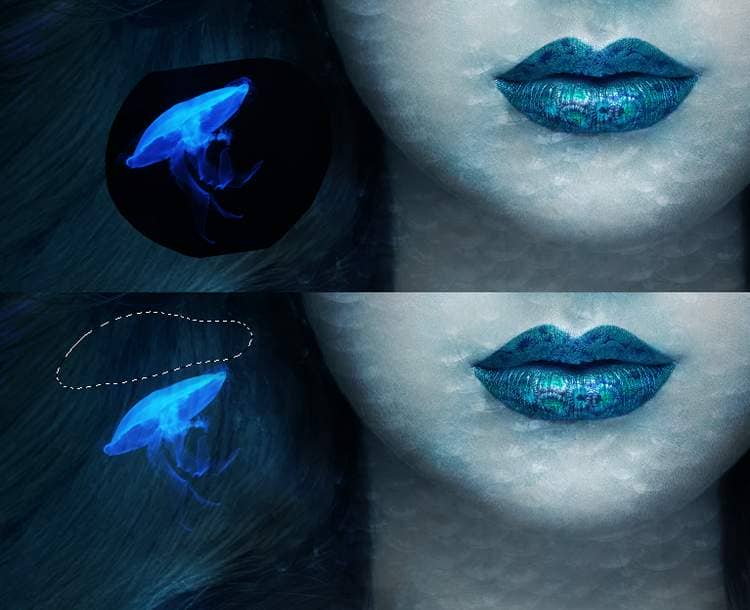
Step 35
Make a Hue/Saturation adjustment layer to change the color of the jellyfish.


2 comments on “How to Create a Fantasy Sea Woman Portrait Photo Manipulation with Adobe Photoshop”
Beautiful thank you
Muchas gracias por el tutorial y el Psd. ES un excelente y magnifico trabajo que has realizado y hermoso resultado, excelente. Felicidades, enhorabuena.
Thank you very much for the tutorial and the Psd. It is an excellent and magnificent job that you have done and a beautiful result, excellent. Congratulations, congratulations.