Make skin look perfect in one-click with these AI-powered Photoshop actions.
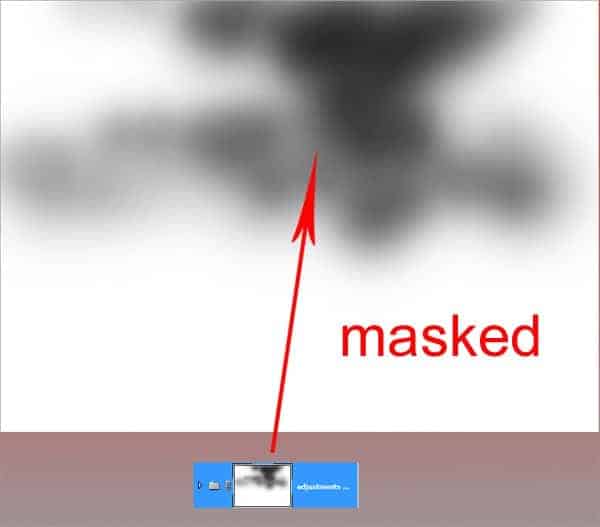
Here is the result after masking.

Step 8
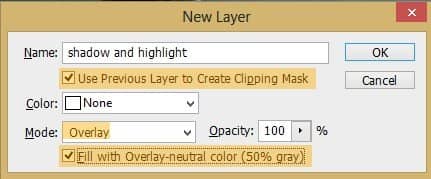
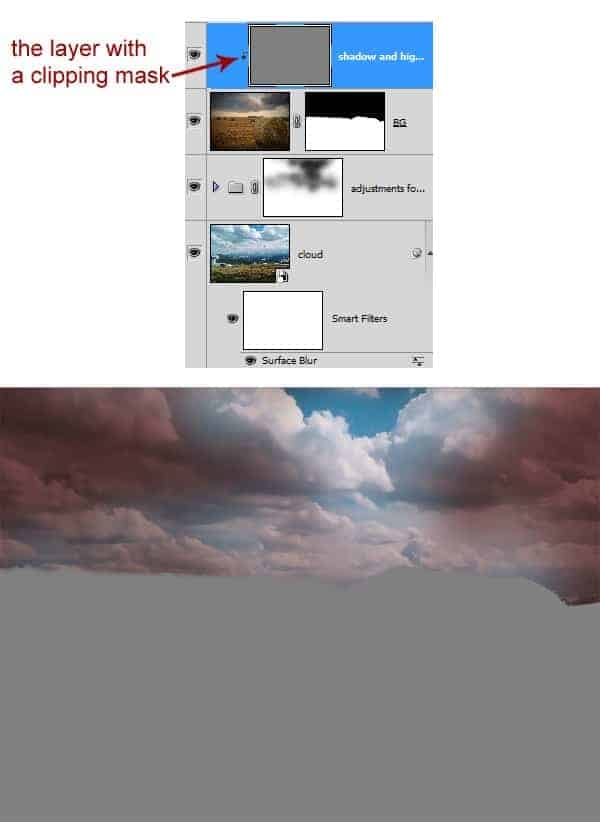
Next, we will add some highlight and shadow for the scene. Firstly select the BG layer to activate it. With the BG layer activated, hit Shift+Ctrl+N to create a new layer. On the new layer option box, give the name of this new layer (I named this layer shadow and highlight). Make sure to check ‘use previous layer to create a clipping mask’ to give this new layer a clipping mask. Set the blending to overlay and fill it with neutral color of 50% gray.
Here is the result we should have.
Step 9
To give the highlight for the scene, firstly we will activate the dodge tool. Set the tool as shown in the option bar below: choose a very soft round brush at size of about 500 pixels, set its range to highlight and exposure of about 10%.

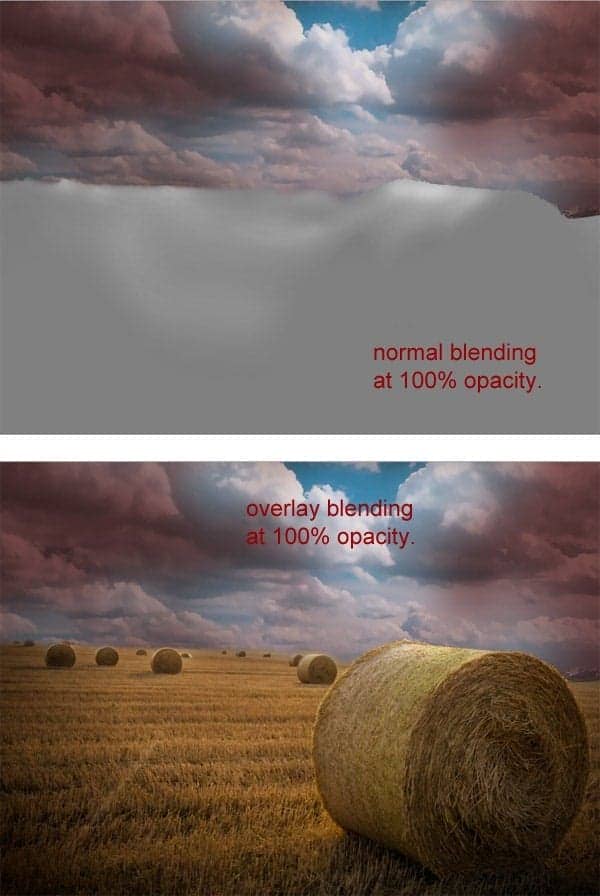
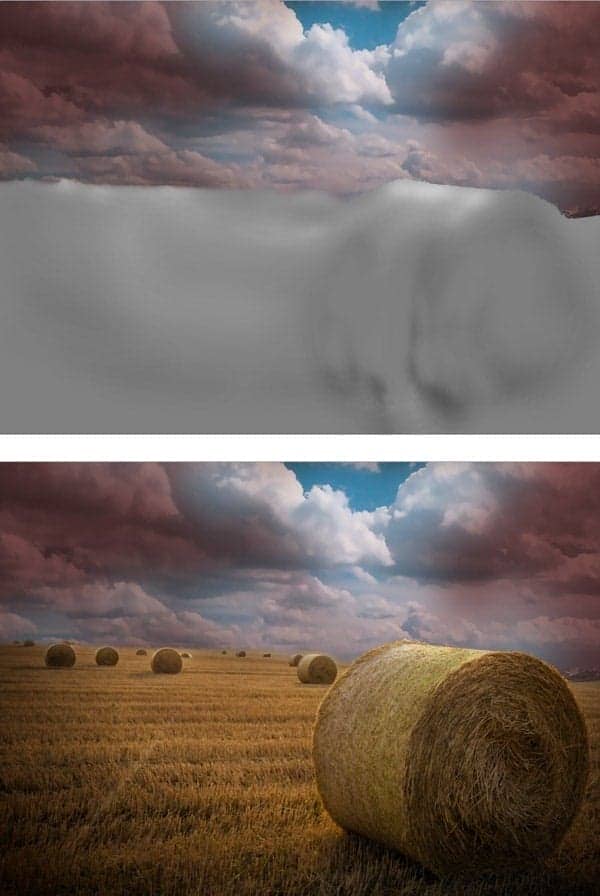
On the shadow and highlight layer, start stroking the dodge to give some highlight for the scene. Here is the result I created set in normal blending and the result set in overlay at 100% opacity.
Proceed to give some shadow for the scene. To achieve this, activate the burn tool and set the tool as shown in the option bar below.

Stoke the burn tool to some areas where needed to give some shadow. Here is the result I created for our inspiration:
Step 10
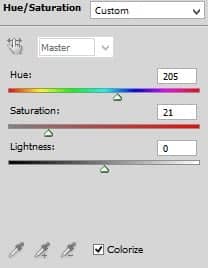
Proceed to set the overall mode for the scene. We will give the scene some adjustment layers to achieve this. Firstly we will give it hue/saturation. Go to layer > new adjustment layers > hue/saturation. Set this layer to the value as shown below:
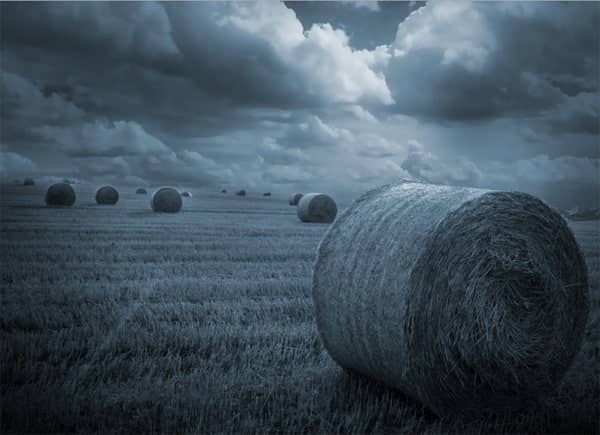
Set this layer to normal at 100% opacity to have the result like this one:
Step 11
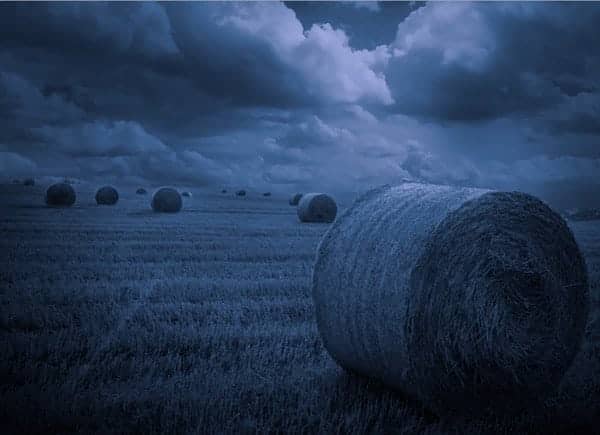
Give another adjustment layer: photo filter
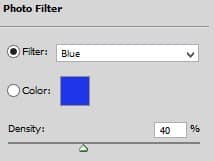
Duplicate the photo filter layer one time. Set the original layer to normal blending at 100% opacity and the duplicate to normal blending at 40% opacity. Here is the result we should have now:
Step 12
Give the last adjustment layer: curves
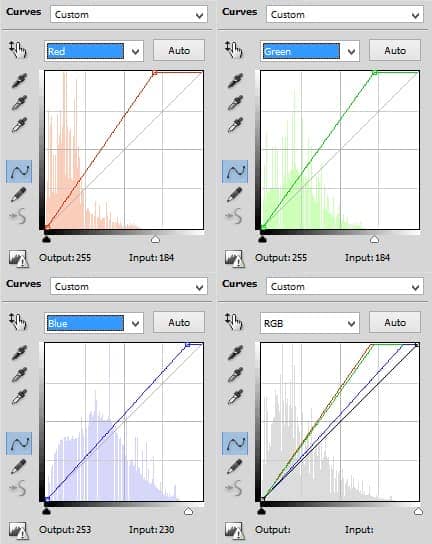
Set this curves layer to normal blending at 70% opacity. Select the three adjustment layers and hit ctrl+G to group them into one folder. I named this folder ‘overall adjustments’.

Step 13
Open the grim image in Photoshop. Take any extracting tools in Photoshop we are familiar with to cut out the grim from its background.
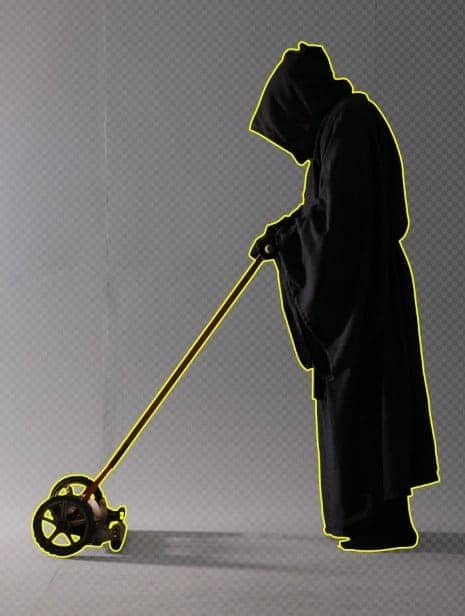
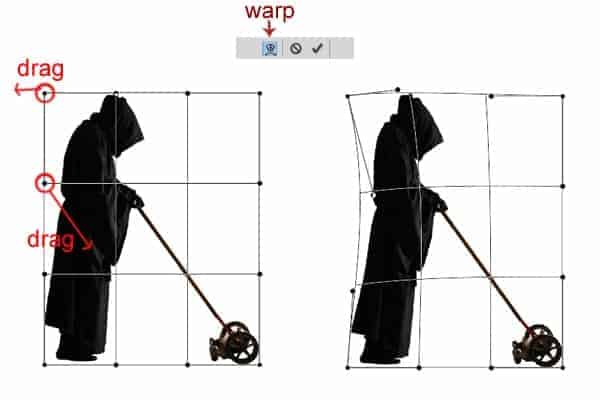
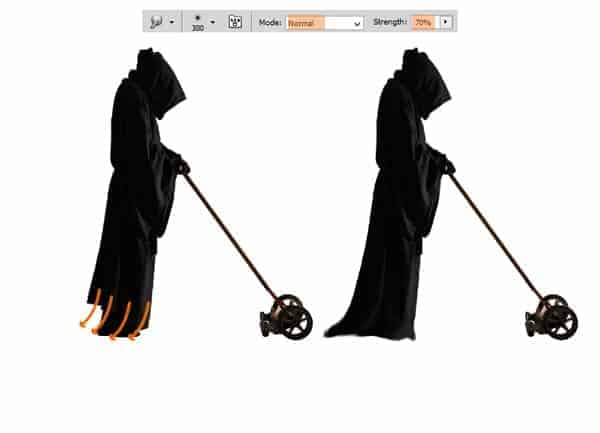
Here is the cut out of the grim. We will alter the shape of it a little bit. Take free transform tool and choose the warp mode. Click on one of the transform point, hold and drag to the direction needed as shown in the screenshot:
Now take the smudge tool. Set the tool as the setting in the option bar below. Start stroke the tool on the lower parts of the grim’s cloth to alter its shape. Stroke the directions as shown below:
Step 14
Add the grim image to the document by simply copy-paste it. Create a new folder group for this grim layer. I named this folder ‘grim’. Make sure to place this grim folder under the overall adjustment folder in the layer panel.
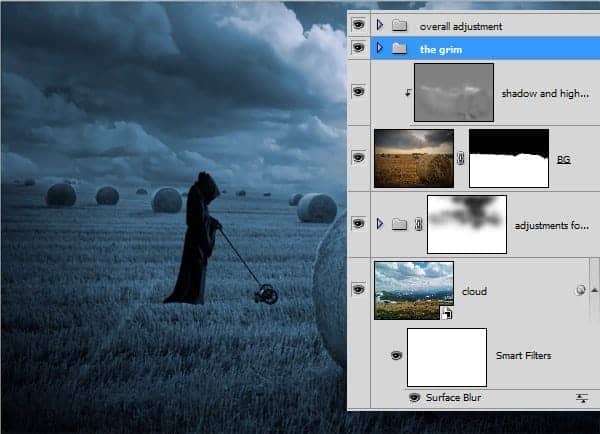
Open the grim layer within the grim folder. Give this layer a layer mask. Mask the lower parts of the grim on the areas around the lowest cloth and wheel. Try to use the combination of the soft and hard brush with size varied according to the parts to be mask. For instance, I use a small hard round brush to mask the cloth to reveal the grasses.


20 comments on “The Grim Reapers Side Job”
this is a terrible tutorial a lot of stuff you need past experience to know where it is and if you dont it takes 4 other tutorials to do. die
Step 8 what is clipping mask for?
Good tutorial I learned a lot thanks!
Why i can't look full tutorial?
Click on page 2
Great. Thank you very very much!
Wow ... it's so elaborate with each steps perfectly depicted with screen shots... it's a great job... really like the image transformation with perfect use of layer mask, adjustment layer, blur, transform, wrap, curves, hue saturation and a lot. Excellent
Awesome! :)
Its been a while.
So nice!
you help me to create with a good idea
Great, thanks for all the helpful info!
super
Excellent Tut
Thank you very much for sharing the tutorial.
Good it is very good tutorial THX
I LIKE UR TUTORIAL
I like the tutorial but it is very dark for Christmas.
Does anyone have extra photoshop subscriptions I can have?
freeloader...