

Step 18
Add a Color Balanceadjustment layer and alter the Midtonesand Highlightssettings:


Step 19
Open the house image and use the Move Tool to drag the house into our main canvas. Place it onto the model body.

The top of the highest tower is hidden. To fix it, add a mask to this layer and use a hard black brush to remove this part and the middle to reveal the model face, arms and dress.

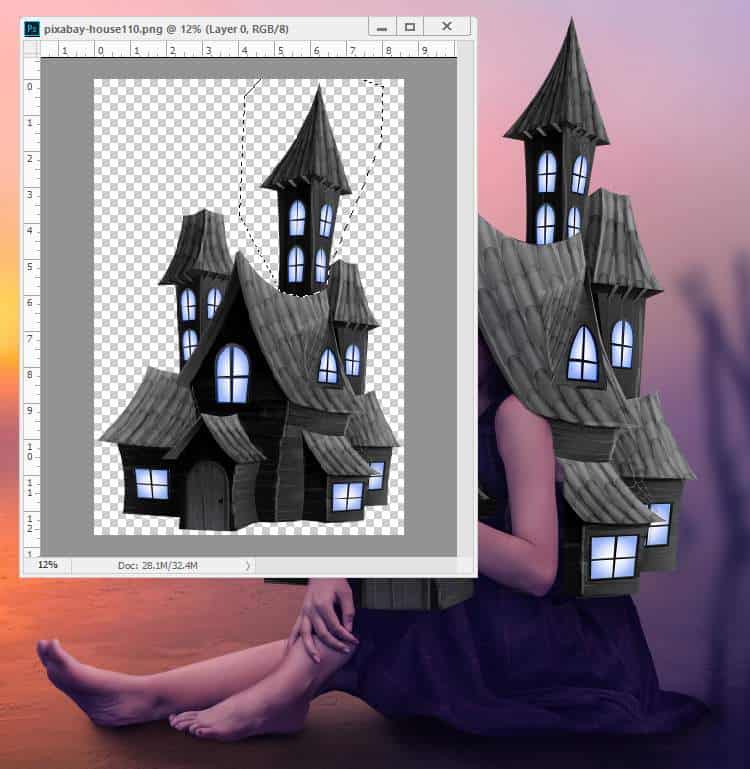
Step 20
Come back to the original house image and use thePolygonal Lasso Toolto select the top tower and place it onto the top of the house. Use Ctrl+Tto resize it to be smaller than the original one. Set this layer below the first one.
Step 21
Make a group for the house layers and add a Color Balance adjustment layer to change the color of the house.

Step 22
Create another Color Balanceadjustment layer to add some light warm tone to the roof of the towers on the left (from the viewer). On this layer mask, paint on the rest to remove the warm effect on these areas.


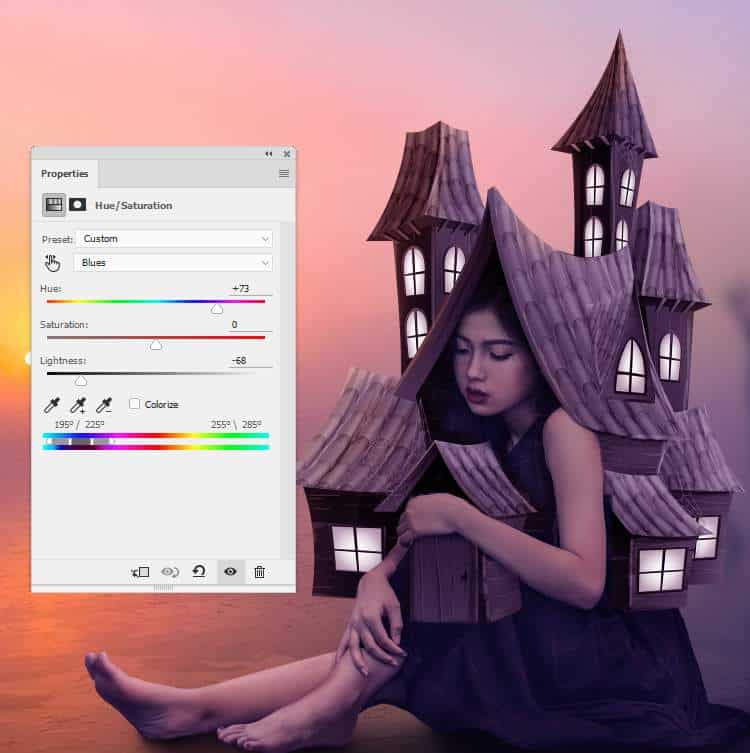
Step 23
Use a Hue/Saturationadjustment layer to desaturate the color of the light on the windows.
Step 24
Make a Curvesadjustment layer to darken the house. On this layer mask, paint on the contour of the house and any details you feel too dark.

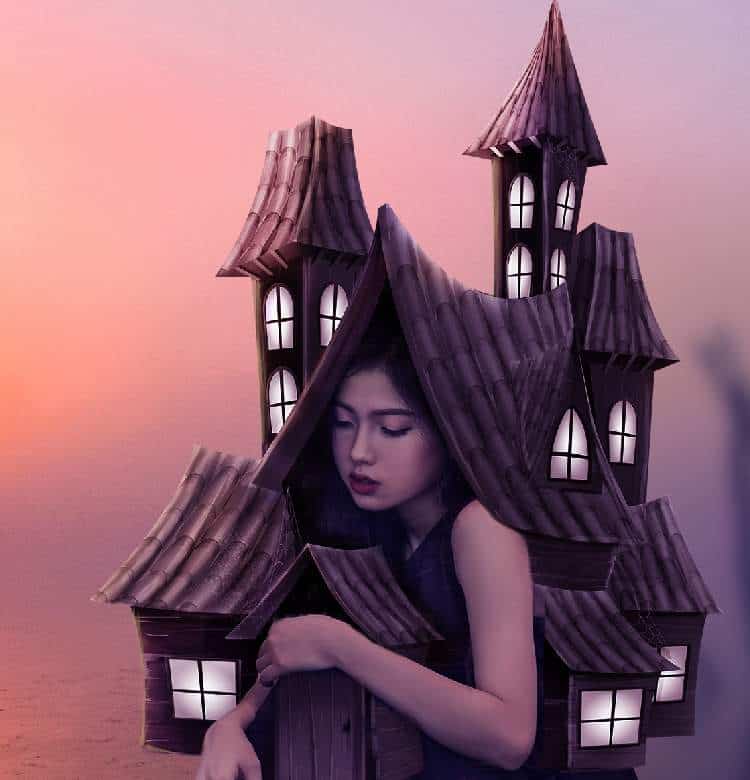
Step 25
Make another Curves adjustment layer to bring more light to the house’s contour. Paint on the rest to keep its shadow and contrast.

Step 26
On each of the house layers, make a new layer, change the mode to Overlay 100%and fill with 50%gray.

Activate the Dodge andBurn Tool (O)and use the Burn Tool with Midtones Range, Exposureabout15%,the Dodge Toolwith Highlights Range, Exposure about 40-50%to paint more light and details for the house. You can see how I did it withNormalmode and the result with Overlaymode.


Step 27
Make a new layer on top of the layers and use a small brush with the color #b49355to paint on the contour of the top towers. Change this layer mode to Color Dodge 100% and use a layer mask to remove the unwanted light parts.

Step 28
Isolate the tree from the background and take different branches to add around the house. Feel free to take the branches you like and use a layer mask if needed to remove any unnecessary details.
4 responses to “How to Create a Surreal House Photo Manipulation with Adobe Photoshop”
-

Great tutorail
-
great
-
Do you have a video
-
Lovely
Leave a Reply