Make a new layer and use a soft brush with the color #d1ac92, the opacity and flow about 25-30%to paint on the white part of the foot to remove it.

Step 10
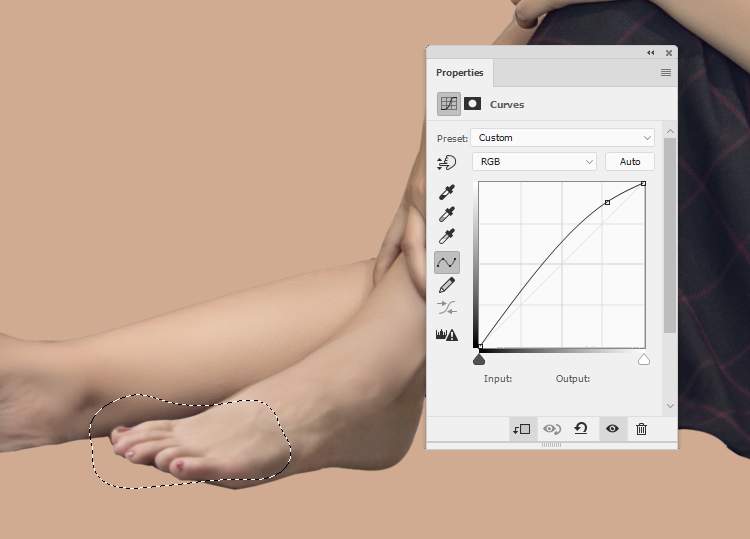
Add a Curvesadjustment layer to brighten the hidden side of the foot. On the layer mask, use a soft black brush to erase the lower front of the foot so it won’t be brightened by this adjustment layer.

Make another Curvesadjustment layer to darken the front of the foot. On the layer mask, paint on the hidden side to keep it shadow and contrast.

Step 11
Hide the background and the fill layer and hit Ctrl+Shift+Alt+E to merge all the transparent layers into a new one. Move the merged model into the main document and place her on the middle of the ground. Add a mask to this layer to refine the contour of the left leg.


Step 12
Create a new layer below the model one and use a soft brush with the color #0f0d0d to paint a hard shadow below the dress and feet.

Make a new layer and use the same brush but lower the opacity of the brush to 25-30%to paint a soft shadow of the model on the ground to fit the light’s direction.

Step 13
Create a new layer above the model one and use a soft brush with the color #dfc0a7,, the opacity about 18%to brighten the part below the cheek a bit.

Make a new layer and change the mode to Multiply 100%. Use the same brush to paint on the part below the cheek to darken it.

Step 14
Add a new layer and use a soft brush with the color #d6d0cbto paint a small part below the left foot. Change this layer mode to Multiply 100%.

Step 15
Select the model layer and the shadow ones as well as the ones made in the step 13 and 14 and hitCtrl+Gto make a group for them. Change the group’s mode to Normal 100% and add a Hue/Saturation adjustment layer within the group. Bring the Saturation values down to-24and on this layer mask, use a soft black brush to erase the legs to keep some warm tone there.

Step 16
Create a Curves adjustment layer and decrease the lightness. On this layer mask, paint on the contour of the model to reveal the light there.

Step 17
Make another Curvesadjustment layer and increase the light for the contour and some parts of the model. The selected areas show where to paint on the layer mask.
4 responses to “How to Create a Surreal House Photo Manipulation with Adobe Photoshop”
-
Great tutorail
-
great
-
Do you have a video
-
Lovely


Leave a Reply