In this tutorial, I’ll show you how to create a surreal scene featuring a man with the head of a lamp watching flying birds. First, we’ll build the base scene using images of a sky, mountains, and arch rock. After that, we’ll add the man, lamp, and tree and blend them together using adjustment layers, masking, and brushes. Later, we’ll import the birds and paint the light effect. We’ll use several adjustment layers to enhance the final result.
Preview of the Final Result

Tutorial Resources
Step 1
Create a new 2000×1333 pxdocument and fill it with white. Open the sky image and drag it into the white canvas using the Move Tool (V). Place it in the upper section of the canvas.

Step 2
Go to Layer > New Adjustment Layer > Curvesand change the contrast of the sky by increasing the lightness so much.

Step 3
Open the mountain image and use the Rectangular Marquee Tool (M) to select the sky and mountains part only and add it to the main canvas using the Move Tool. Place it onto the existing sky area.

Click the second icon at the bottom of the Layerspanel to add a mask to this layer. Select a soft round one with black color (soft black brush) to remove the top hard edges and blend the sky with the existing background .

Step 4
Make a Hue/Saturationadjustment layer above the mountains one and set it as Clipping Mask. Decrease the Saturationvalues to -61:

Step 5
Create a Curves adjustment layer (set as Clipping Mask) to brighten the mountains a bit more.

Step 6
Open the arch image and using the Magnetic Lasso Tool (L)or your own method to isolate the arch with the sea area and place it in the lower section of the main document. Use the Free Transform Tool (Ctrl+T)to distort the perspective of the arch a bit .

Step 7
Make a Hue/Saturationadjustment layer to desaturate the rock arch. Bring the Saturationvalues down to -76:

Step 8
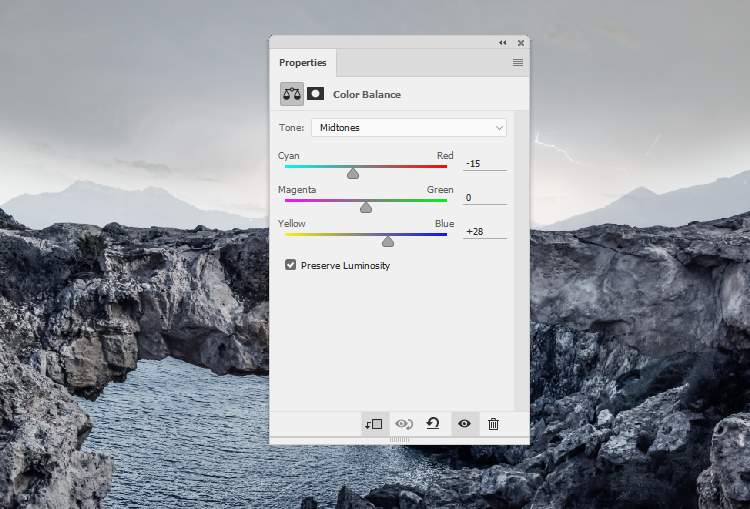
Make a Color Balanceadjustment layer to change the color of the arch.

Step 9
Add a Curvesadjustment layer to darken the back area of the arch and rock. On this layer mask, use a soft black brush to erase the arch surface and the front details to reveal the lightness there.
6 responses to “How to Create a Surreal Photo Manipulation of a Man with Head of Lamp”
-
very thankful its amazing Tutorial.
Tank You!
-
It helps to know about Photoshop CS3
-
A very helpful tutorial with full of information.Thanks
-
Very helpful full if informatio. Thanks
-
Thanks for sharing this amazing photoshop ideas with us.
-
Thanks man love it

Leave a Reply