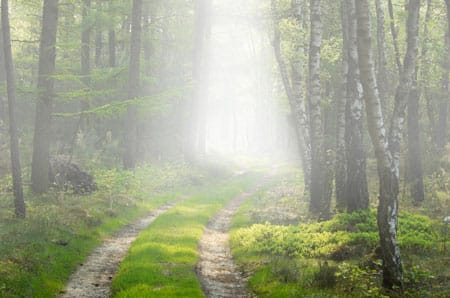
Learn how to use Photoshop to add a dreamy fog effect to any photo. This Photoshop tutorial will teach you how to use several layers to create a realistic fog effect that appears thicker in the distance.
Preview of Final Results

Fog Photoshop Tutorial
Step 1: Open an image into Photoshop
Open a photo that you would like to add a fog effect to into Photoshop.

Step 2: Create a Solid Color layer
In the Layers pallet, click on the New Adjustment Layer icon and select Solid Color. A window should appear where you can select a color. Select white as the color as click OK.


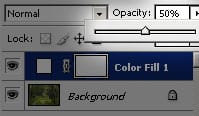
Step 3: Reduce the opacity
A new layer called Color Fill 1 should appear. Reduce the opacity of this layer to 50%.

Step 4: Select the Gradient tool
Select the Gradient tool from the toolbar. If you cannot find it, look for the Paint Bucket tool, click and hold on it, and a menu should appear where you can select the Gradient tool. Once you have the Gradient tool selected, the option bar should change to allow you to set the settings of the tool. Apply these settings:
- Gradient: White to Black
- Gradient Type: Linear
- Mode: Normal
- Opacity: 100%

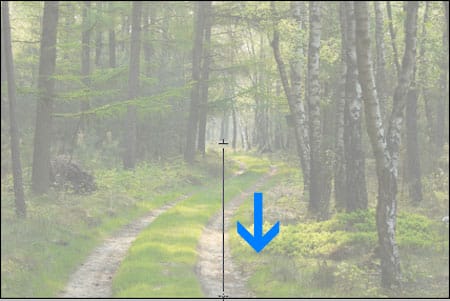
Step 5: Add a gradient
Before we add a gradient, make sure that you have the layer mask selected. To do this, simply click on the thumbnail of the layer mask in the Layers pallet. Once the layer mask is selected, click on the horizon of your photo, press and hold the shift key, and drag a straight line to the bottom. By holding the shift key, the line that you draw will remain straight. The shift key also works for other Photoshop tools such as the Move or Transform tool.

Step 6: Duplicate the Layer
Press Ctrl+J or open the Layer menu and select Duplicate Layer to create a duplicate of the layer.

Step 7: Select the Eraser tool
Select the Eraser tool from the toolbar. The Eraser settings should appear on the option bar where you can adjust the settings of the tool. Use a large brush size with a soft edge such as the one set in the image below.

Step 8: Erase the foreground
First, make sure that you have the layer mask of the top layer selected. Erase the foreground area so that the fog appears stronger in the distance.


Step 9: Duplicate the layer
Create a duplicate of the top layer by pressing Ctrl+J or opening the Layer menu and selecting Duplicate Layer. Change the opacity of this layer to 75%.

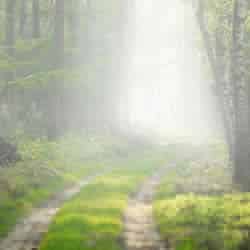
Step 10: Erase the foreground and middleground
Again, make sure that you have the layer mask of the top layer selected. Erase the foreground and background area so that the distance looks thick with fog.
11 responses to “Fog”
-
Wonderful tutorial! Thank you so much!
-
It worked perfectly and was exactly what I needed, thank you so much!!
-
great effect thank you
-
very nice tutorial i like it
thank you so much………. -
I appreciate your demonstration. Can you please tell me why your Gradient Tool started from the middle of the photo, but not from the top?
Thanks!!
-
I appreciated your wonderful demonstration. But Can you please let me know why the Gradient Tool started from the middle of the photo, but not from the top?
-
класс)
-
Thanks! Easy and useful…
-
where did this picture was took
-
-
Thank you, very useful.
-
Guest


Leave a Reply