Turn any photo into a dot grid artwork with these Photoshop actions. You'll get great results with dots that change size. They get larger in brighter areas and smaller in darker areas. Free download available.
Step 17
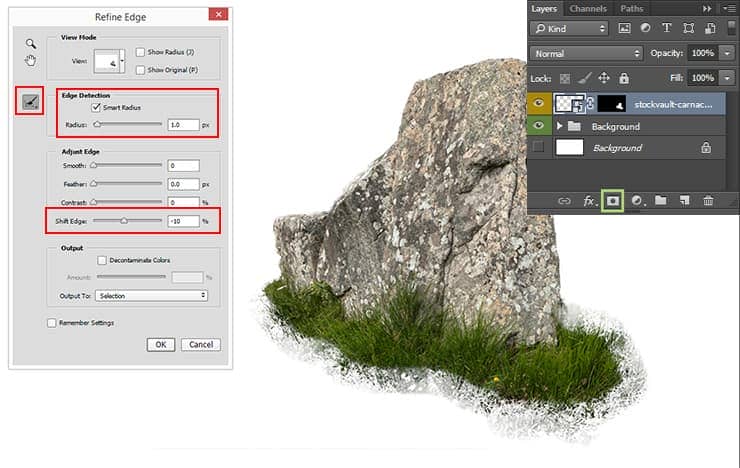
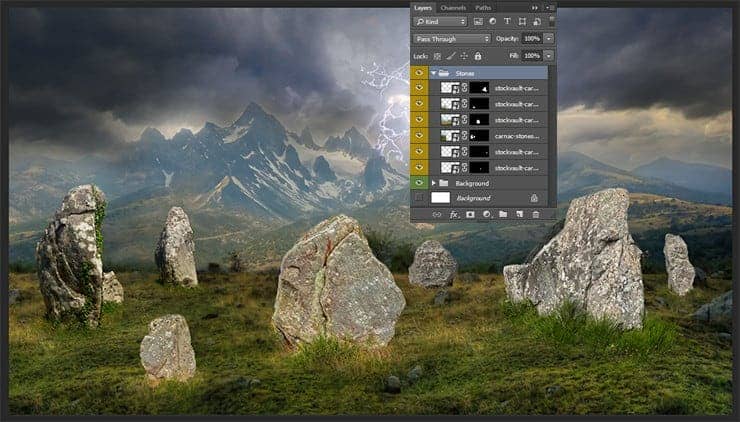
Add more stones following Steps 15 - 16 and used images "Carnac Stones 2", "Carnac Stones 3". You can use any the stones that you like. The most important thing is to respect the proportions and harmonious place them in the picture. Also, be careful so stones do not hang in the air and use "Flip Horizontal" (Edit > Transform > Flip Horizontal...) option to find an interesting angle of the stones. Group all layers with stones (Cmd/Ctrl + G or Layer > Group Layers...).
Step 18
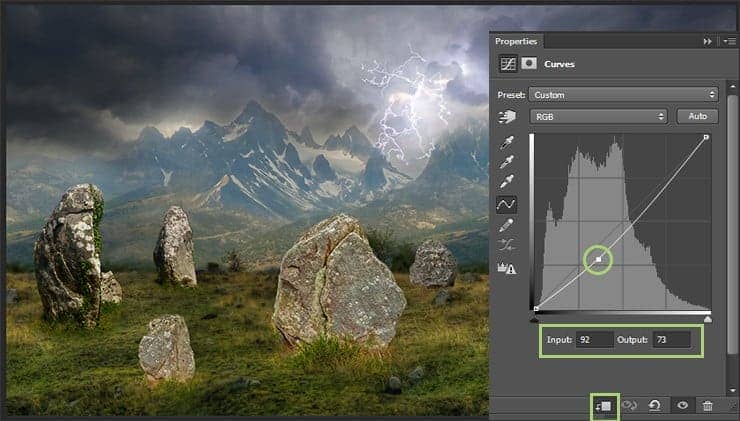
Go to Layer > New Adjustment Layer > Curves... or use "Add adjustment or Fill layer" icon to add "Curves"" adjustment layer. First clip this layer to a group by using icon at the bottom of "Properties" panel. Next you need darken stones. create one point with Input: 92, Output: 73.
Step 19
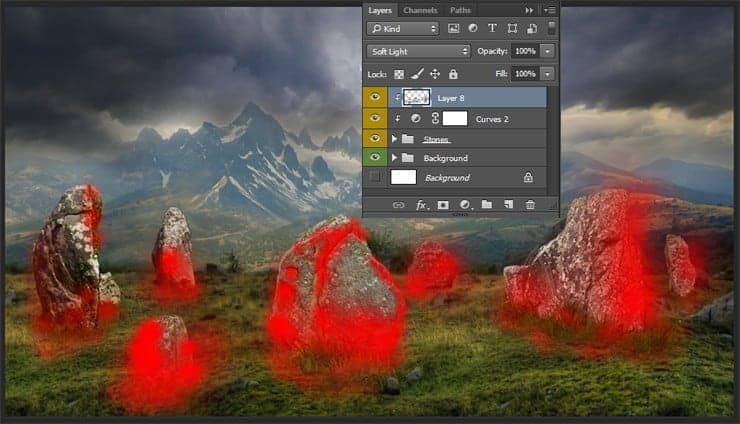
Create a new layer (Cmd/Ctrl + Shift + N) and change Blending Mode to "Soft Light". Make from this layer a Clipping Mask via Cmd/Ctrl + Opt/Alt + G or hold Opt/Alt and click between layers so top layer become with arrow. Use black and white soft brush (Brush Tool (B)) with Size: 100 - 200px and Opacity around 30% - 50%. Draw a basic lighting on the rocks. It is necessary to lighten the center stone and darken the edges. Importantly do not overdo it, because the next step, you add the main light and shadow.
Step 20
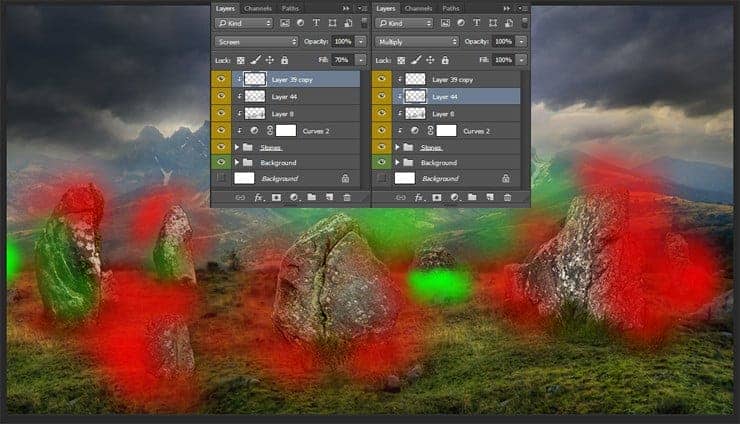
Now create two new layers (Cmd/Ctrl + Shift + N). For the first layer change Blending Mode to "Multiply" and for second to "Screen" and set Fill to 70%. Make a Clipping Mask from both layers to a group (Cmd/Ctrl + Opt/Alt + G). Use Brush Tool (B) with the settings from previous step and draw key light. Use black color on "Multiply" layer and white on "Screen". Draw lighting as shown in image below. On screenshot I use red for shadows and green for the light.
Step 21
Now select all stones (hold Cmd/Ctrl and click on a layer mask thumbnail). Create a new layer above clipped layers and fill selection with black color (Cmd/Ctrl + Del or Edit > Fill > Color...). Deselect stones (Cmd/Ctrl + D or Select > Deselect) and flip this layer vertically (Edit > Transform > Flip Vertical). Use Warp Tool (Cmd/Ctrl + T + right click > Warp) to deformed fill so that each shade consistent the correct stone. Create the shadow for each stone on new layers and warp each layer. A little bit of skill and you will succeed! Merge all layers into a single layer (Cmd/Ctrl + E). Change Blending Mode to "Multiply" and Opacity to 58%.
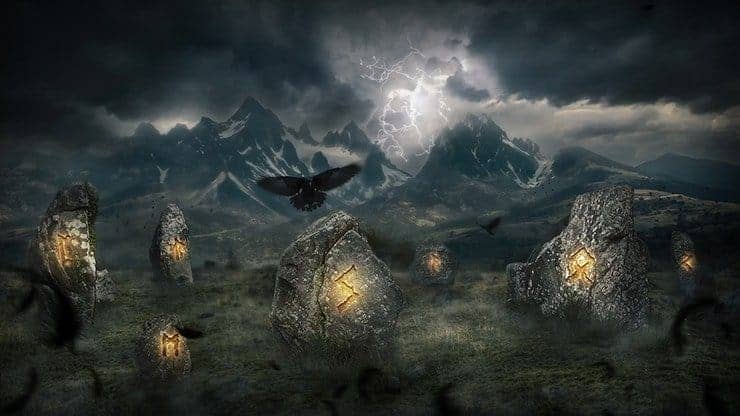

6 comments on “Create a Mystical Photo Manipulation of the Great Ragnarok in Photoshop”
totally cool. I figured it might be way more steps, but when you are dealing with stock images and things, it goes much faster.
Thank you very much! I am very pleased to hear that! Optimization process an important part of the picture. This helps to save time and organize steps. Feel free to share your final result!
Maria.
What brush you use in 35 step??
I greatly love this good picture
Missing lightning image
https://pixabay.com/en/lightning-weather-rocket-983/
Unbelievable... ???