Step 22
Stay on shadow layer and go to Filter > Blur > Gaussian Blur… Set Radius to 30.0 pixels and click OK. At this stage, the lighting is sufficient. A little later, at the end of tutorial I will add the final light and shadow. The most important thing is not to overdo it, because it is very great possibility of losing realism.

Step 23
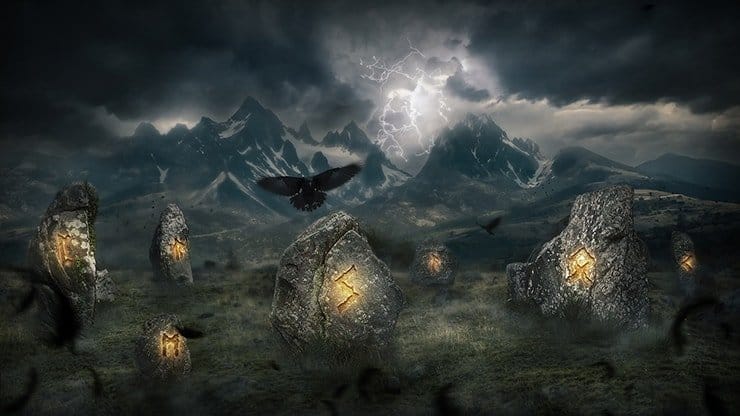
Add a birds. Raven is a key animal in Norse mythology. The satellites of Odin – ravens Hugin and Munin (“thinking” and “remembering”). I created a brush with feathers and flying birds. But you can use other resources if you want. Load this brushes in Photoshop. First, add the main crow. This image so use the technique from Steps 15 – 16 to clear the raven from the background and place it over the main stone. It is important to correctly guess the direction of the bird to create the impression of a bird landing and create realism in a picture.

Step 24
Create a new layer (Cmd/Ctrl + Shift + N) and use bird brushes to create several flying flocks in the background. Use black color for the birds and brush size around 100 – 150px. Use Eraser Tool (E) if you want to create a variety of flocks by removing part of birds and the addition of other birds. I group this layers (Cmd/Ctrl + G) to make work with layers easier.

Step 25
What mysticism and without fog. This is a very interesting and useful part of the atmosphere that we create using only Photoshop. In total, I used 3 layers with fog. The first will be the basis, the second is structure, the third is details of fog. Let’s start with the basics. Create a new layer at the top of layer stack (Cmd/Ctrl + Shift + N) and use Brush Tool (B) with low Opacity around 10%, Size 100 – 50px and color #e2e2e2. Draw small patches of fog near the stones in the foreground. Go to Filter > Blur > Gaussian Blur… and blur fog on Radius 5.0 pixels.

Step 26
Create a new layer (Cmd/Ctrl + Shift + N), set to default foreground and background colors (D). Go to Filter > Render > Clouds. Use Distort Tool (Cmd/Ctrl + T or Edit > Transform > Distort) and transform clouds to perspective of image. Just grab mid point and move down to horizon. Hold Opt/Alt + Shift and drag point from bottom right corner and move in the direction of the viewer. Change Blending Mode to “Screen” and set Opacity to 25%, Fill to 45%.
6 responses to “Create a Mystical Photo Manipulation of the Great Ragnarok in Photoshop”
-
totally cool. I figured it might be way more steps, but when you are dealing with stock images and things, it goes much faster.
-
Thank you very much! I am very pleased to hear that! Optimization process an important part of the picture. This helps to save time and organize steps. Feel free to share your final result!
Maria.
-
-
What brush you use in 35 step??
-
I greatly love this good picture
-
Missing lightning image
https://pixabay.com/en/lightning-weather-rocket-983/ -
Unbelievable… ???


Leave a Reply