
Download Lightroom presets and LUTs, absolutely free. Use the presets to add creativity and style to your photos.
Learn how to create a sci-fi photo manipulation of a mysterious chamber with amazing light flares and a great entrance with Photoshop. In this tutorial, you'll learn how to construct your own chamber with textures, place a model in front of the entrance and then complete it by adding realistic shadows and lighting effects Throughout the tutorial, you'll learn techniques that will help you create better photo manipulations.
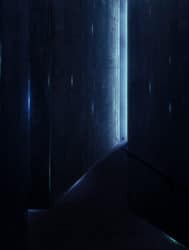
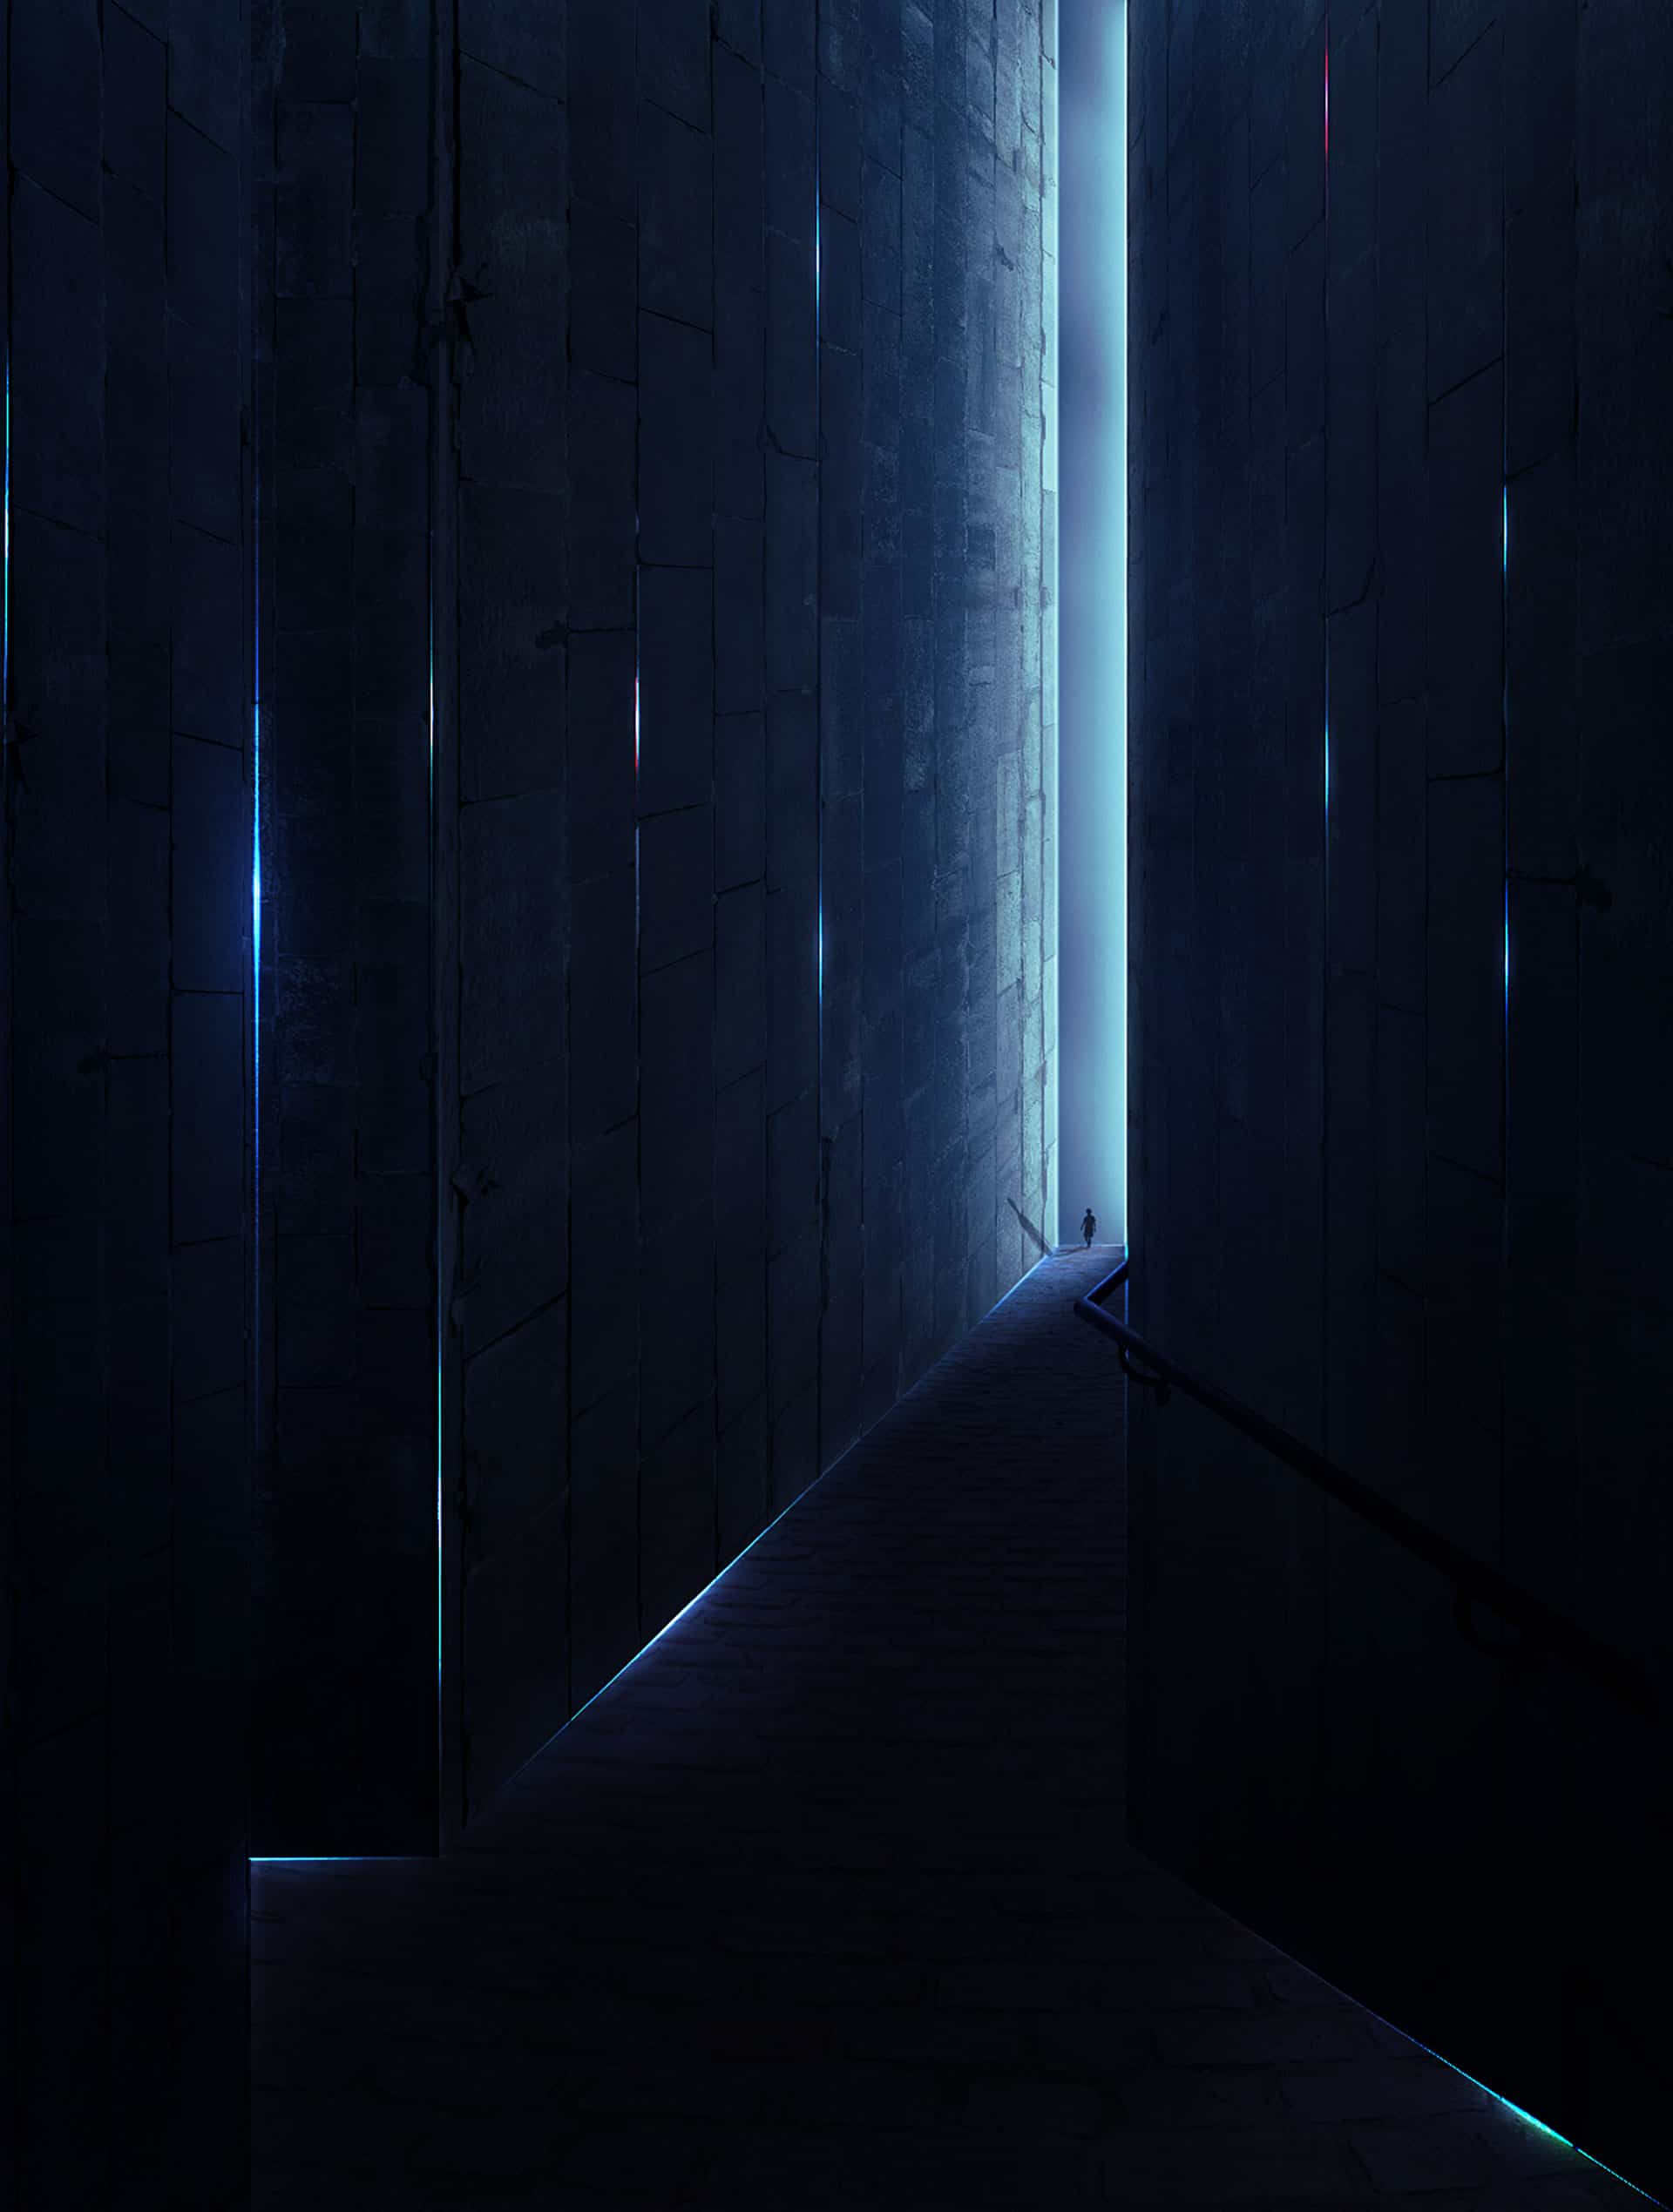
What you'll be creating
On this tutorial we will create a sci-fi scene of a mysterious chamber with flares and an astonishing great entrance. We will use some essential techniques in doing photo manipulation. We will use masking, brush tool, some filter, color adjustments, and textures all through the steps in this tutorial. Use Adobe Photoshop CS3 or higher, don’t forget a glass of coffee and optionally a pack of cigarette for your companion. Ready..?
Tutorial Resources
- Texture- cgtexture
- Model- Pixabay
- Brick Floor 04- camarogirl666
- Passage in Duinos Castle I- brunilde stock
Step 1
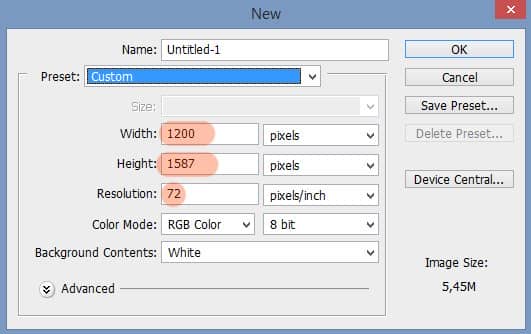
Let’s start by creating a new document (Ctrl+N) in photoshop with size shown in the screenshot below:
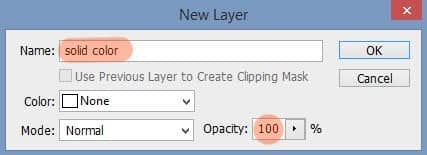
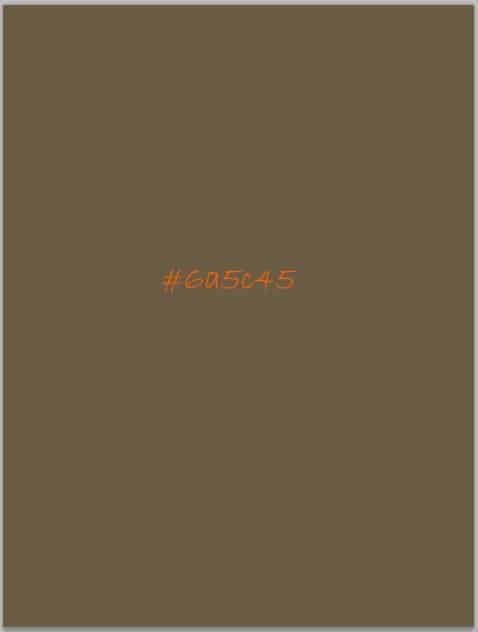
Then, proceed to create the first new layer on the document (Shift+Ctrl+N). On the new layer pop-up window, name this layer "solid color". While we are being active on the solid color layer, hit Shift+F5 to fill this layer with color. Choose light brown (#6a5c45)
Step 2
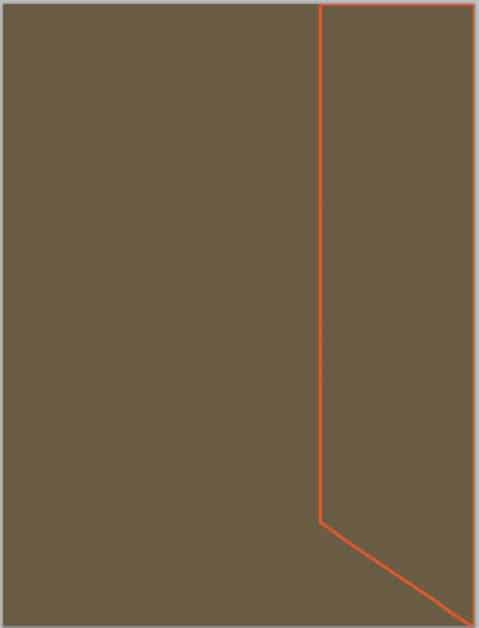
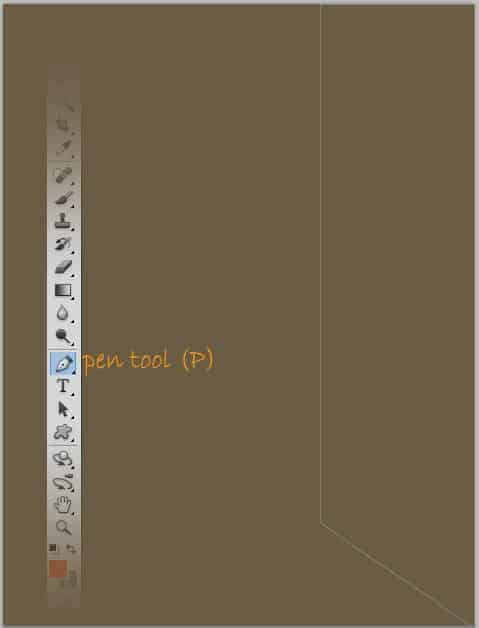
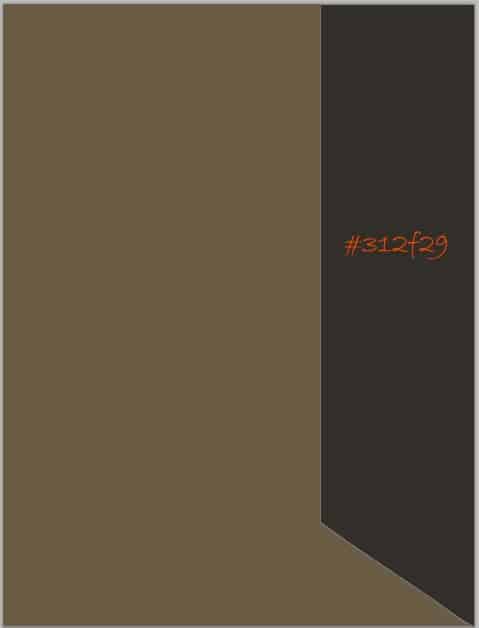
Create a new layer (Shift+Ctrl+N) above the solid color layer. Take the pen tool(P). With this tool, create a square path as the one highlighted in orange color.
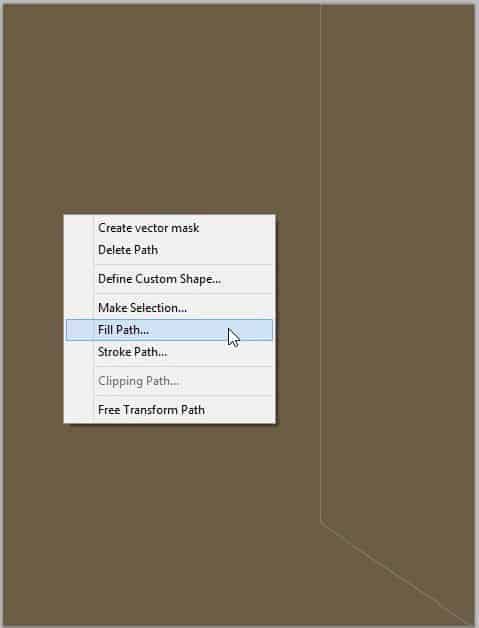
After creating the path, right-click on the document to show the path option window. Choose Fill Path. Then, fill it with a solid color of any color we prefer or we can fill it with a given color of #312f29 as shown in the screenshot. Finally, delete the path. Name this new layer right.
Step 3
On another new layer (Shift+Ctrl+N), create another color-filled square path. Take a look at the screenshot below for our reference. Name this new layer left.
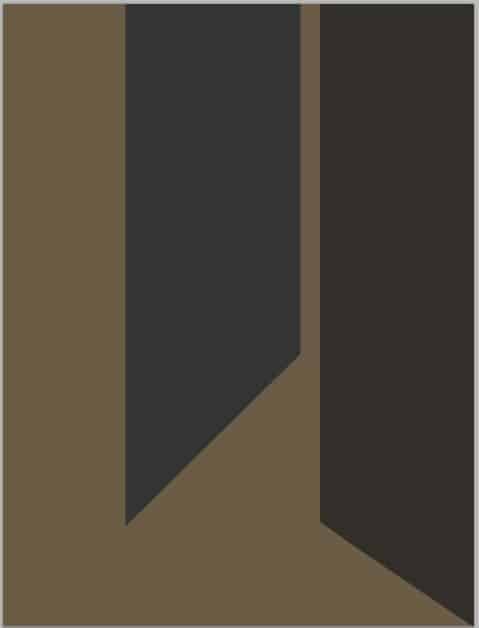
In the same way, create the other two color-filled square paths on two different new layers.
So we have four color-filled squares. The first and second are right and left. Let’s name the third middle foreground and the fourth left foreground. The four squares are supposed to be walls of a chamber.
15 comments on “Create a Sci-Fi Chamber Photo Manipulation in Photoshop”
where did you get the photo of the railing?
Excelente tutorial ....gracias
Little lost on step 18 - what layer is the masking suppose to be done on?
I believe on the brightness/contrast layer. You can double-check this in the PSD file at the end of the tutorial
Thanks for providing the new link. I don't see any information on how to create the shadow for the person and I know this is something that I need to learn. Do you have any info on that?
Try using the Brush tool and manually painting the shadow on a new layer.
The link for the 'texture' doesn't appear to be valid anymore.
Thanks for letting us know! The link has been fixed. Here's the new link: https://www.textures.com/download/brickmedievalblocks0059/7301
Very good tuto even for a beginner like me, many thanks.
Thanks so much for this - great tutorial - shame about not explaining the girls shadow BUT I managed to do it. It looks like you just drew one in, but what I did was copy the girl to a new layer and manipulate it and set it to overlay and got a good shadow from this.
I always love anything like this
Absolutely love everything like this
This is cool!
Nice one
Very nice composite but forgot to show how to make a shadow for the little girl. Just a thought.