Luminar AI lets you turn your ideas into reality with powerful, intelligent AI. Download the photo editor and see how you can completely transform your photos in a few clicks.
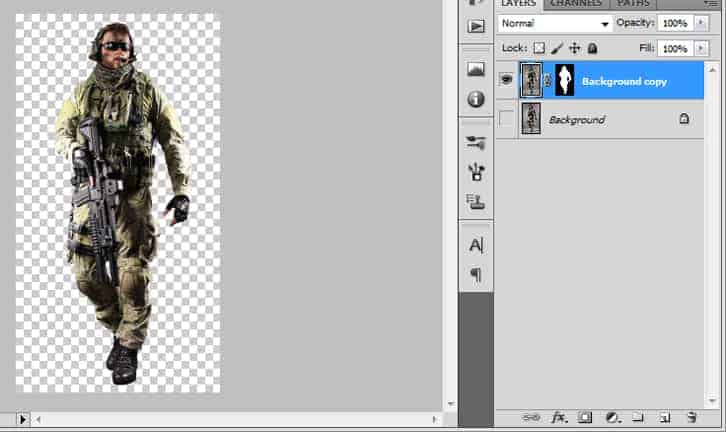
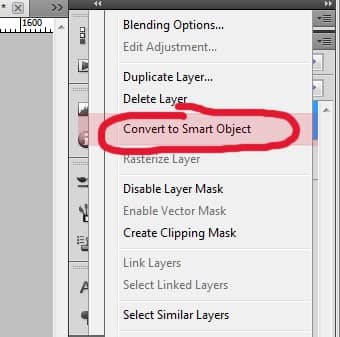
Once you're done Convert it to a Smart Object by Right-clicking on the Layer > Convert to Smart Object... Doing this will not only let us retain the original quality of the image as I stated before, but it will also let us re-adjust future edits we'll make with no problem.
Step 6
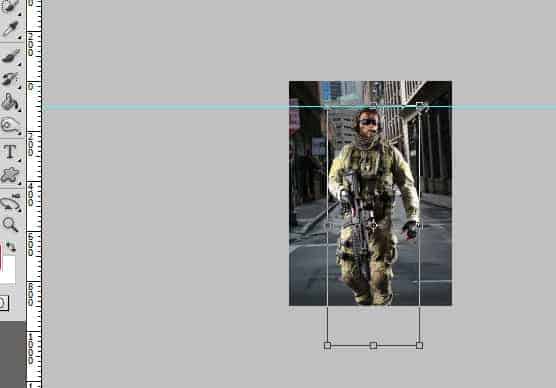
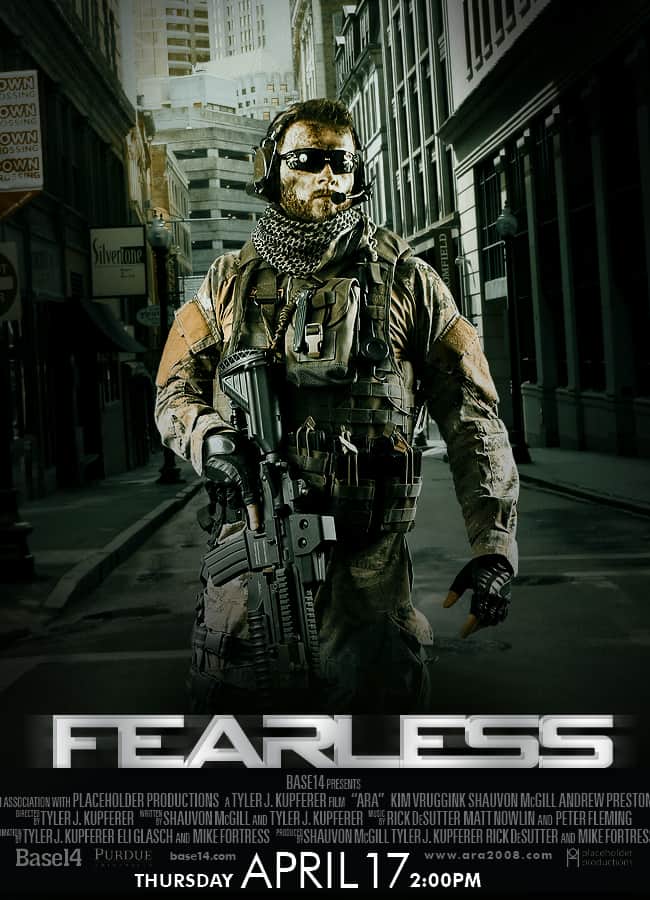
After that, place it to your canvas, re-size it to 65% then position it as shown below.
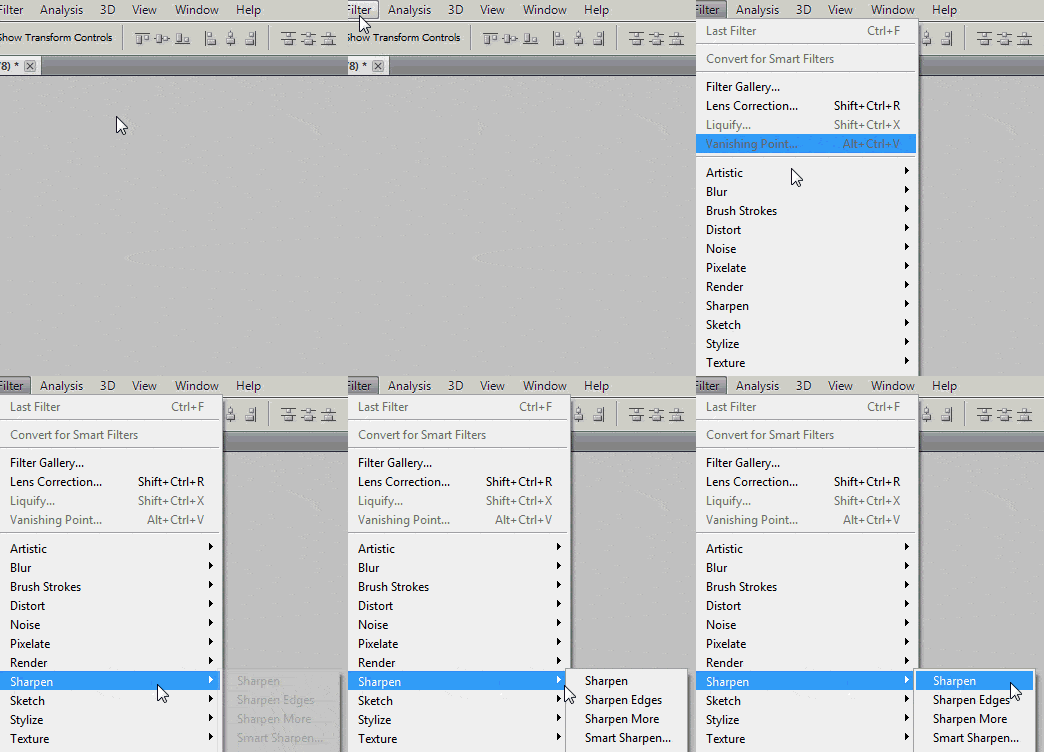
Next go to Filter>Sharpen> Sharpen.
Step 7
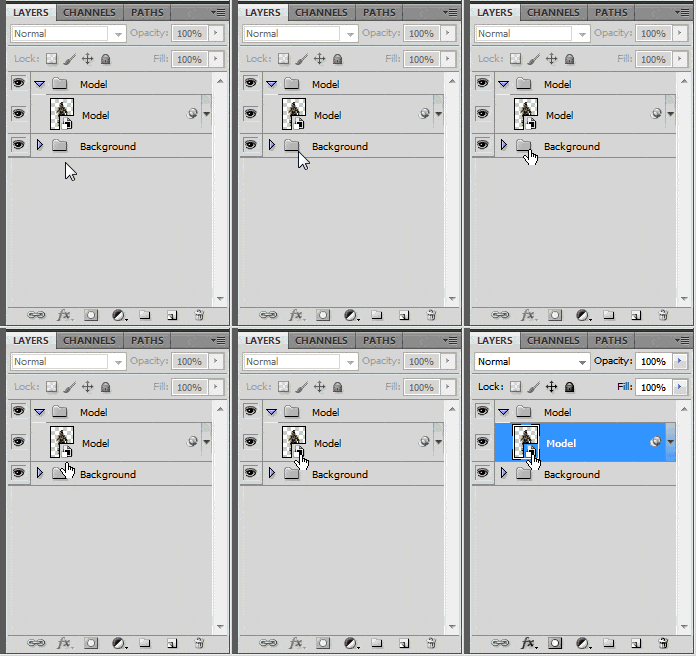
The man's arm's are pretty bright compared to the rest of his upper body while his face is a bit dark because of the original image's lighting but are going to fix that. To start off, double-click on the Smart Object Icon located on the bottom right corner of the Image Thumbnail. A window will pop-out just hit 'Ok'. Doing so will open us to a separate canvas filled only with that layer.
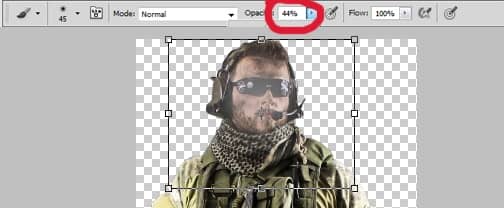
We'll start by lighting his face. But before doing so, set your Foreground Color to #C0C0C0. Now grab your Brush Tool (located on the Layers Panel |or| use the Keyboard Shortcut B), with the Hardness at 0% and Brush Opacity (take note, the brush opacity not the layer) at around 40-55%, brush over his face a couple of times.
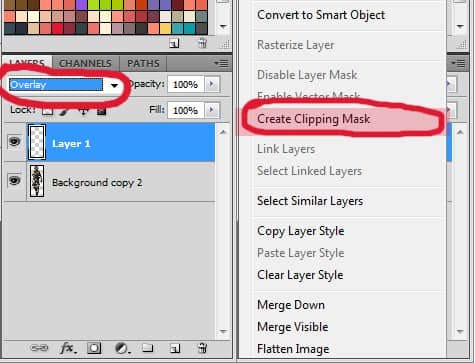
Then Set the Blend Mode of the layer to Overlay and Create a Clipping Mask (Right-Click > Create a Clipping Mask...)
Step 8
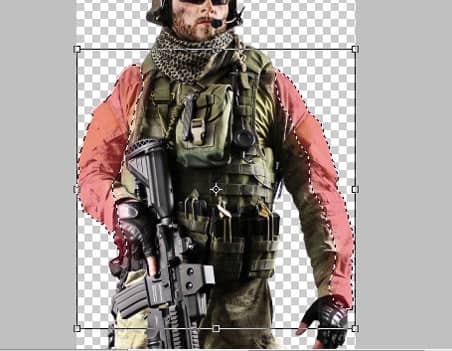
Now we'll move onto his arms. First, using either the Pen Tool or the Lasso Tool, make a selection from his shoulder until his wrists. If you are using the Pen Tool, don't forget to convert the Path you made into a Selection. It doesn't really need to be precise, just enough to cover the bright parts. (I highlighted the parts I selected so you could see them...)
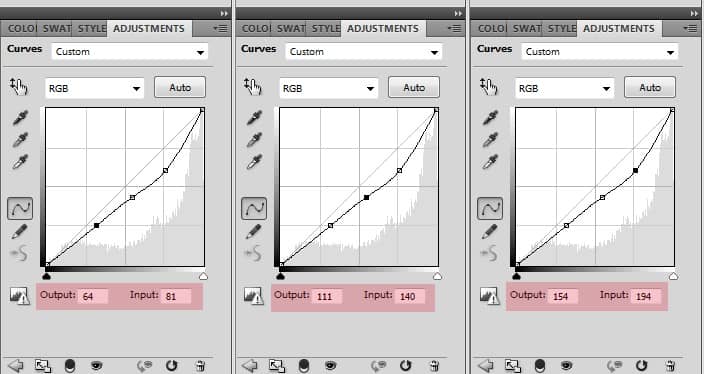
Click on the Adjustments Layer Icon> Curves. Adjust it like so:
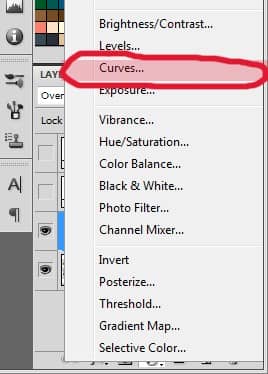
Click on the Adjustments Layer Icon> Curves. Adjust it like so:
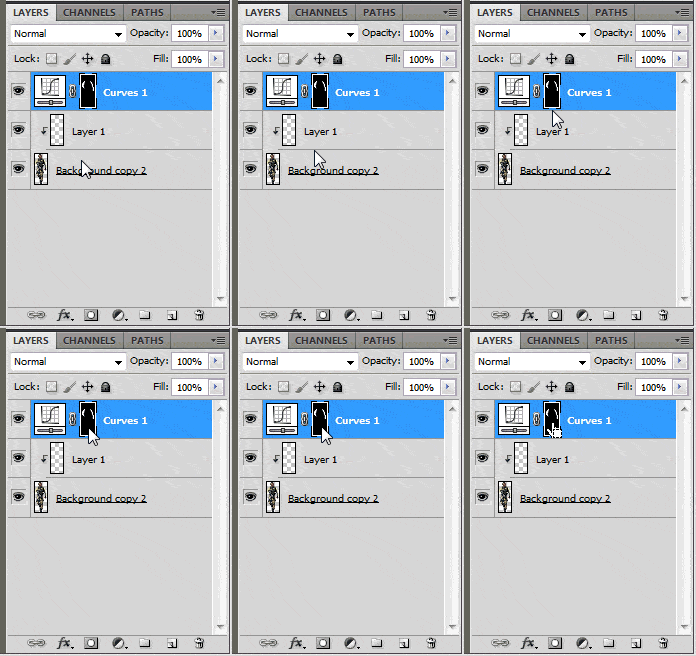
Re-select the selection we just made (Hold Ctrl then Click on the Layer Mask of the Curves).
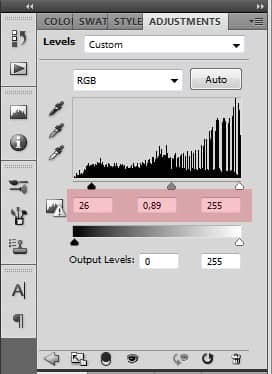
Click on the Adjustments Layer Icon> Levels. Adjust it like so:
After that Save the .psb file by going to File > Save |or| press Ctrl + S
Step 9
Leave the .psb file open as you might need to re-adjust some settings later on. Go back to our main canvas, now we will cover the bottom part of the image. Change your Foreground Color to #0c1418, create a new layer and name it 'Brush' using the Brush Tool (Hardness at 0%, Brush Opacity at 100%, with the size of your choice), Brush over the bottom part of the canvas, try making an upside-down U or a triangle shape with a not-so-pointy end or a half circle.

6 comments on “Create an Action Movie Poster in Photoshop”
why i cant download psd file? :(
This action hero isn't messing around! I've often looked at film posters and wondered what kind of work goes into them. I grew up with some classic film posters such as the original Star Wars that were painted. However, modern ones can be captivating when they use the right blend of color, positioning, and shapes. On a more technical note, can I make posters using Photoshop elements or do I need Photoshop to make one as described here? Thanks!
Great! Thank You.
http://i.imgur.com/HSBosmx.png I had fun with this tutorial .. Thank you ! But one thing was i couldn't find the Gradient fill in the adjusment icons so i skiped the darkening .
Nice design
Nice tutorial