Learn how to create a detailed Apple Safari icon in Photoshop. This tutorial will show you how to create shapes and use different layer styles to create effects.
Preview of Final Results

Download the PSD
Safari.zip | 2.27 MB
Download from Website
Apple Safari Icon Photoshop Tutorial
Step 1
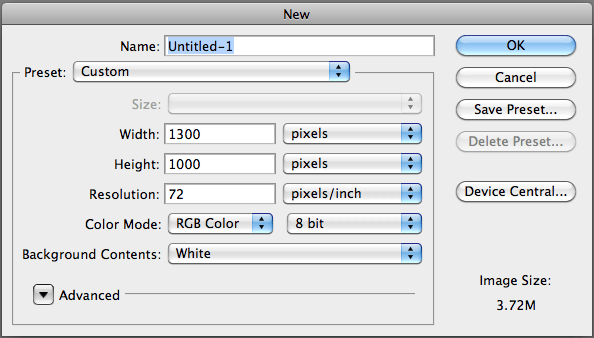
Open up a new Photoshop file by going to File > New or by pressing Command/CTRL + N. For the purpose of this tutorial, I’ll be using a large document (1300 x 1000), but you can chose any size you please.
Step 2
Go to Layer > New > Background from Layer and name the layer “Background.”

Step 3
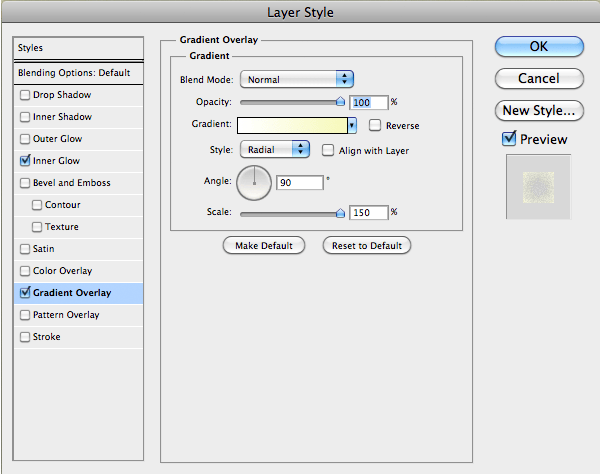
Next go to your Layer Styles tool by either double clicking your “Background” layer or by going to Layer > Layer Style > Blending Options. Once your Blending Options panel is open, apply the following settings:

Step 4
When you’re done adding effects to your “Background” layer, you should have a nice looking gradient with some noise.

Step 5
Next, it’s time to start working on the safari icon itself. We’ll start by selecting the Circle Thin Frame tool (you can find this tool by going to Custom Shapes Tools > Circle Thin Frame tool).

Step 6
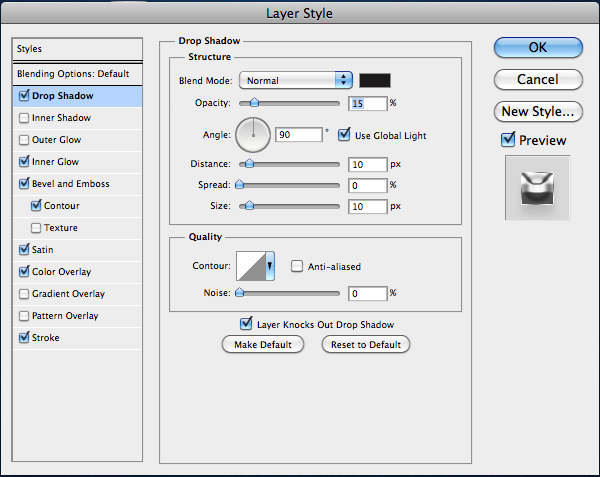
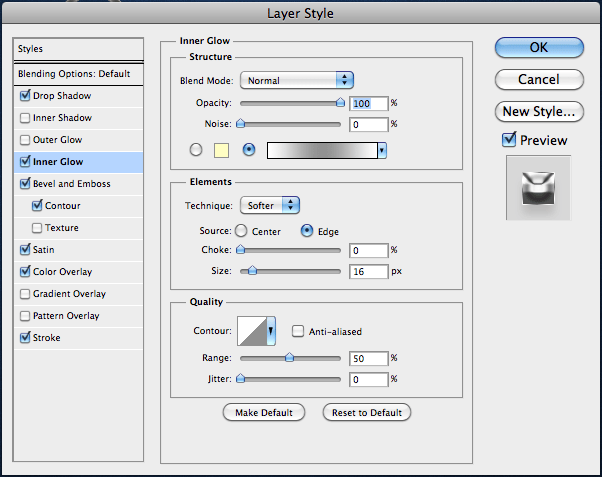
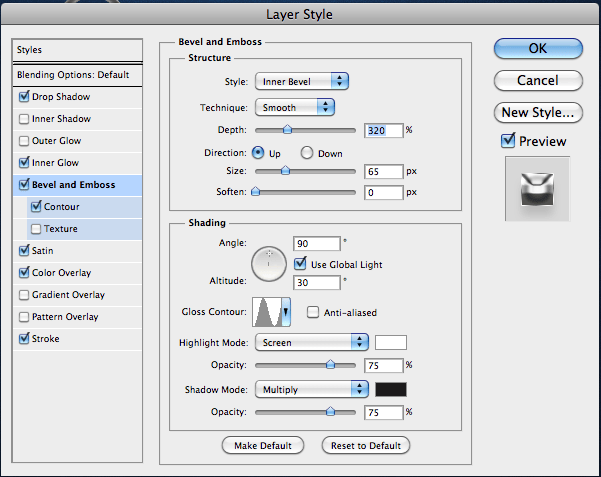
After you’ve selected the Circle Thin Frame tool, click and drag your mouse (while holding the Shift key), and make a fairly small and round circle. This will be our hoop ring. You don’t have to name this layer, but I called it “Outer Ring”. Double click this layer and enter the following:


Step 7
Now that you’ve added some cool effects to your loop ring, click New Style in your Layer Styles window. This will save this effect so when you use it in a few minutes, you won’t have to add the effects again. You can name this effect anything you’d like but make sure the “Include Layer Effects” option is clicked.

Step 8
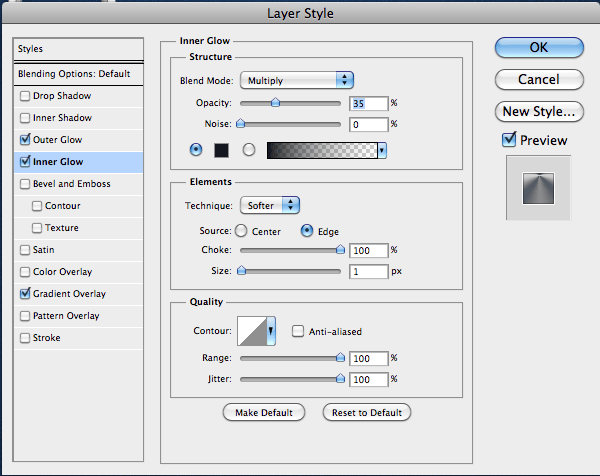
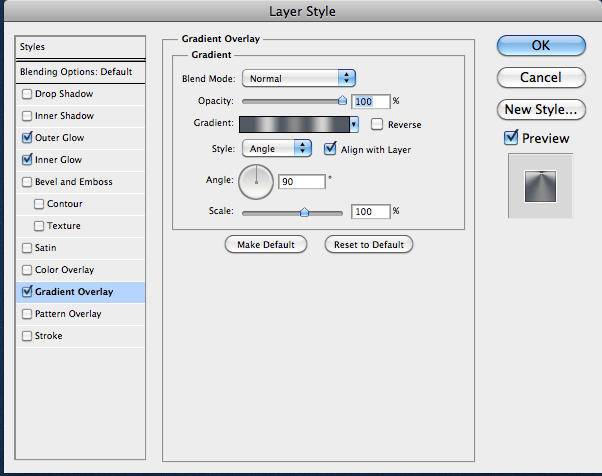
Next we’re going to duplicate our “Outer Ring” layer, rename it “Inner Ring”, and shrink it so it fits perfectly inside the previous layer. Then, add the following effects in your Layer Styles window: before saving it, save it as a New Style like in the previous step.

Step 9
You should have a nice little hoop ring now.

Step 10
Next, using the Ellipse tool, click and drag your mouse while holding the Shift key to create a round circle. Then add the following layer style effects:
6 responses to “Create an Apple Safari Icon in Photoshop”
-
Link download is not found. Could you resolve it?
-
Fixed!
-
-
are you kidding me? are you serious? what about the colors? seriously. look at other tutorials. they tell you the color. what makes you special?
if anyone knows the colors lemme know. honestly.
seriously, dude. you’re a fail -
I have come back from the dead and this is what I find? How humanity has fallen. I shall live with the elves for the remainder of my life.
-
Keep helping man
your tutorials are best i find many things new from Your tutorial -
best and easiest ever!


Leave a Reply