Learn how to create this beautiful printer icon with reflections and shadows all within Photoshop. A detailed PSD is included with this tutorial.
Preview of Final Results
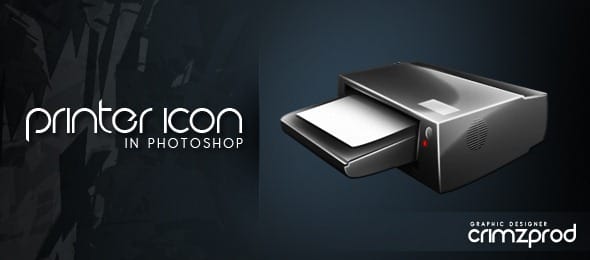
How to Create a Beautiful Printer Icon Photoshop Tutorial
Tutorial Details
- Program: Adobe Photoshop
- Version: CS4
- Difficulty: Intermediate
Step 1
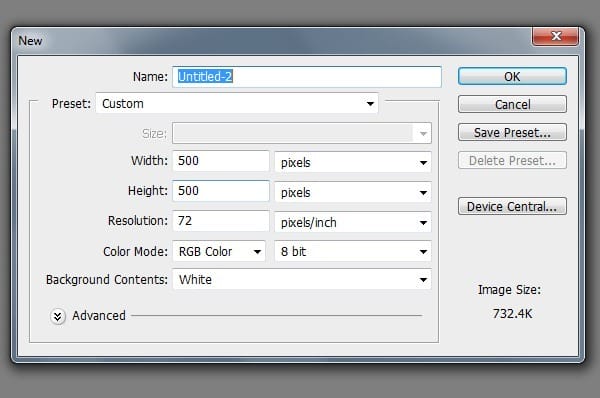
Run Illustrator CS5 and open up a new document (Ctrl+N).
- Resolution: 72dpi
- Color Mode RGB color
- Dimensions: 500×500 px
Step 2
First of all, imagine a shape that should be suitable for a printer and its components. Outline that shape with the Pen tool (P): drag the points from one corner to the next, while pressing the Alt button at the same time. If you want to draw round corners, simply drag the mouse in the way you want to draw the line.

Step 3
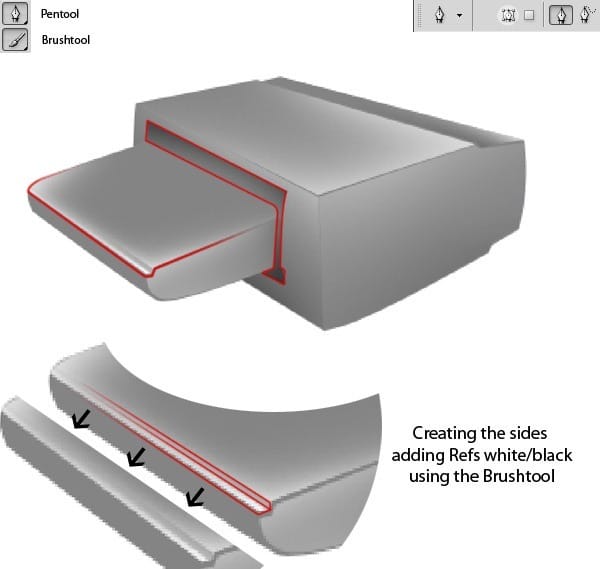
Make a selection of the side you want to outline. Use the Brush tool(B) with a large feather, draw slowly around the selection as what I did with the image below. Use the white color on the upper side of the selection and black on the lower.

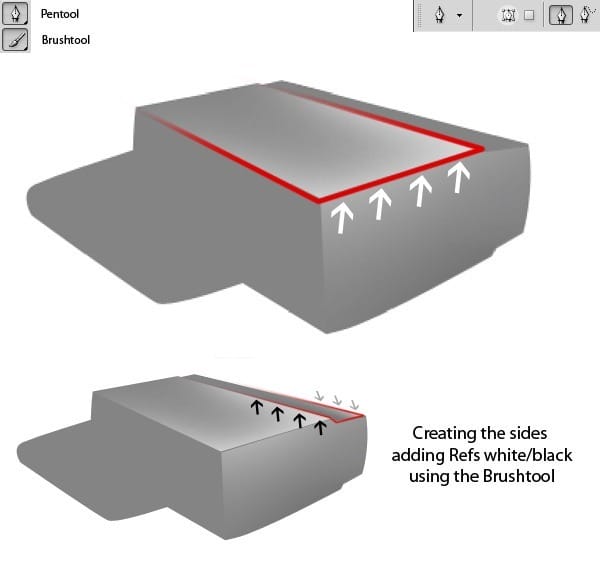
Apply the same technique for the other sides.
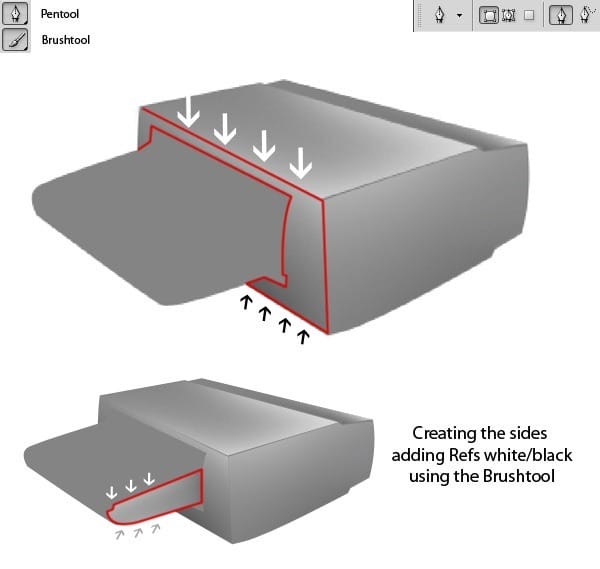
Step 4 – Strokes on the margins
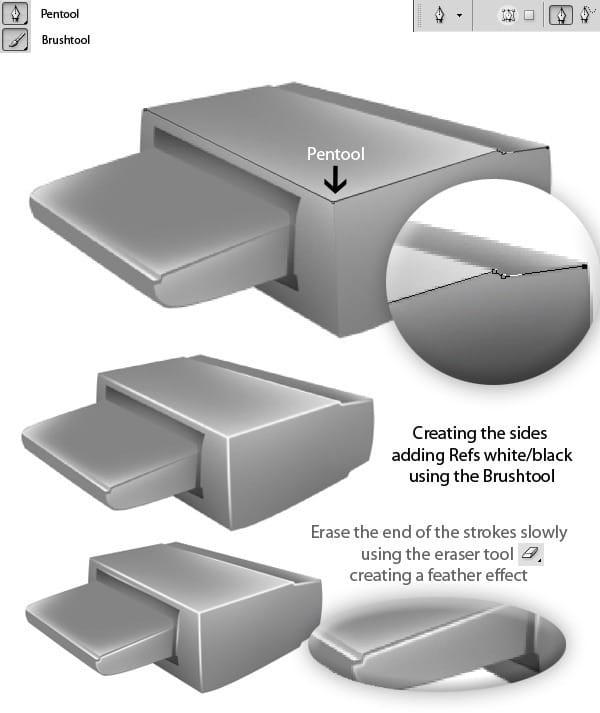
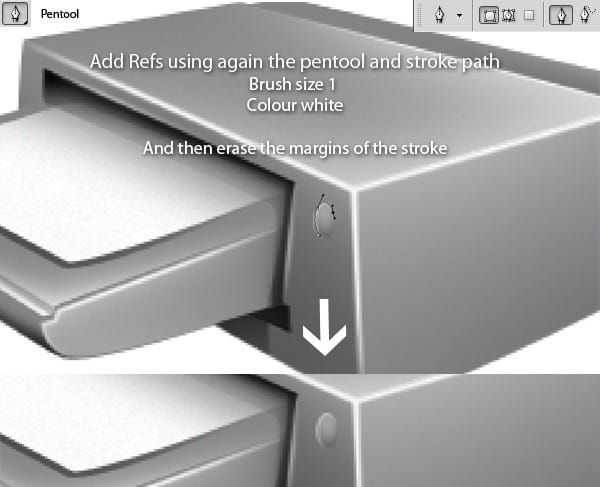
Use the Pen Tool to draw the lines tracing the margins of the components and then right-click, and select Stroke Path with a brush size of 2 or 3 in white. Pick up the Eraser Tool and erase the end of the strokes to create a feather effect.
Step 5 – Paper
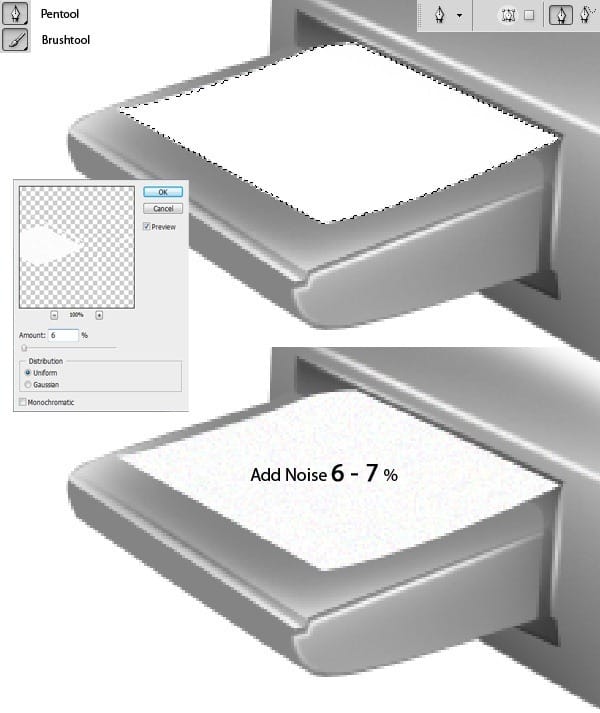
Draw the shape in which you want the paper with the Pen Tool (P). Fill it in white with the Brush Tool (B) or the Paint Bucket Tool (G). To make it more realistic, you should add some noise to it (Filter > Noise > Add Noise).
Step 6
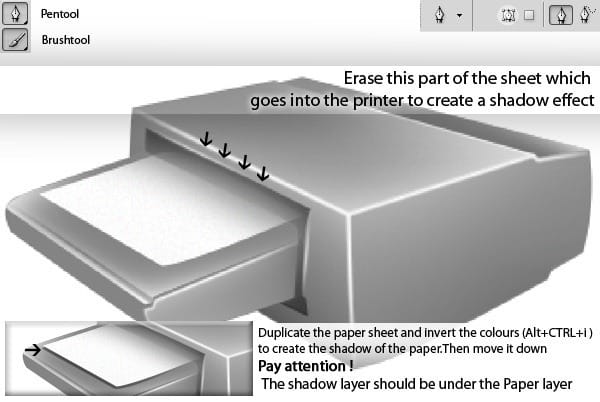
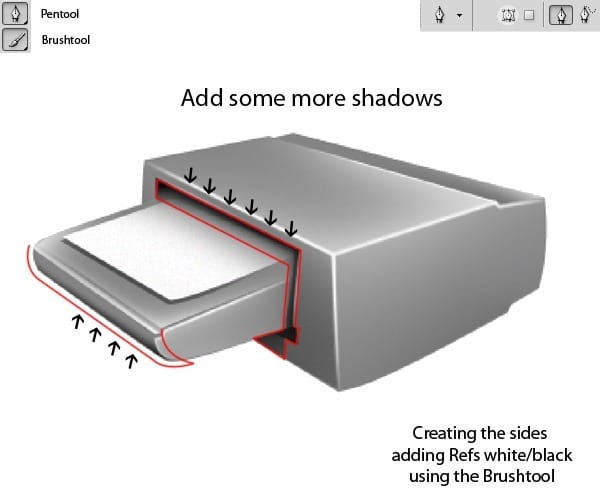
Add shadows with the same tools that we’ve been using. Make a selection, and then brush slowly with black color in the zones where I’ve marked in red.
Step 7 – Creating a button
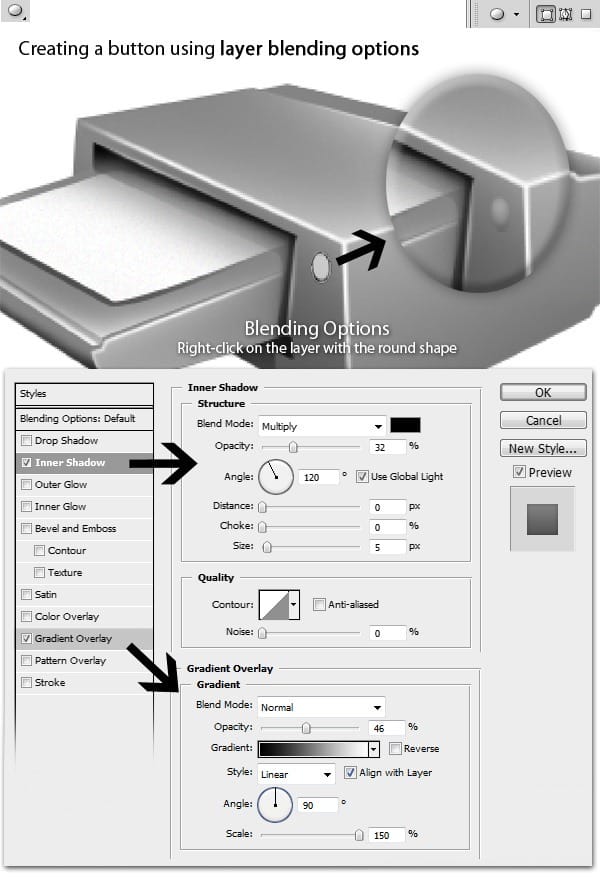
Pick up the Ellipse Tool and draw a circle with color code: #c9c9c9. Apply those effects. Go to Blending Options(right-click on the layer with the round shape and choose Blending Options).
Step 8
Add some details to the printer to make it look more complex, such as a cooler space or a sticker. After you created the ellipse, right click on the vector layer of the ellipse and pick Rasterize Layer.

After you made the selection while taking into consideration of the notes I’ve made in the image below, press Delete.
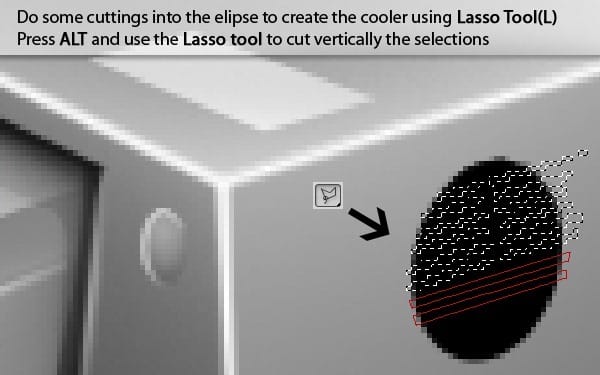
The cooler should look like this:
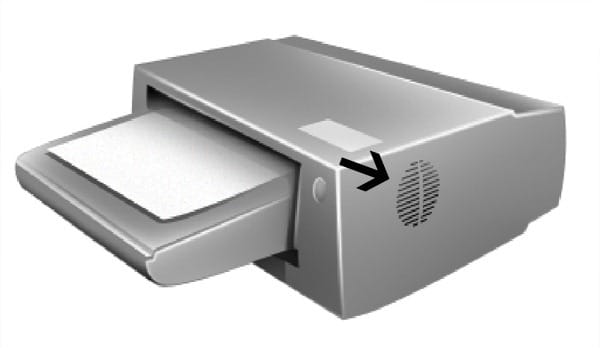
Duplicate the layer of the cooler and invert colors (Ctrl+Alt+I). Place the layer under the black cooler and then move it to give a light effect. Opacity of the white cooler layer should be 53%.


Leave a Reply