Turn any photo into a dot grid artwork with these Photoshop actions. You'll get great results with dots that change size. They get larger in brighter areas and smaller in darker areas. Free download available.
Step 14
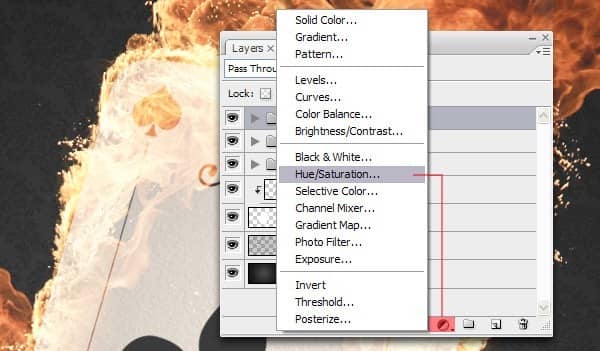
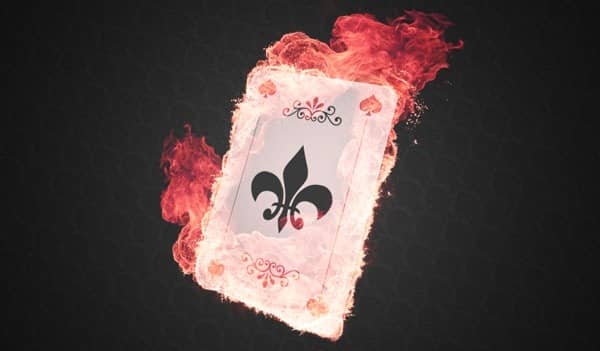
I am kind of tired of seeing the generic flame colours we always see so let's go ahead and give it another tint by using a Hue/Saturation Adjustment layer and set the Hue to -24..
Step 15
Create a copy of the Paper Texture and set the Layer Mode to Darker Color and set the Opacity to 50%. Use the Burn tool (O) to darken some of the spots on the paper texture to accentuate the flames a little better.
Step 16
I personally think all the card shapes look a bit flat so I am going to add a Layer Style to help show them more. Double-click on the right side of the Fleur-de-Lis shape and check the box for Inner Shadow. Set the Blending Mode to Multiply, the Opacity at 75%, the Angle at 120 degrees and set the Distance to 1px.
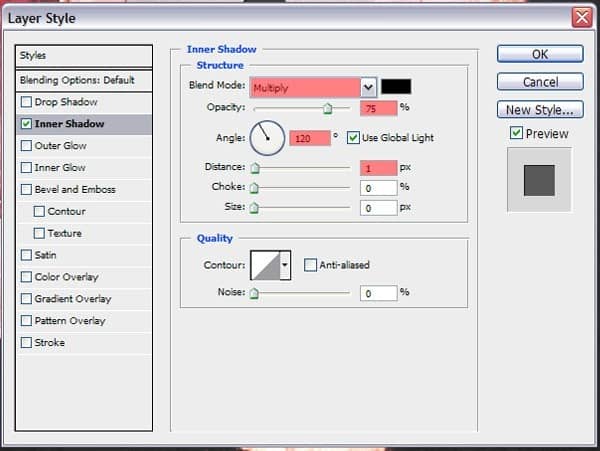
If done properly, you should end up with this effect:

Repeat this step for all shapes or simply copy the Layer Style and paste them onto the remaining shapes.
Step 17
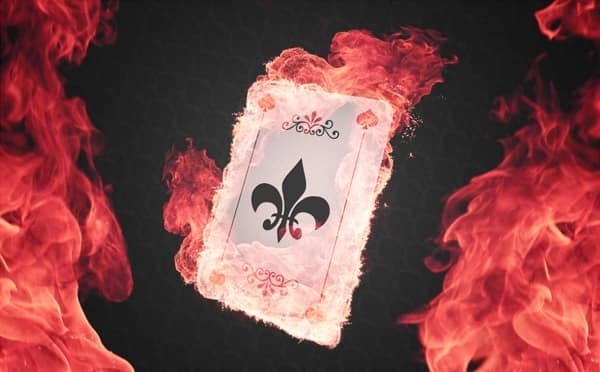
For the giant flames on both sides, you will need to open the original Fire image again and drag two or three flames into the composition. Do not resize them until you are happy with the placement. You can rotate or flip them, whatever you want.
Step 18
I'm not really happy with how the colors look at this point but we can easily change that by adding a Color Balance Adjustment Layer with the settings shown below.
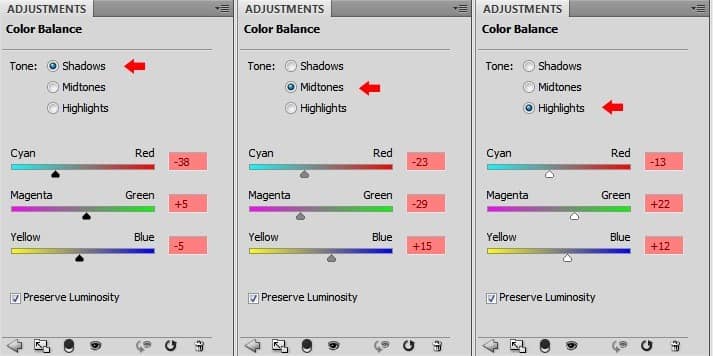
Set the Layer Mode to Darker Color.
End of Tutorial
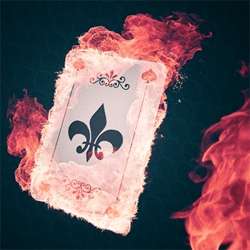
![pc_final[1] pc_final[1]](https://cdn.photoshoptutorials.ws/images/stories/c485331dd07d_10673/pc_final1.jpg?strip=all&lossy=1&quality=70&webp=70&avif=70&w=1920&ssl=1)

2 comments on “Create an Explosive Flaming Poker Card in Photoshop”
I meant BUY
WHYYYYYYYY i dont wanna by the Fire :,(