
Learn how to make this abstract and very emotional composite in Adobe Photoshop. You will learn some technical things – as using adjustments for making masks, loading brushes etc. You’ll also learn some photo manipulation principles such as how the golden proportion works.
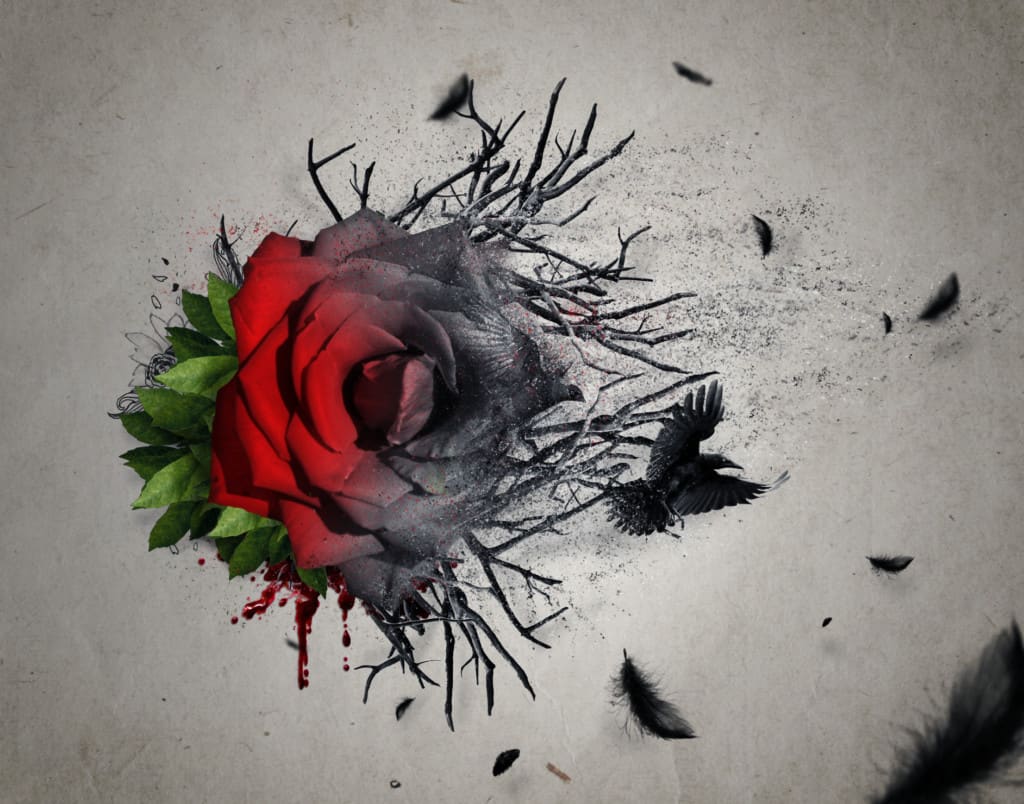
What you’ll be creating
You will be creating photomanipulation which is filled by symbols of transformation. I’ll show you, how to blend stock images in abstract composition. I’ll show you how shadows works. You can also learn, how to make photo looks like hand-drawn and more. You will need Adobe Photoshop CS5 or newer, to follow this tutorial.
Tutorial Resources
- Red roseRGBstock
- Foliage packdesignercandies.net
- STOCK Raven Flying with Alpha Layer – Netzephyr
- Jackdaw masked stock – frankandcarystock
- Ashes stock 2 – jennyraepip
- feather brushes – dark-dragon-stock
- old paper – klimek
- Hand Drawn Flower Brushes
- Dead Branches Stock – jojo22
- Debris Brush Set – zigabooooo
- Debris Brushes – dacmaniac
Step 1
Let’s start. Create new file. Go to File > New… Set size to 1884 x 1480 px.

Step 2
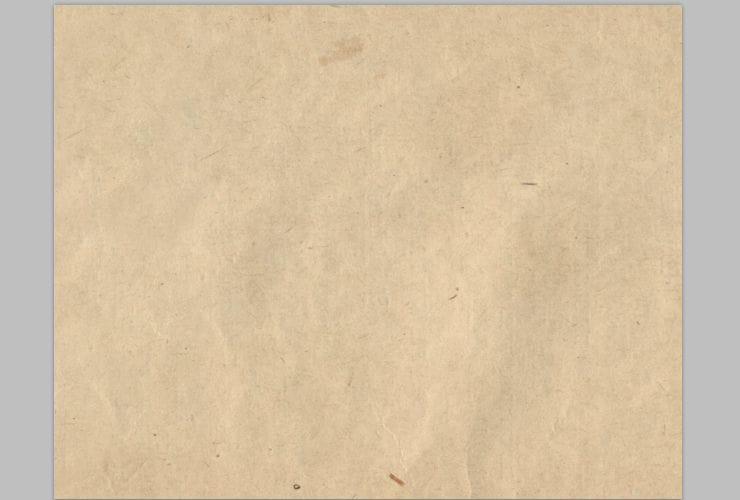
Place “Old Paper” stock. It will be base to whole project. Drag stock from folder and drop to your Photoshop file.
Step 3
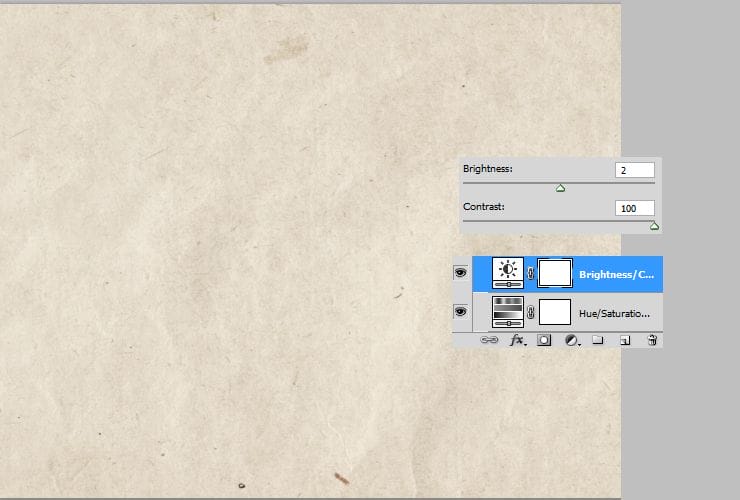
I really want to achieve grunge style of paper, not old. Add adjustment layer (shortcut or Layer > New Adjustment layer…) with Hue/Saturation.

Now, add Brightness/Contrast.
Step 4
Optional – You can add Gradient fill (shortcut or Layer > New Adjustment layer…). Radial gradient allows you to make vintage look.

Step 5
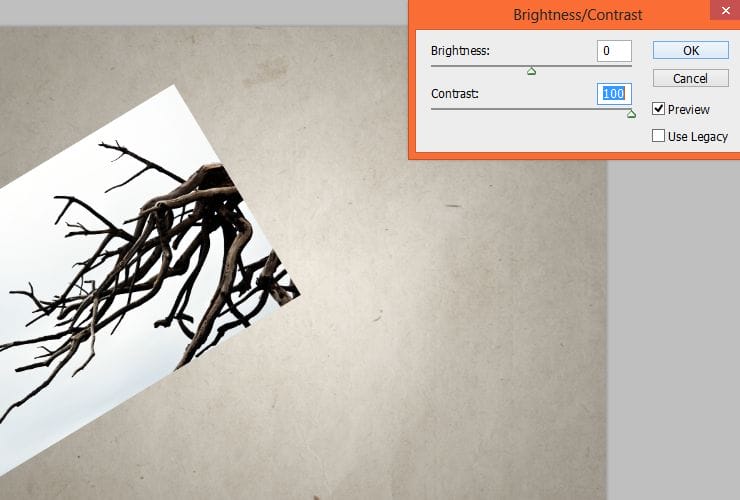
Let’s the game begin, huhu. You will learn, how to mask layer, without using brush. It works with black and white background. Place “Dead branches stock” to your file.

Duplicate the stock – drag layer on new layer symbol.

Click on duplicated layer with RMB. Choose “Rasterize layer”.

From top menu choose Image > Adjustments > Brightness/Contrast.
Again go to top menu Image > Adjustments and choose “Levels”.

It’s time to decrease saturation. Image > Adjustments > Hue/Saturation.

Now, add again Brightness/Contrast effect. Image > Adjustments > Brightness/Contrast.

Choose bucket tool and fill with white rest of the layer.

With white brush, erase not hidden sky.

Now go to Image > Adjustments > Invert.

Marquee created layer. (ctrl + A, or just by tool) Copy it. (ctrl +c or Edit > Copy)

Step 6
Now go to first layer. With holding alt, click on layer mask (white canvas on the left). Paste created layer (ctrl + v).
12 responses to “Create an Emotional Abstract Photo Manipulation of a Rose”
-

I got lost at the golden ratio. What do you mean by transform it at the focal point of 1.68?
-
Very Informative and Lovely Tutorial! I always love the way you have narrated is awesome. I will follow you to make something like this. Thank you so much.
-
Lovely
-
No follow up on Tutorials is so frustrating. It really is to bad, great design, but half the effort to help I have noticed..Step 5 worked beautifully for me, but when I tried to do the rose..total frustration. I must be having a real slow day or maybe 2..
-
I got lost at step 6… I can’t copy…
-
I got lost at step 5, what is RMB? Can someone please show me in details of step 5?
-
Right mouse button.
-
-
I got lost at step 5, can someone please show me?
-
is there any next step?
-
yes
-
-
This is really beautiful! You have quite an eye for creativity, and I’m grateful for this tutorial you have shared with us.
-
Sorry, could not find a link to blood
Leave a Reply