Turn any photo into a dot grid artwork with these Photoshop actions. You'll get great results with dots that change size. They get larger in brighter areas and smaller in darker areas. Free download available.
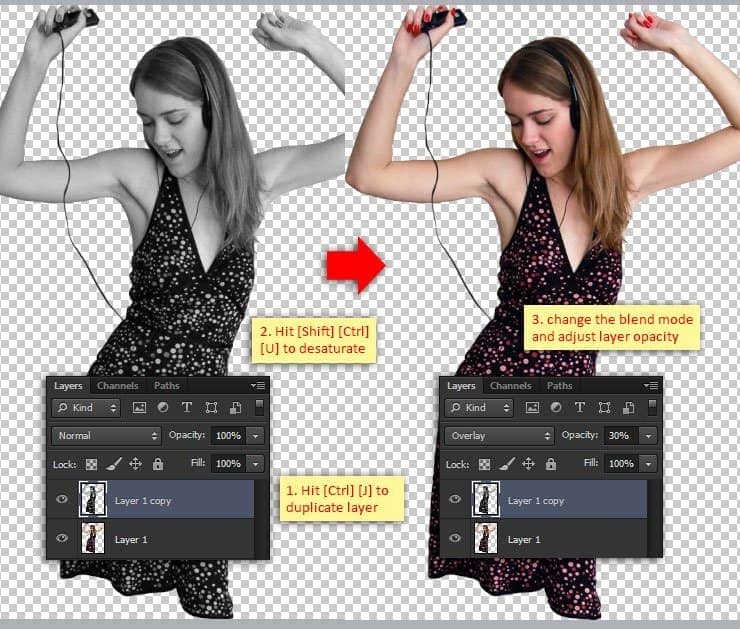
Step 8
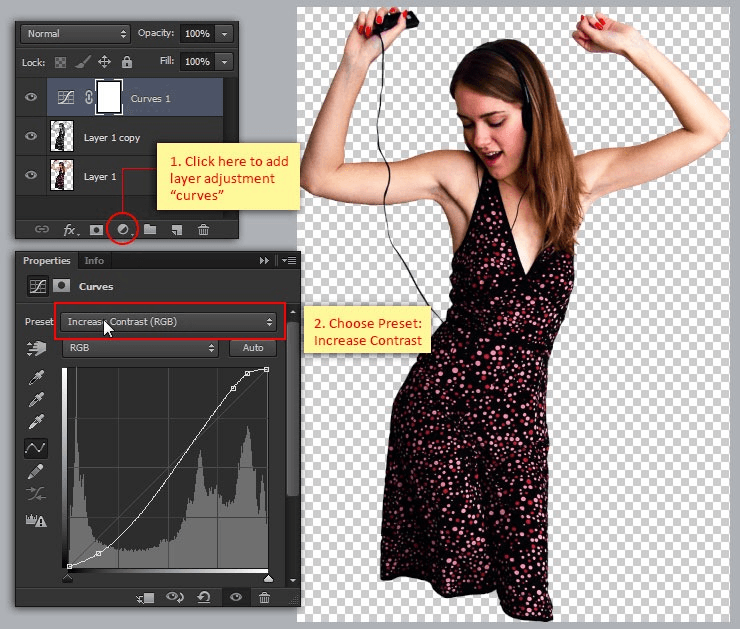
Click the new fill or adjustment layer button and select Curves, this will add Curves layer adjustment above previous layer. Inside the Curves Properties panel, choose Preset: Increase Contrast. The result in this step will boost the color's contrast.
Step 9
Close the smart object window by clicking the close button. A dialog will appear, click Yes to confirm so all lthe change we made to the smart object will be saved and applied.

Step 10
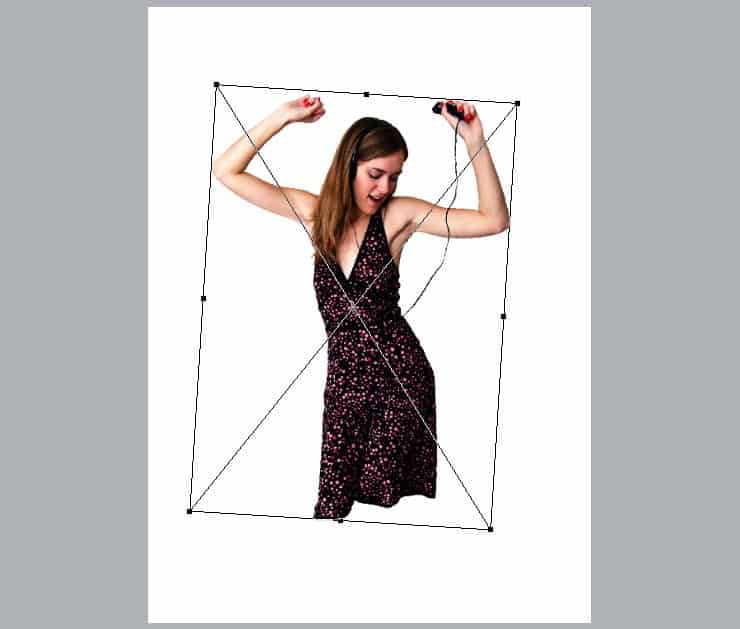
Go to Edit> Free Transform menu to adjust the model's size and position inside the canvas. Hit Enter when you're done.
Step 11
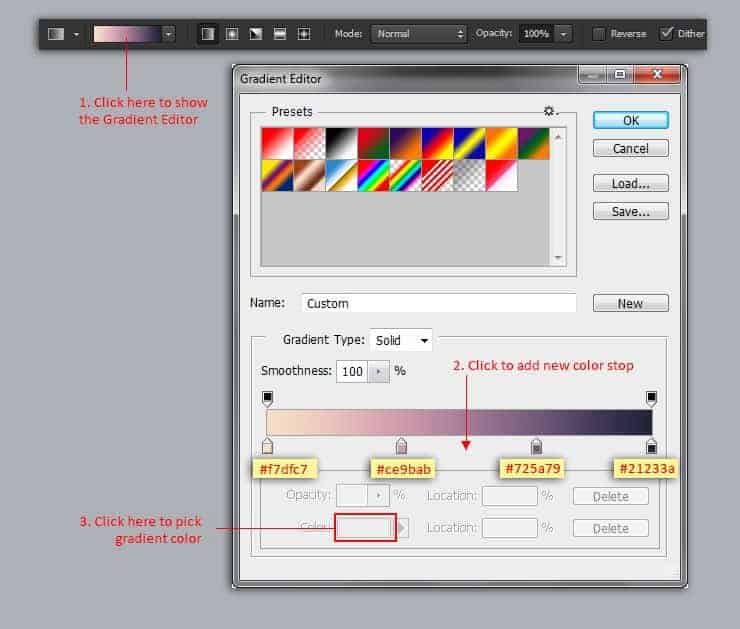
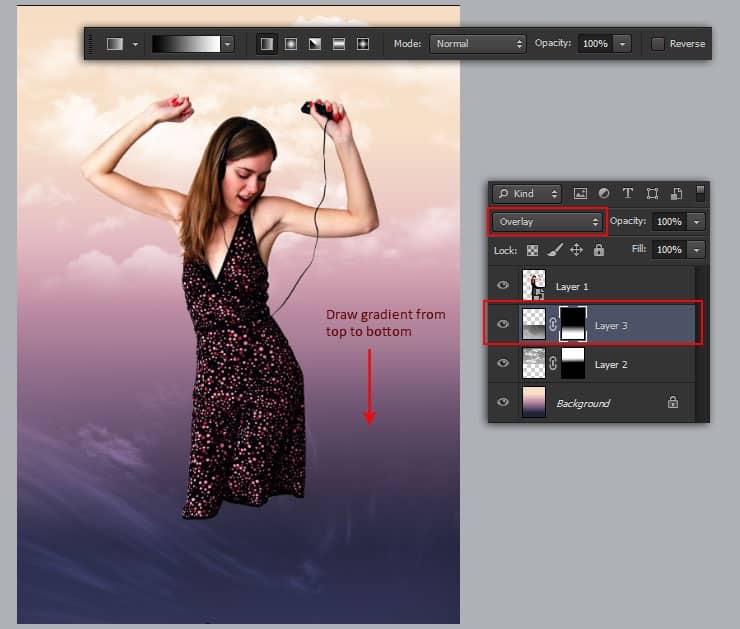
Grab the Gradient tool from the Tools panel. Now adjust the gradient color from bright to dark purple, follow instruction in the picture below for details.
Step 12
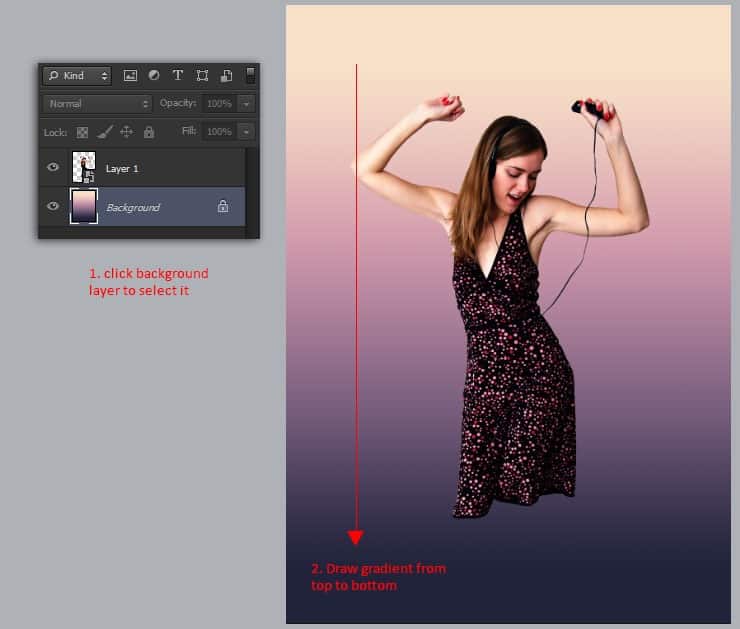
To apply the gradient, click background layer first. Then drag the Gradient tool from top to bottom until the gradient fill the background as shown in the example below.
Step 13
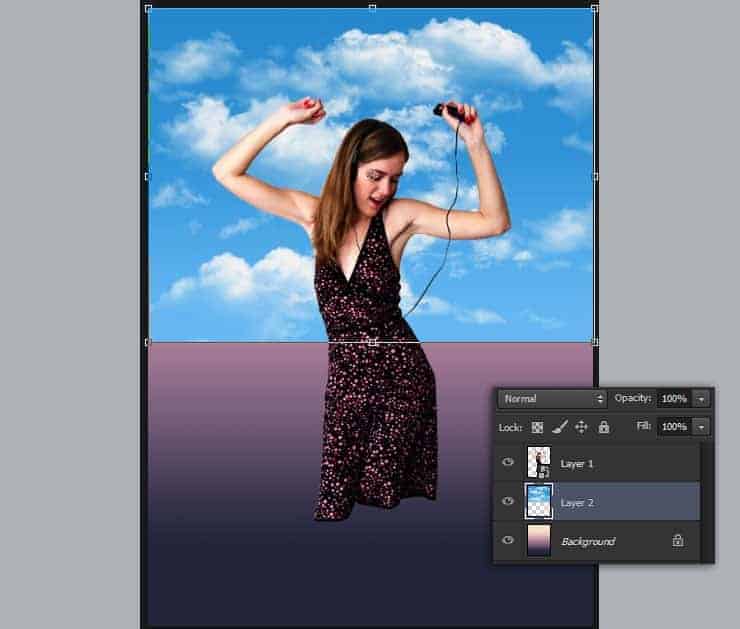
Open the sky 1 picture within Photoshop, copy and paste it into our working canvas document. As usual, use the free transfrom command to adjust its size and place it in the half-top of the canvas.
Step 14
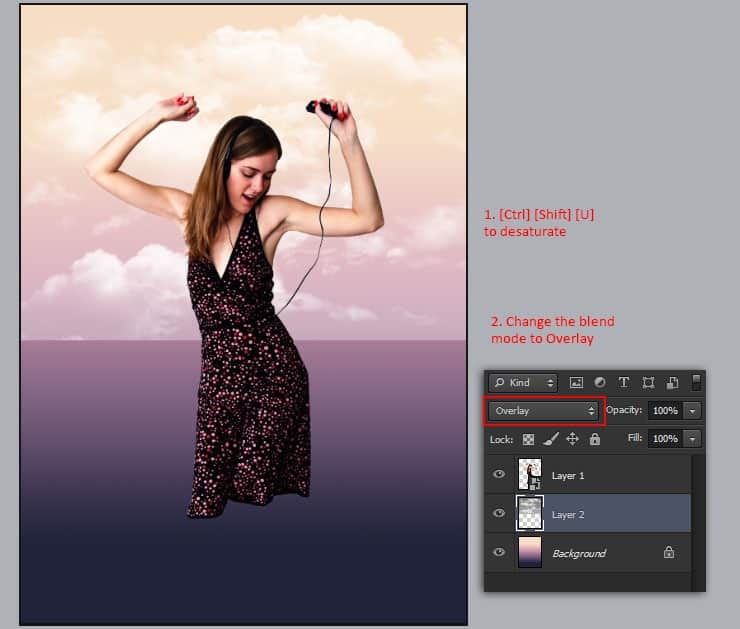
Desature sky 1 image by going to Image> Adjustment> Desaturate menu or simply press [Ctrl] [Shift] [U]. Change the blend mode to Overlay.
Step 15
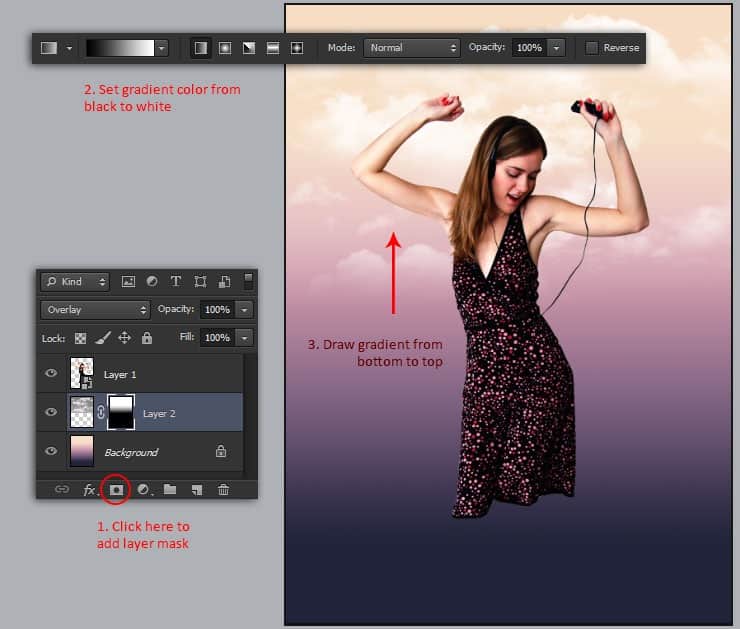
Still in the same layer, add layer mask by clicking the add layer mask button from the layers panel. Use the linear Gradient tool again to mask the sky gradually from bottom to top.
Step 16
Add another sky 2 picture. Follow the same step as steps 15 to mask the sky 2 layer (add layer mask and use linear gradient tool to do the masking job).
Step 17
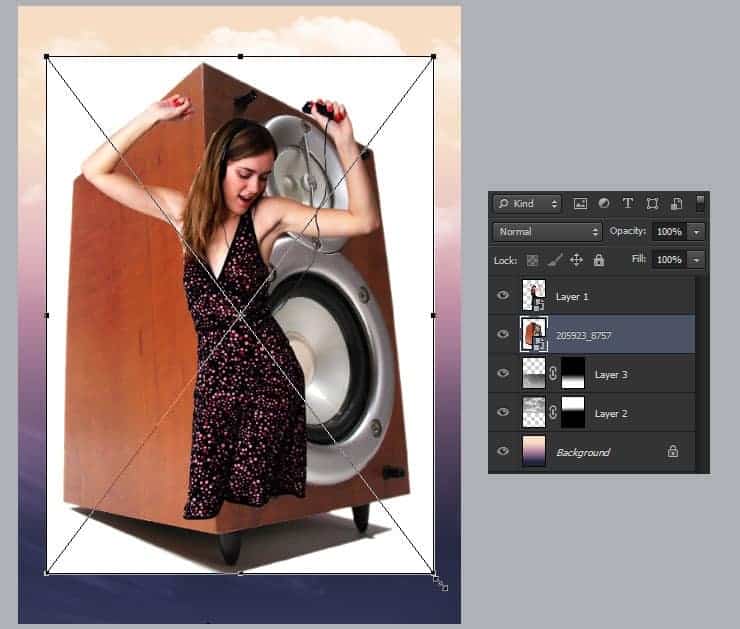
Go to File> Place menu. Select the speaker image to insert it as smart object. Adjust speaker size with the free transform menu ( press [Ctrl] [T] ) and place it below girl's layer.
Step 18
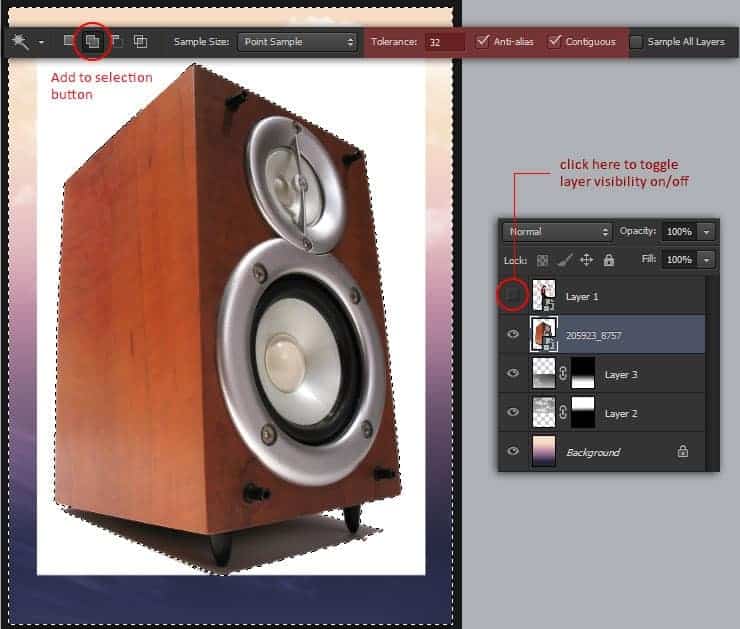
We have to remove the white background from the speaker. To do this, hide the girl's layer first and then click the speaker layer to activate it. Select white background and the rest of the area by using Magic wand tool (choose the add to selection option).
Step 19
Invert the selection by going to Select> Inverse menu or simply press [Ctrl] [Shift] [I]. Convert the inverted selection into layer mask by clicking the Add layer mask button.


5 comments on “Create Groovy Music Flyer Poster with Photoshop and Illustrator”
This is great job !!!
clap.... Clap....clap..
Thanks for the info.
#Famous_Boy_Attitude Boss Liked This
The tutorial is very great, i am following some of your tutorial from last few days, I love your website because you have some well written and profestional photoshop tutorials.. Keep it up
Admin
Thank you