Download Lightroom presets and LUTs, absolutely free. Use the presets to add creativity and style to your photos.
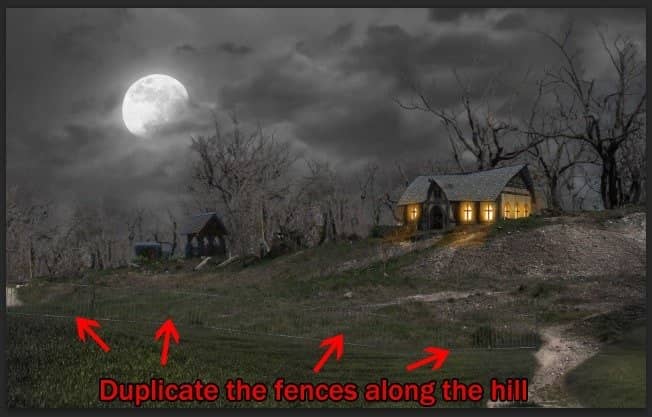
Step 16
Apply adjustment layers to the fences. You can do it quickly by grouping all the fence layers, select all the layers and hit Ctrl + G then place the adjustment layers on top of it with "Create Clipping Mask"
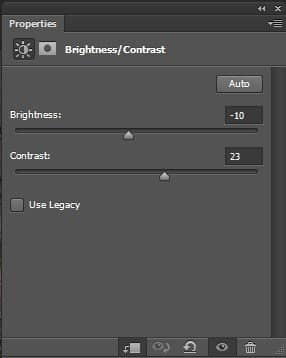
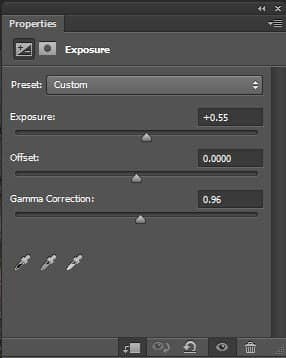
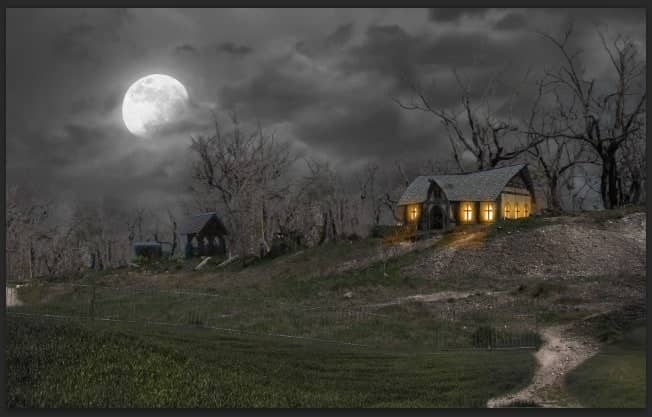
Step 17 - Object Placing Time!
Time to fill up our document with some spooky objects! Open the Tombstones and Dead Tree image and start dropping them into the image.
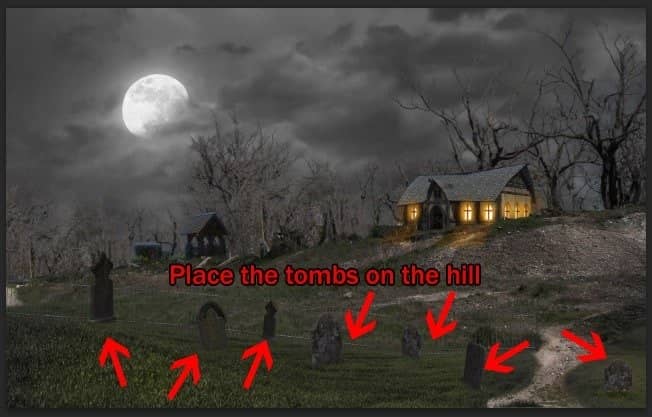
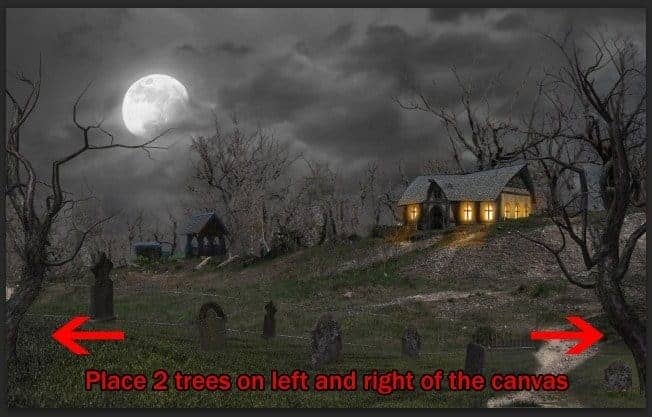
Step 18
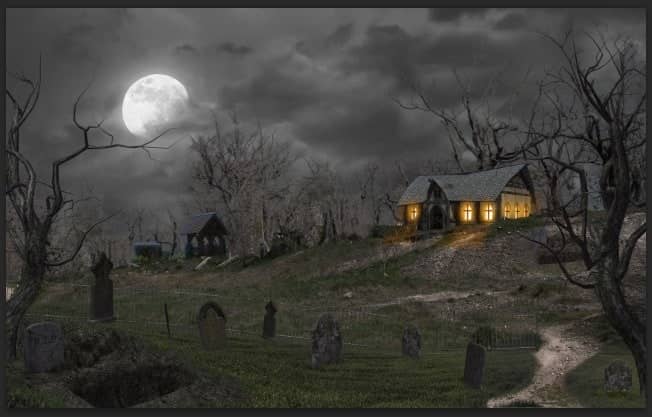
Open the Dig Grave image and place it in these spots
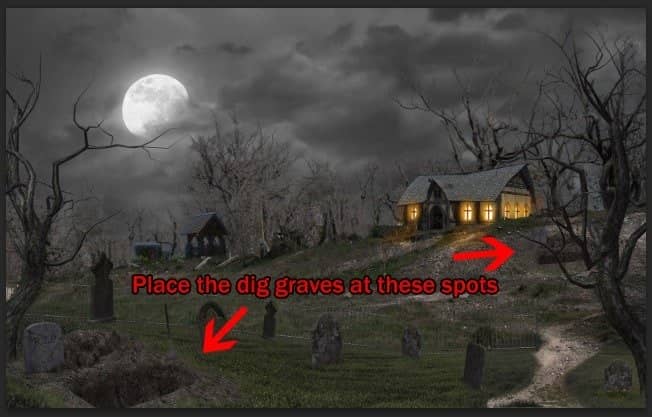
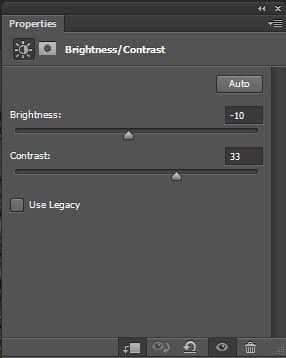
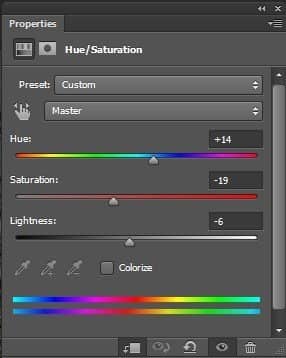
Apply these adjustment layers to the dig grave near the tree outside.
Step 19 - The Ravens, The Crows!
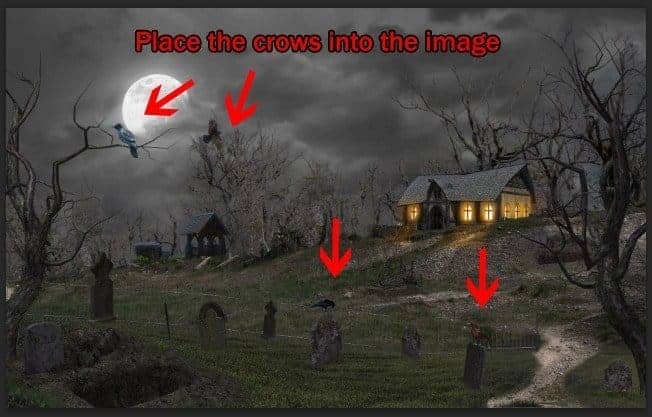
Open the Ravens & Crows image, pick some of them and place them on the tree, on the tombstone, or just let them fly as you desire!
Step 20
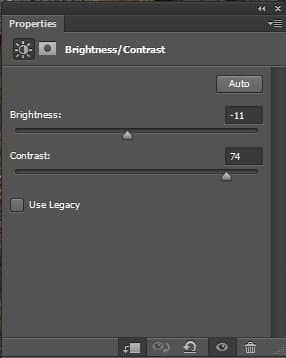
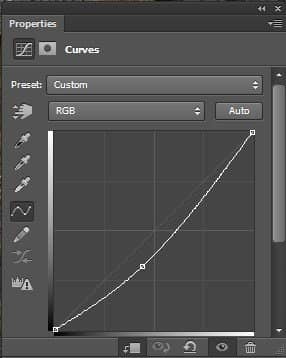
Place the Hayswagon into our document and apply some adjustment changes.
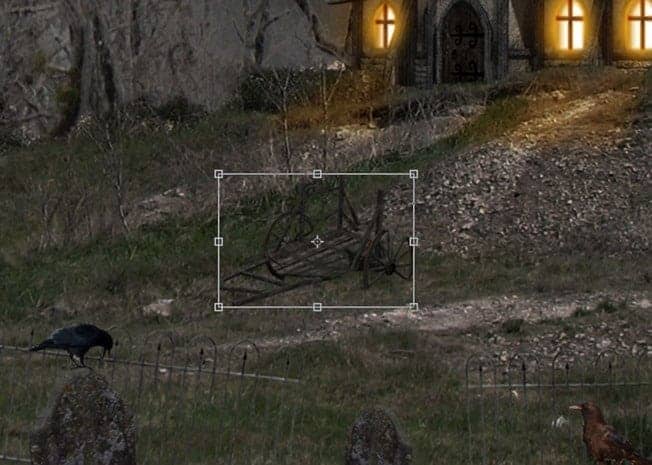
Brightness/Contrast - Curves
Step 21
We need some pumpkins on that hayswagon cause empty hayswagon looks sad! Open the Pumpkin On Hayswagon image and extract the pumpkin.
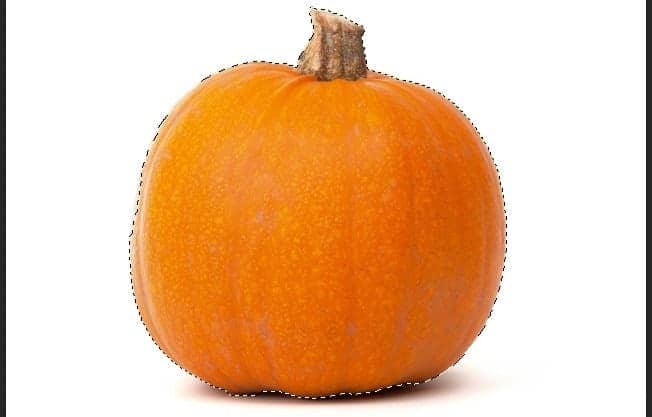
Place it on the hayswagon. Duplicate a few more pumpkins on it.
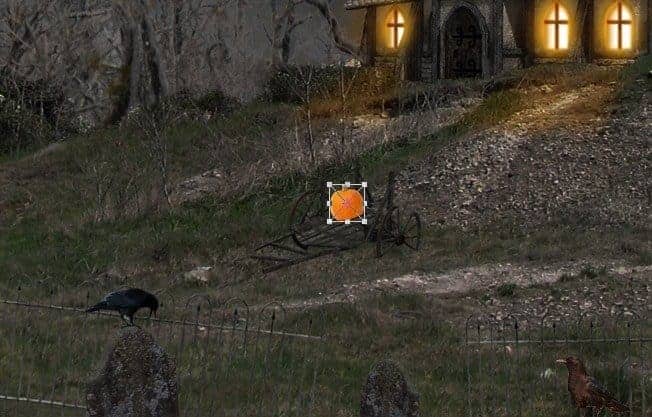
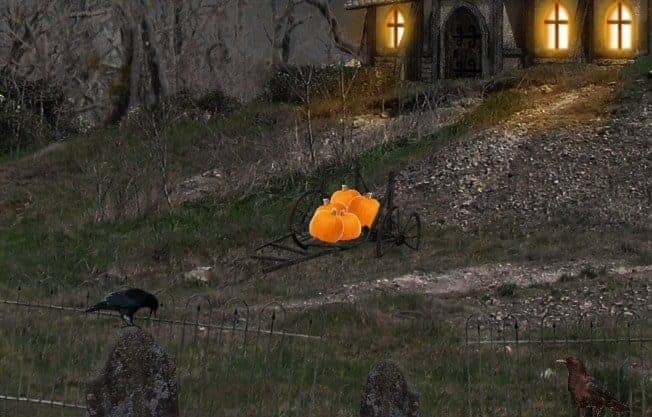
Group all the pumpkin layers into one group and apply these adjustment layers.
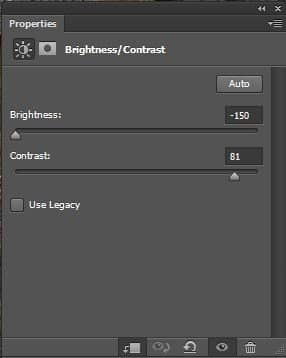
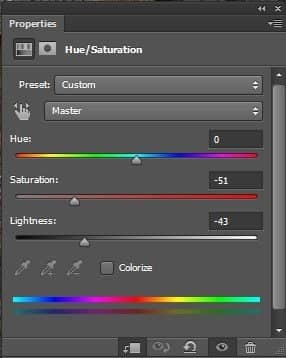
Step 22 - Evil Pumpkin Arrives!
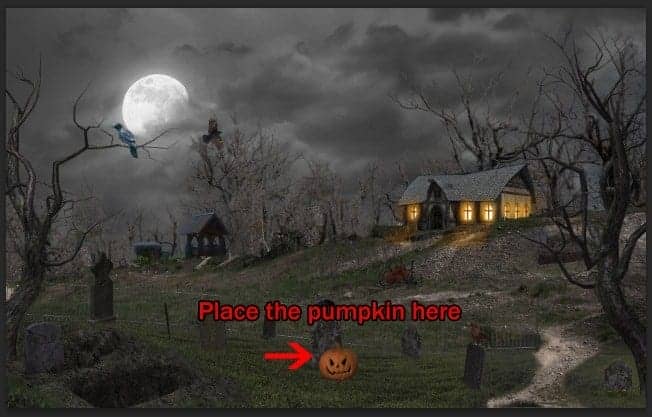
Now to the main character of this piece! Open the Pumpkin image and extract the pumpkin.
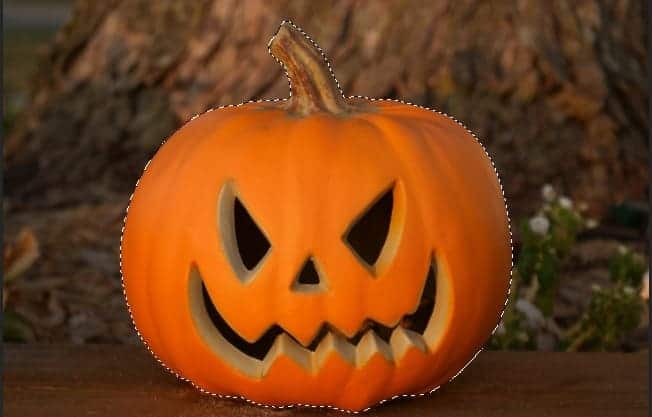
Place it into our document, near the tombstone.
Step 23
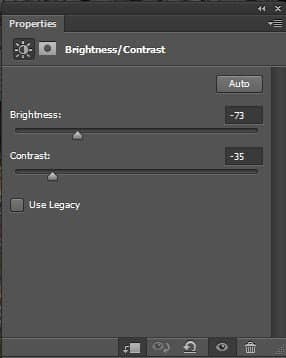
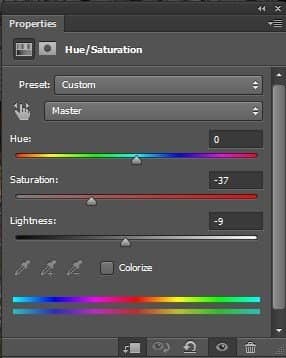
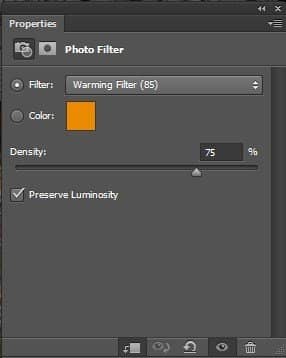
Apply the following adjustment layers for the pumpkin layer.
Step 24 - Light It Up!
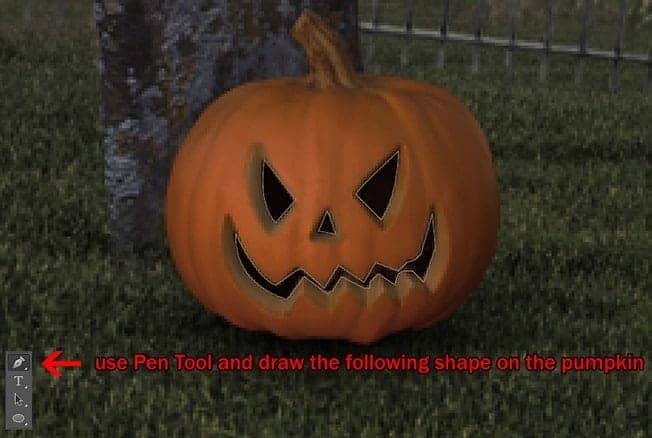
We will create a glowing light effect for the pumpkin. Create a new layer and grab the Pen Tool, draw the pumpkin's mouth, nose and eyes like this.
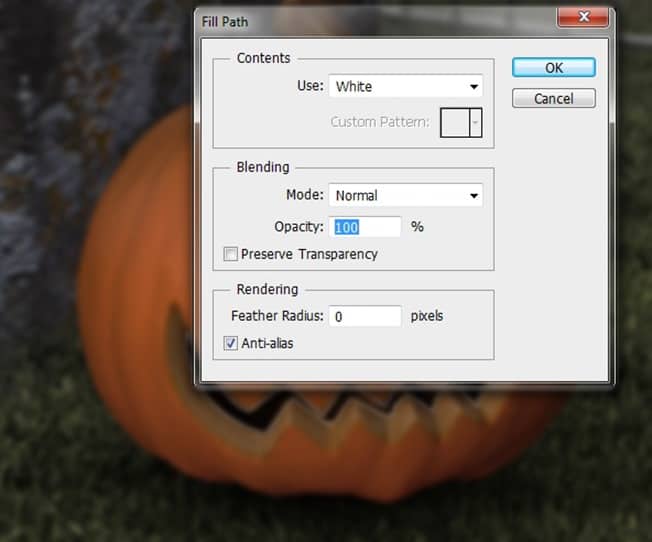
Fill the path with White color.
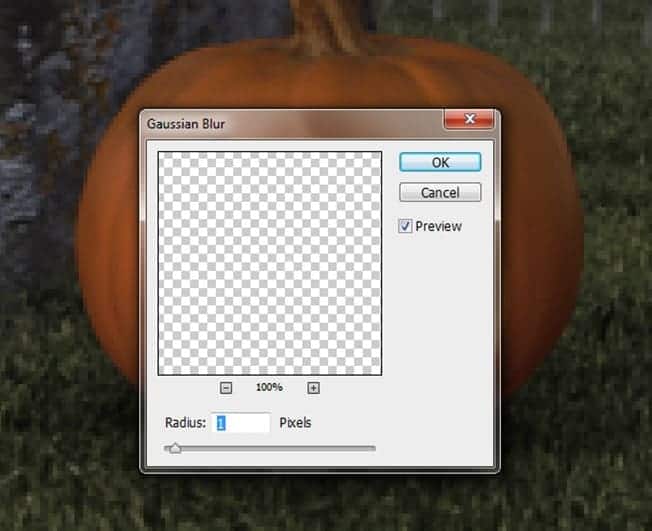
Apply Gaussian Blur.
Step 25
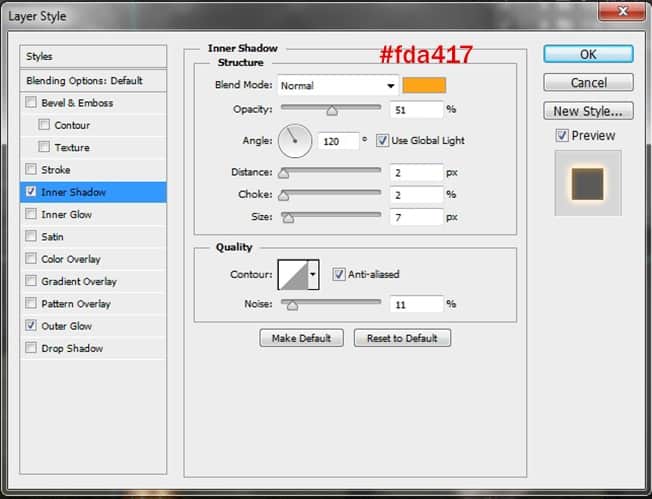
Apply these changes to the layer's Blending Option.
Outer Glow
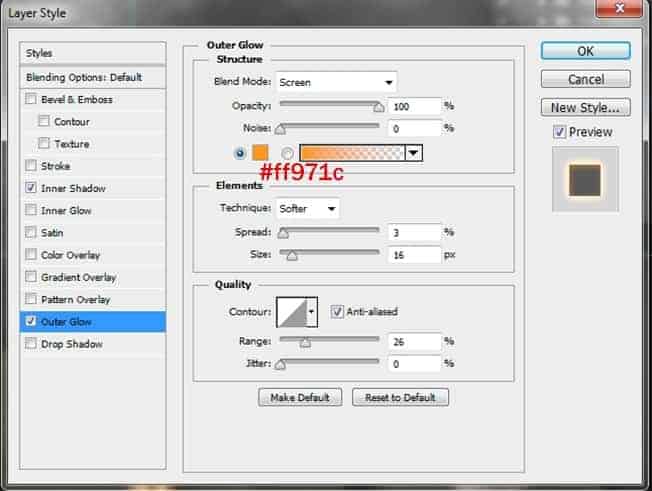
Inner Shadow
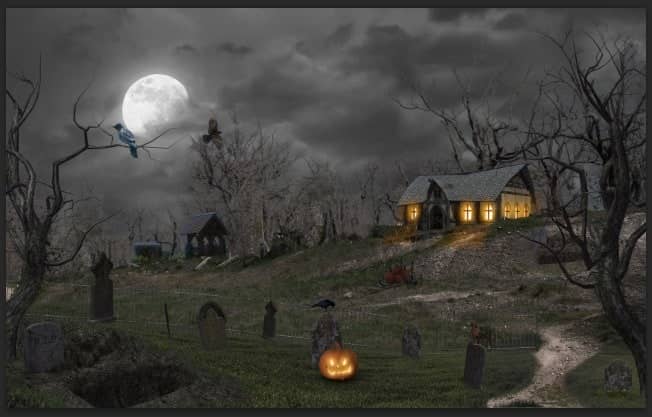
And here's the result : a scary glowing pumpkin!
Step 26
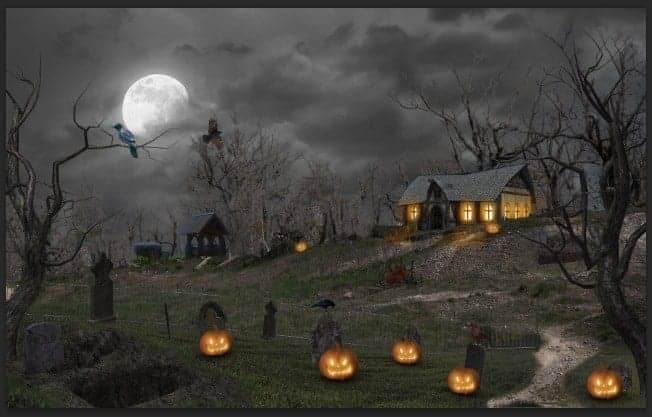
Duplicate a few more pumpkins and place them around, resize and transform them to fit with the positions.
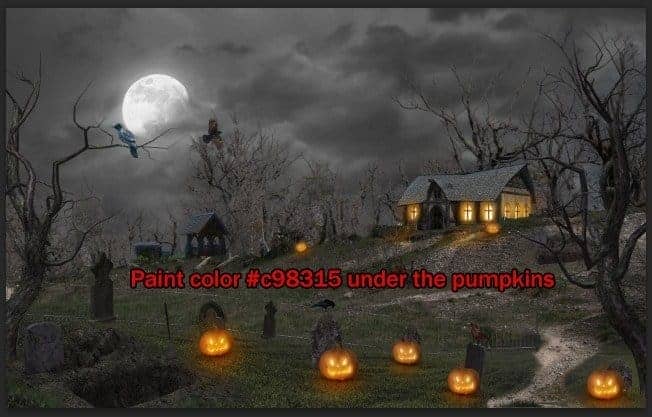
Create a new layer and use a Soft Brush with color #c98315 and paint under the pumpkins. Change the Blend Mode to Soft Light with 70% Opacity.
Step 27 - The Mist Comes.
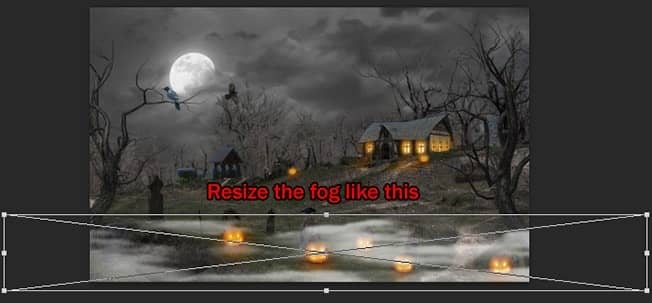
Place the Fog image into our document, resize it like below.
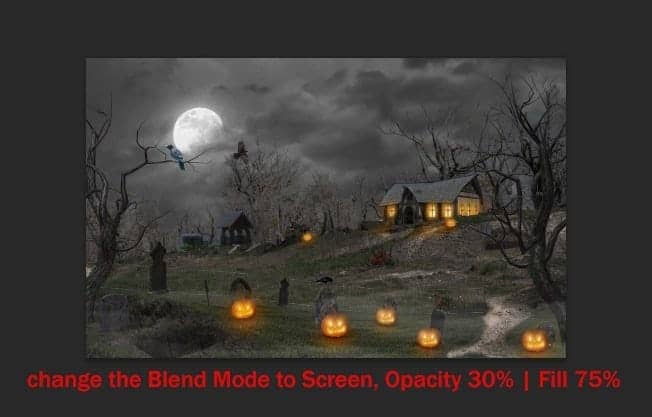
Change the Blend Mode of the fog layer to Screen with 30% Opacity, 75% Fill
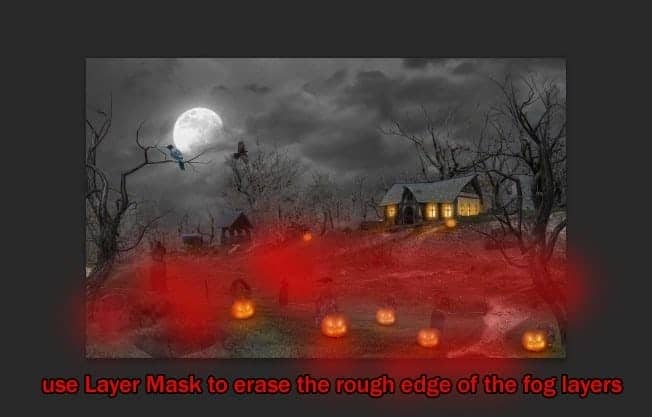
You will notice there're rough edges from the Fog layers still around, so apply Layer Mask to get rid of them.
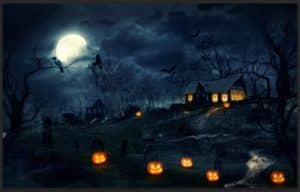
Keep adding more fog into the image, place some behind the house too.


21 comments on “Create a Halloween Photo Manipulation in Photoshop”
There are about 3 links that don't seem to work for me. I can't seem to know why for example the house. Even the link that Henk posted doesn't work for me. Very confused and worried as I have to finish a project.
Thanks for sharing such informative post its help me to know deeply Photoshop work step by step.those are very useful for me! :)
These are beautiful designs! Typography can be so powerful.
Best tutorial, great skills!!! Tanx
Lovely ANTAKA. Thnkz fr your Tutorial. It really Impressive.
mais comment entre sur le prgrame :'(
Great tutorial!! However I need some help on Step 18. I am not familiar with using the Perspective tool and I can't get it to conform to the landscape. Can you give us some tips on how to do this?
Thank You
Thank you so much Antaka.
I have reahed the stage of lighting the windows in the witch house, I make a new layer and use the pen tool to draw around the window but I cant replicate the yellow light that is supposed to be emmited. I follow the instrutction to the letter and have tried many times. I also dont have the red colour with the brush tool when applying masks. Please help :(
Hi Jules,
After you've finished drawing with pen, just right click on the draw path and choose Fill Path, you should be able to fill with drawing path with the color in the tutorial provided.
Also, the red color in the layer mask is just a sample for better visual view, its actually the black color you use when masking.
Let me know if there's anything more you want to know, contact me via my email : [email protected].
Best,
Antaka
can i have a download link to the full completed photo shop of this project i need to show my class
LOL I think I know what class you're talking about.
awesome photo manipulation
thank you for sharing!!
Where's the link to the witch house?
Hi Steve,
Sorry for the mistake, here's the link to the Witch House stock :
http://atknebula.deviantart.com/art/HOUSE-07-03-328360230
Thanks for pointing out!
Post updated. Thanks for the link!
Found the house.
For all who is searching for the house:
http://www.deviantart.com/art/HOUSE-07-03-328360230
Hey this is a cool tutorial whitch I am trying to do aswell.
But where can I find this witch house?
Thanks
It seems like you forgot to include the Witch House in the tutorial resources.
Thanks for all the great tutorials!
perfect~~