Luminar AI lets you turn your ideas into reality with powerful, intelligent AI. Download the photo editor and see how you can completely transform your photos in a few clicks.

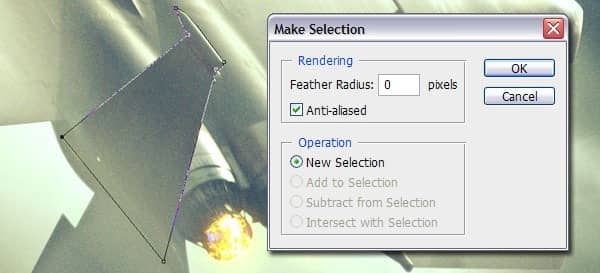
With the Layer Mask selected of the 'Vapor_trail_left_wing' layer, pick a large Soft Round brush and gently start masking away the top of the vapor trail on the top of the tail wing. Do the exact same thing for the right tail wing. The difference is subtle but noticeable.

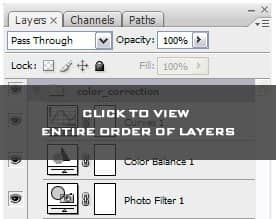
We are done for now with the F15 fighter jet so let's move on to the Russian MiG-29. For the next step you should drag the MiG-29 folder below the F-15 folder. If you have followed this tutorial step by step, your order of layers should be exactly like the image below. Click on the image to view the entire order of layers.

Step 7
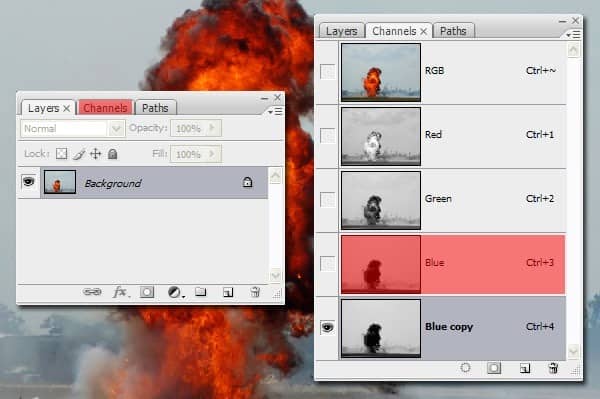
Download the 'Explosion' image and open it up in Photoshop. What we're going to do now is masking the explosion from the background. Go to Channels and select the channel with the highest contrast which in this case is the Blue channel. Right-click on the Blue channel and create a copy, make sure you are working on the copied layer otherwise the masking won't work properly!

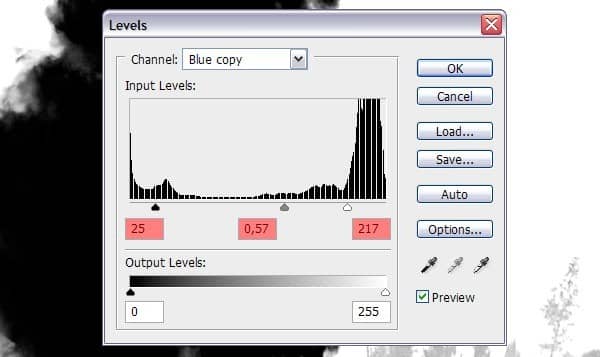
Go to Image>Adjustments>Auto Levels. By clicking on Auto Levels you can see that this helps us tremendously as we need to separate the black from the white but there is still quite a bit left to be masked. Go to Image>Adjustments>Levels and the Levels menu will pop up. Enter the settings as shown in the image below.

Paint this over with a white color in Normal Brush Mode. Now that the explosion is as good as being separated we can start working on the explosion. Grab a Soft Round brush of any size, set your foreground color to black and set the Brush Mode to Overlay. By setting the mode to Overlay we won't be able to mask away the black color but we can darken or paint away the white and grey colors. Gently start painting outwards of the explosion, the final outcome will profit from this. Make sure you switch from the RGB channel to the corresponding channels to see what's actually part of the explosion and what isn't.
To remove white or grey areas, simply switch your foreground color to white. When you're done painting on the layer mask, click on the RGB channel and head back to the Layers menu. Go to Select>Load Selection... and switch the Channel to the Blue copy Channel, make sure you check the 'Invert' box.


2 comments on “How to Create an Intense Movie Poster in Photoshop”
the links don't work :( i really want to do this tutorial :> thanks!
just great...