

Download Lightroom presets and LUTs, absolutely free. Use the presets to add creativity and style to your photos.
Step 5
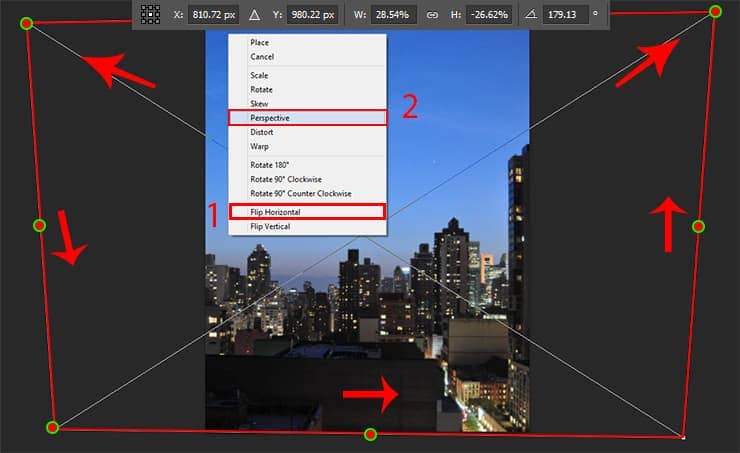
To complete the picture, I added an image to the first plan. This is our main stage. Go to File > Place.../Place Embedded and open city image. First you need a flip it. Right - click in Transform Mode > Flip Horizontal... (Ctrl/Cmd+ T or Edit > Free Transform). Then resize image to size of working field and now the most interesting - you need to align the perspective of the image that the city did not go to the left, and was flat in the frontal projection. Right click > Perspective... Use the corner points to "squeeze" the image itself and the side point, to raise or lower the slope of the image. Try not to overdo it and do as shown in the image below.
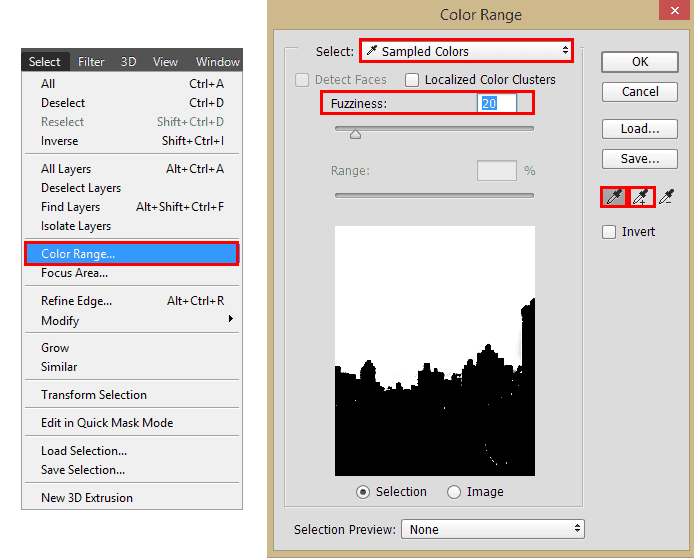
Now remove the sky. To make a selection, use Color Range... Go to Select > Color Range... and set Select: "Sampled Colors", eyedropper with "+" in this window or hold Shift and spend all the shades of the sky. Be careful not to add the color of the town. To make the selection more accurate, set Fuzziness to 20. This method is very good and at skilful use, make easier selection of objects when their background is different in color.
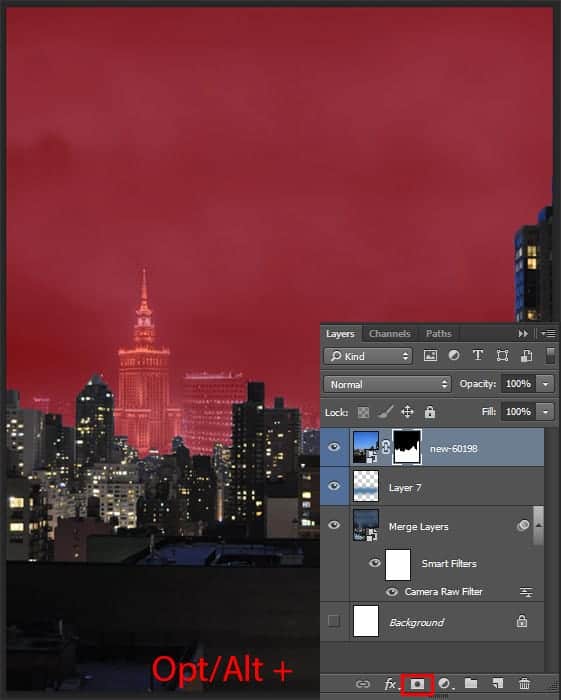
It remains only to add a layer mask. Hold Opt/Alt (to add inverse layer mask) and click on "Add a mask" icon or go to Layer > Layer Mask > Hide Selection.
Step 6
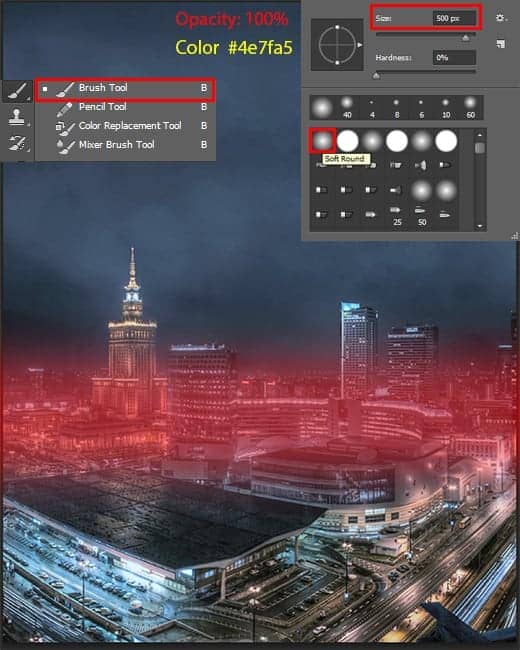
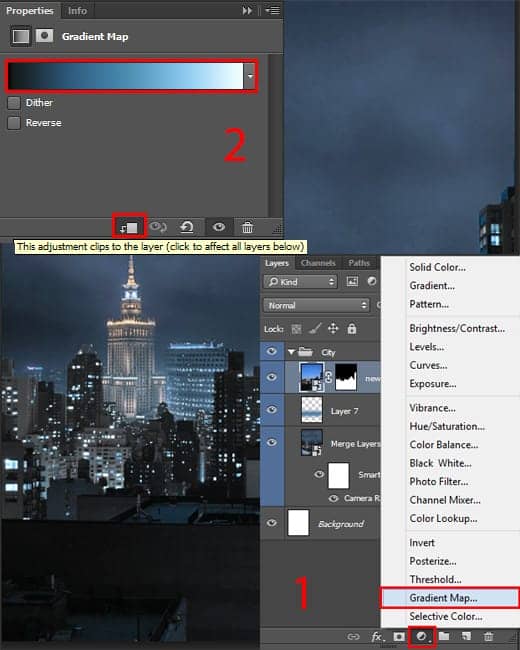
We now present the city in accordance with the general atmosphere. I convenient to use for this useful adjustment layer "Gradient Map". Go to Layer > New Adjustment layer > Gradient Map... or use "Add adjustment layer" icon on bottom of Layer panel. Right away make from this layer a clipping mask by using icon at the bottom of this window.
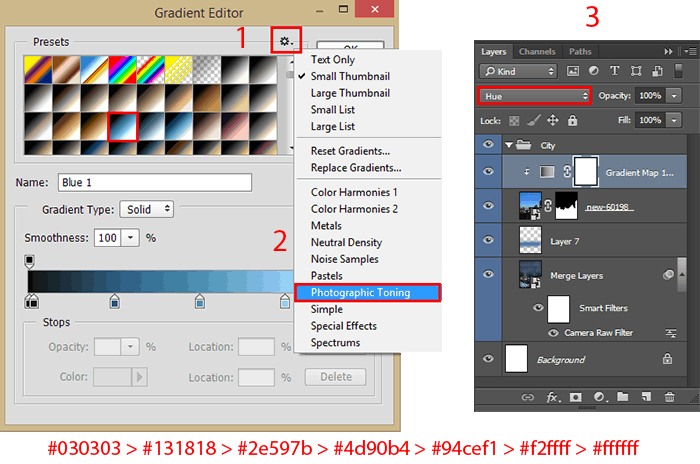
Then click on gradient to create a new gradient. At the top of the dialogue box, on the right side there is a small gear. Click on it to open additional properties. The lower list is available Photoshop default gradients. Add "Photographic Toning" and in the popup window click "Append". Use blue gradient shown below. Set Blending Mode to "Hue" to change color but leaves brightness and saturation as on original image.
Step 7
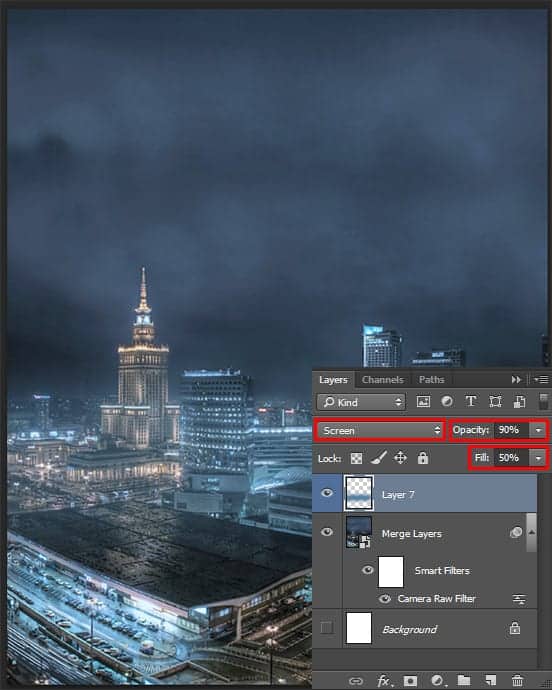
Repeat step 4 for this image to this part of the city was in the general atmosphere and did not stand out. But this time Blending Mode "Screen", Opacity: 25, Fill: 65.

Step 8
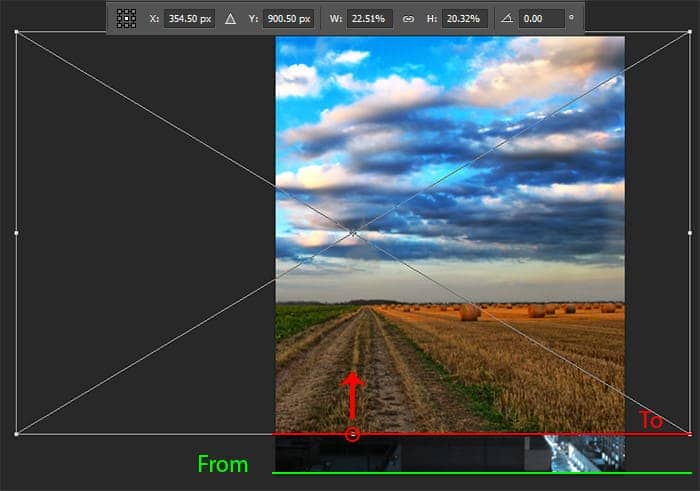
What could be the poster without fanning and tense atmosphere (in the example of this picture)? The sky is very well managed and complements the mood and story of the picture (because we plan that we want to get). Place image of sky and resize it to the size of the working field. But do not rush to apply the changes. Take the midpoint of the bottom and move up it a bit. This will change the perspective of clouds that will help harmoniously and correctly place them in the sky in accordance with the city.
Step 9
Use any portion of the sky, but I liked the right part. It is intense and harmonious. The remaining parts a much overload the picture or not expanding it. Before proceeding further, I removed the noise from the photo that it does not spoil the final result. Go to Filter > Noise > Noise Reduction... In window that appear set Strength to 10, Preserve Details to : 10%, Reduce Color Noise to 10% and check box on "Remove JPEG Artifact". This will be enough to get rid of the noise and preserve details. If you want to achieve good results you have to take care of every detail and be careful.
27 comments on “Create This Magnificent Sniper Artwork in Photoshop”
Great tutorial but the skyscraper link goes to a search result rather than the image used in this tutorial
Anton, you should download some of her PSD files so you can see what's she's doing. It'll help you learn PS faster.
Yea thanks. I'm gonna definitely check this out
Great Tutorial. Ive been working on my weaknesses, and photo manipulation is one of them. I never even used some of the adjustment techniques in this, so that was a real eye opener. Camera Raw was really cool. Very powerful.
Thank you very much for this tutoria! I gave it a try and submited it here: http://dilarosa.deviantart.com/art/Meanwhile-in-the-rain-589781746 with due credit :D
I couldn't find the skyscraper image from the link provided
WOW. These comments are amazing. Did anyone even do the tutorial? How about the part with the first step where you have to download the skyscraper image, and how it's not actually available in the link provided.... ? Do we just try with another image that looks kinda similar? Is this tutorial meant to be a "rough guide" ?
I'm looking forward to trying this exercise out with some of my students.
This kind of work is common, there are several works in this style.
It would be very interesting if the owner of the website to publish creative tutorials.
For goodness sake why a gun? Such barbarity and not anything to celebrate or glorify. Go take a picture of something less banal and more inspirational.
This is simply wonderful composite work...just one correction she's not a Sniper as she's carrying a customized M4 Assault Rifle with Reflex sight & Sound Suppressor attachment..
Mahmoud Ibrahim ElKasrawy, And what's the similar here - rain?
Long Ago, i made a project that is similar to this.
You can view all the process in the photo Album + the photo description
https://www.facebook.com/elkasrawy.ph/photos/a.673942746020840.1073741860.521393071275809/673943752687406/?type=3&theater
And what's the similar here - rain?
maybe the model :) .
Oops! By the way here is a small list of artworks that were long time ago previous to your artwork and they are very similar to your. http://nenoc2.deviantart.com/art/Demonia-Web-387514487?ga_submit_new=10%253A1374561982%29
http://trehote.deviantart.com/art/Wall-test-001-377658984
http://julez88.deviantart.com/art/Never-Alone-382434639
http://kaderart.deviantart.com/art/LA-VENGEANCE-DE-KAYLA-422798633
http://child-of-minerva.deviantart.com/art/Raven-that-s-the-fourth-wall-don-t-touch-that-423379938
Maybe because they used the same stock which is a model on deviantArt :) .
and she allows others to use her photos.
Then, what is similar in these photos. http://phelandavion.deviantart.com/art/Olesia-Anderson-STOCK-III-515126408
http://kayladavion.deviantart.com/art/Katana-Stock-4-376959103
Kayla Davion is one, but the characters are different.
I don't get why you are panicking :)
When a man rolls up to a lie, he loses his face. I panic because there are no more men.
No, you are showing 2 things by that attitude.
- you Need to grow up
- you have no self confidence :)
There is nothing in the world says to attack others work in order to maintain yours. :)
Although if you just focused alittle. if i say that i did something similar , it would mean that i like yours.
but as i said. you just need to mentally grow up (Y)
Cheers.