Download Lightroom presets and LUTs, absolutely free. Use the presets to add creativity and style to your photos.
Step 30
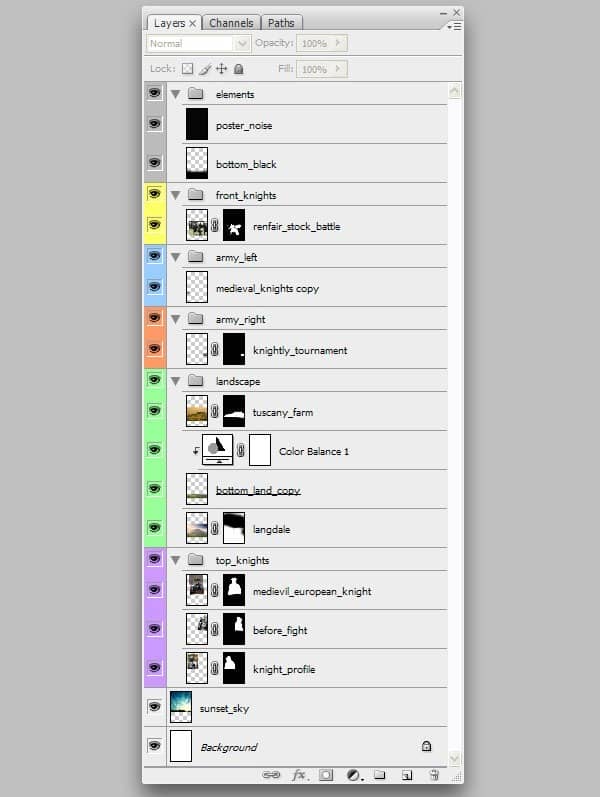
Select the Medieval European Knight layer and add a Curves Adjustment layer so that it's on top of all the main knights. Try to simulate the settings below for each channel.
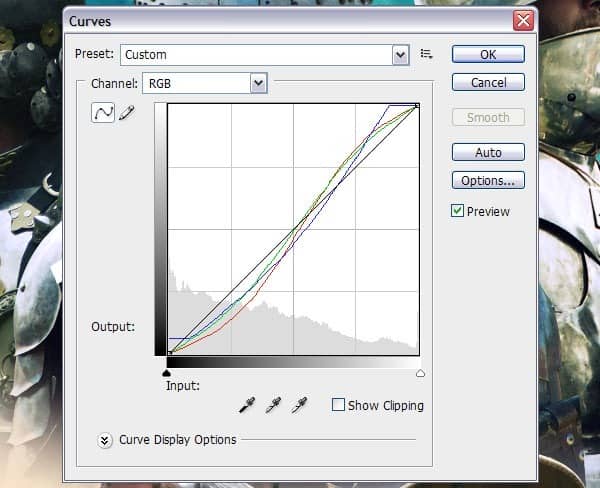
By putting this Adjustments layer on top of the main knights, it will only affect the sky background and the knights.
Step 31
Create a Hue/Saturation Adjustment layer and put it on top of the European knight, right-click and select Create Clipping Mask. Enter the following settings, go inside every Channel and set the Saturation level of the Green, Cyan and Magentas to -100. The saturation in theBlue Channel should be set to -45, the Red and Yellow Channels should be left untouched. This will give the knight a grey-ish look which will be different when we add our final Curves Adjustment layer.
Step 32
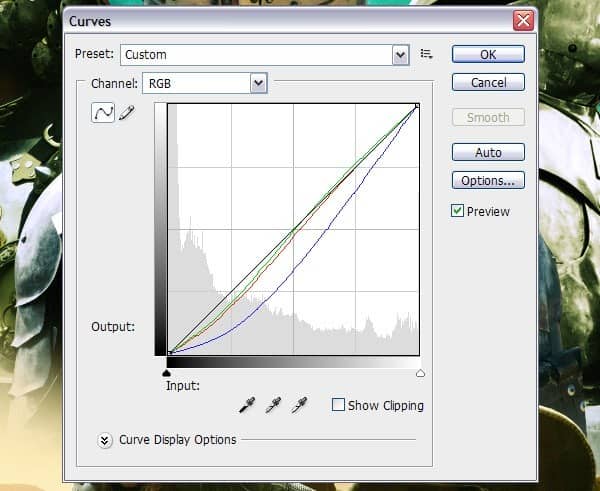
It's very important to create a mood to base your color correction on, so create a new Curves Adjustments layer and put this on top of all the layers. We have our European knight as a reference, so simply try to create your own color scheme which you think looks best. These are my settings:
Step 33
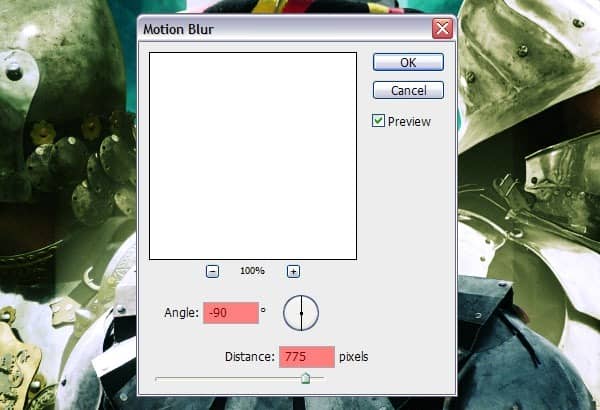
Back to the European knight. To make the top knights really pop, we're going to create an almost majestic type of glow around them. Create a copy of the European knight, name it Majestic_glow and make it all white by using Hue/Saturation and set the Lightness to +100. Go toFilter>Blur>Motion Blur, set the Angle to -90 Degrees and set the Distance to 775 pixels. Make a copy of this layer and you will notice it becomes much brighter.
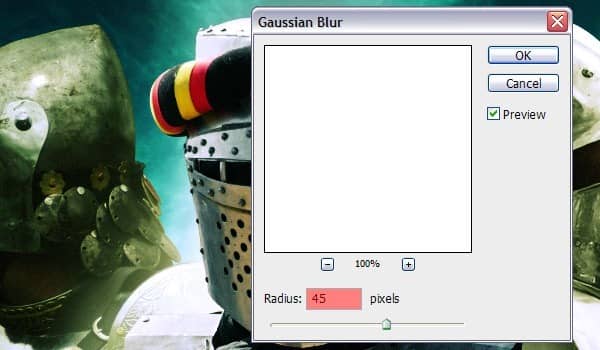
Go to Filter>Blur>Gaussian Blur and set the Radius to 45 pixels, this will soften the harsh streaks of the motion blur a bit.
Step 34
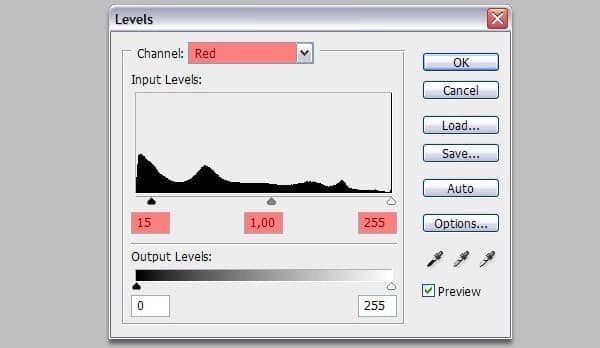
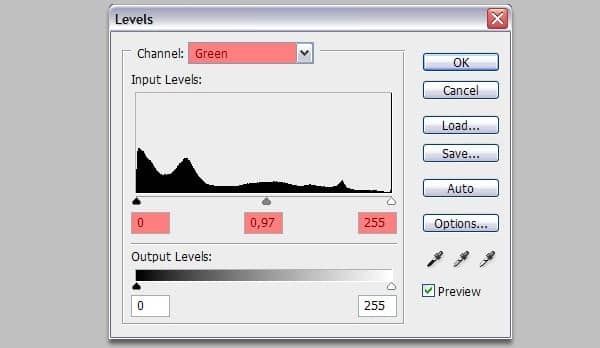
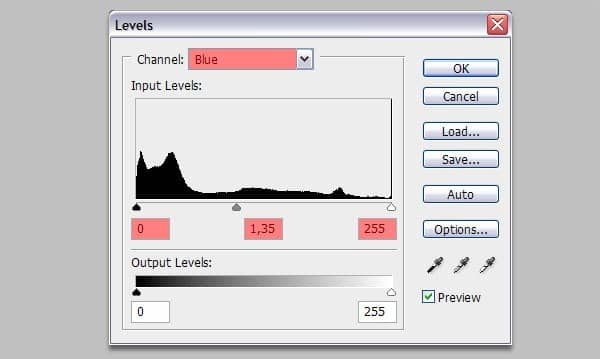
Create a new Levels Adjustment layer and enter the following settings in the appropriate channels. This Adjustment layer should be made into a Clipping Mask on top of the Hue/Saturation Adjustment layer we have made earlier for the European knight.
Step 35
We're going to give our knight a bit of shine as we want the majestic glow to sort of engulf him in light. Add a new Brightness/Contrast Adjustment layer and but this on top of the Adjustment layers we've already made. By default, a new Adjustment layer will have a white window but for this effect to work properly, simply fill the canvas with white while the mask is selected. Grab a Round brush and set the Brush Opacity to 20% and set your foreground color to white. Vary between brush sizes and brush over the area as many times you think is necessary. You should brush over the area shown in red below.


3 comments on “How to Create a Medieval Movie Poster in Photoshop”
could you plz make the psd available again
Link has been fixed. Thanks!
thanks Blog