
In this tutorial I’ll show you how to create a fantasy scene featuring a little girl riding a snail. You’ll learn how to combine different stock photos and textures using a range of photo manipulation techniques. You’ll learn also how to work with group, enhance lighting, create depth of field and more.
We’ll start this tutorial by adding a blurry background and cleaning it using some basic Photoshop tools. Then we’ll add a snail and make its grassy shell using a meadow image. Later we’ll add a child, flowers, butterflies, grass blades and blend them using adjustment layers, masking and brush. After that we’ll use a light and bokeh texture to enhance the atmosphere. Finally we’ll use some adjustment layers to finish this tutorial. I recommend you to use Photoshop CS5 or newer to follow this tutorial properly.
Tutorial Resources
Step 1
Create a new document in Photoshop with the given settings:

Step 2
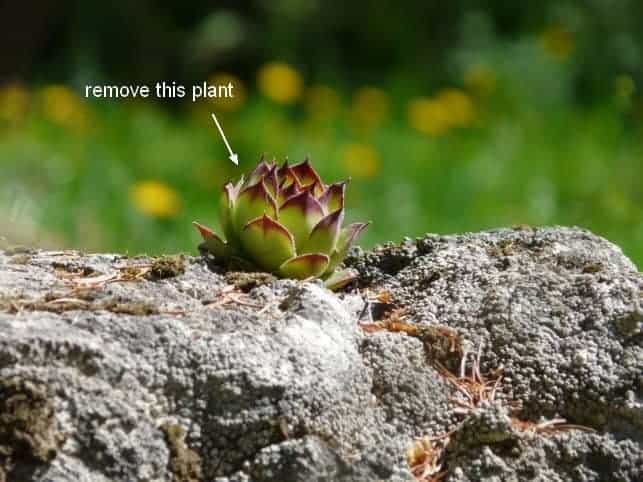
Open the background image. We need to remove the plant on the rock so I made a new layer and actived the Clone Tool (S). Use this tool to clone over the plant:

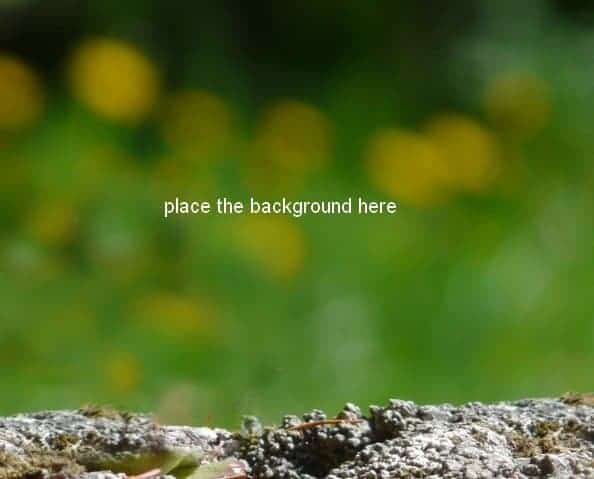
Press Cmd/Ctrl+Option/Alt+Shift+E to merge the background and clone layers into a new one. Drag the merged layer into our white canvas using the Move Tool (V):
Step 3
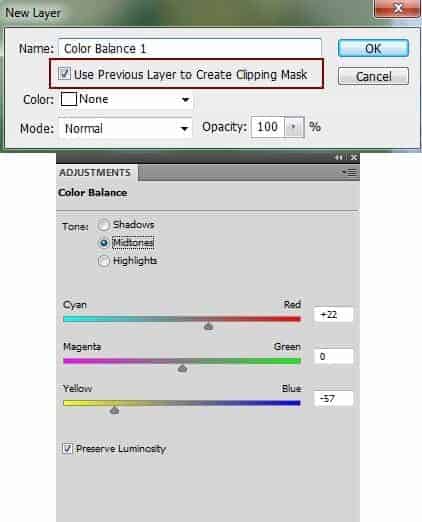
I used an adjustment layer with Clipping Mask to change the background color. Go to Layer > New Adjustment Layer > Color Balance:

Step 4
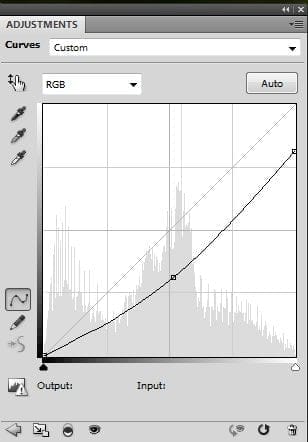
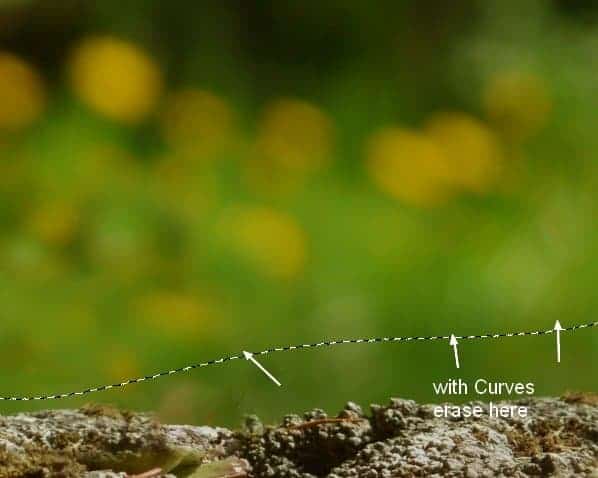
I used a Curves adjustment layer to darken the background:
On this Curves layer mask, active the Brush Tool (B). Use a basic, soft brush with black color to erase the bokeh part to leave the dark effect only visible on the rock:
Step 5
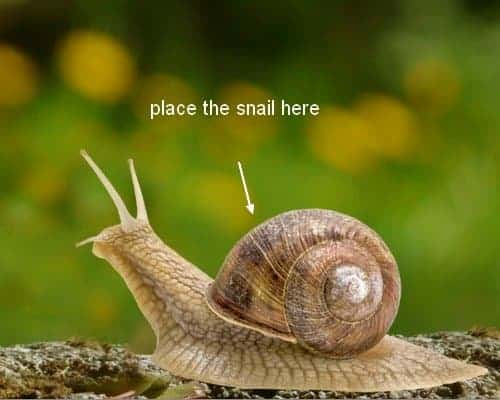
Add the snail image to our main document and remove its white background using a layer mask:
Step 6
Make a new layer under the snail one and use a soft black brush with the opacity about 40% to paint his shadow under the body:

Call this layer “shadow 1”.
I aim to make the light source from the left and above of the snail so he should have a shadow behind. To do it make a new layer under the shadow 1 one. Hold down the Cmd/Ctrl and click the mask thumbnail of the snail layer to load its selection:
12 responses to “Create a Surreal Snail with a Grassy Shell in Photoshop”
-

Photoshop is the toll where things can create how the mind actually want. this tutorial is really awesome, and images are very helpful to do practice to make it. Very detail and very creative really helpful for me. Really thanks man
-
I love this! What a cool fantasy design you put together. I think any young child would love to get lost just staring into it.
-
It’s fantastic! you are the master of photoshop and also a hard worker.
-
Amazing…??
-
NICE! i REALLY WANT TO LEARN A LOT ON Adobe Photoshop… looking forward that this page may help me to improve my photoshop experience especially in photo editing..
-
nice
-
Thank you very much! I love these tutorials with a poetic look! Do you have any others of the same kind?
Excuse me if there are any mistakes. I’m French-speaking.
-
Very lovely lesson.Thanks
-
I do this lesson with pleasure. Thanks for fantastic lesson
-
Đẹp lắm bạn ^^
-
This tutorial is fantastic, Jenny! I am doing this today. Need an escape, anyway, so, why not delve into a fantasy? Thank you so much for your tuts!!
Su -
Eonjena Caster
Leave a Reply