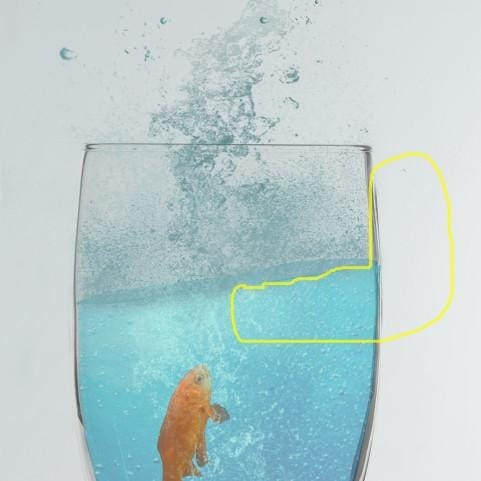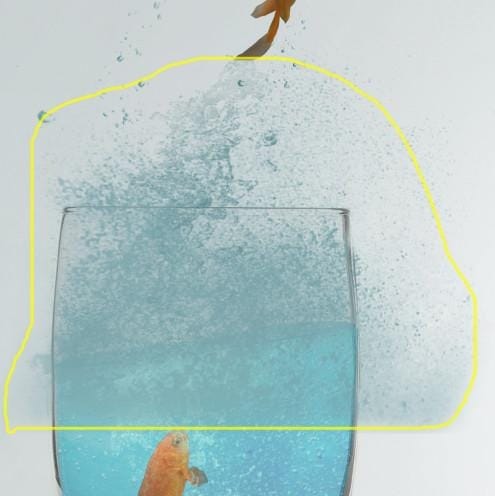
Finally, for our last splash, let’s create a new layer and then name it to Splash 9. For our brush, we would be using the same brush and the same color tone that we used on Splash 7 and 8. This time we would be altering the Brush size. Use the following settings for Splash 9.
- Brush size – 1100 px
- Hardness – Default hardness of the selected brush
- Opacity – 100%
- Flow – 100%
Apply the brush on the highlighted region shown on the image below:

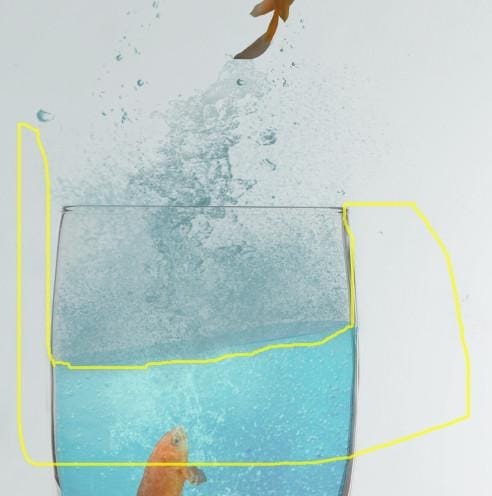
And finally, let’s activate the Eraser tool and use the following values:
- Brush size – 175 px
- Hardness – 0%
- Opacity – 100%
- Flow – 100%
Use the Eraser tool on the highlighted area shown on the image below:

After that, reduce Splash 9’s opacity to 50%. Before we proceed to the next Step, group all the splashes that we have created and name that group to splashes.
Step 6 – Add the hand
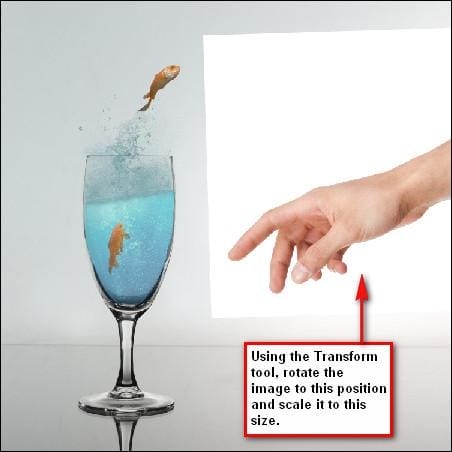
In this Step, we would be adding the hand and its reflection on the surface of the table. So let’s open Hand 014 and move it using the Move tool (V) to the canvas. Yes you read that right just move it directly without deleting the background. Once on the canvas, rename it to hand 1. Remember to put this directly above all the layers that we have created.
Once transferred, activate the Transform tool (Ctrl/Cmd + T) and then rotate the image and then after rotating scale the image. See image below –

After that, activate the Magic Wand tool (W), once activated, the mouse pointer would change to a wand. Left-click on the white spaces surrounding the hand and automatically, the white space would be selected. Hit DELETE to remove this white space.
Now let’s increase the hand’s saturation since its color looks dull. Click on the hand 1 layer and then press Ctrl/Cmd + U to activate the Hue/Saturation adjustment layer for this specific layer. Once the box opens, use the following values:
- Edits – Master
- Hue – 0
- Saturation – +15
- Lightness – 0
Now, we would need to darken some parts of the hand and in order for that to happen, duplicate hand 1 by pressing Ctrl/Cmd + J and when the duplicate appears change the blending mode and opacity to:
- Blending mode – Multiply
- Opacity – 30%
Let’s create the reflection, click on hand 1, duplicate it and then activate the transform tool (Ctrl/Cmd + T); right click on the image to bring up the menu and when the menu opens, click on Flip Vertical.
One response to “How to Make a Fish Jump Out of Water”
-
Great Tutorial thx :D


Leave a Reply