Duplicate that tack again and rename it to “giant tack 3”, and then activate the transform tool and click on Flip Horizontal from the contextual menu, and then this time reduce its opacity to 50%.

When you’re finished, group the layers that we created in this step and rename that group to “giant tacks”.
Step 4 – Give the image a retouch
In this step we would be retouching our whole image to give it a more picturesque output. So let’s start by creating a Solid Color adjustment layer from the Create New Fill layer/Adjustment layer button.

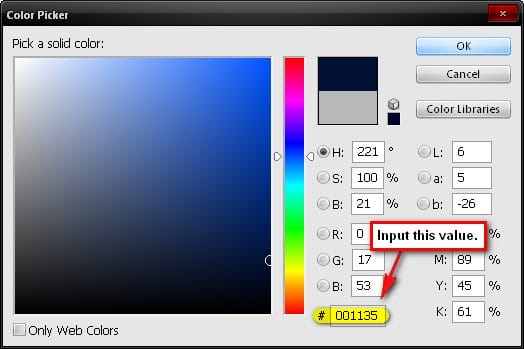
When the box opens, input the following value:
- #: 001135

Now the canvas is filled with a dark blue color, to apply that color to the image, change its Blending mode to Exclusion and change its Opacity to 40%.

Then let’s create another Solid Color, but this time input the value below:
- #: 695231
Change its Blending mode Soft Light and its Opacity to 25%. Let’s create another Solid Color and input the following value:
- #: cf9541
The Blending mode should be set to Soft Light and the Opacity to 15%. The image should be similar to this at present:

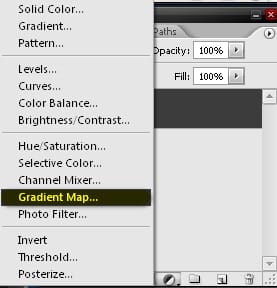
Next, let’s add a Gradient Map adjustment layer from the Create New Fill layer/Adjustment layer button.

When the Gradient Map box opens, pick the Black and white gradient; see image below:

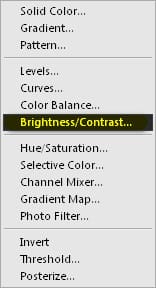
After that, change its Blending mode to Luminosity and its Opacity to 70%. Next, let’s create a Brightness/Contrast adjustment layer.

Input the following values on their respective boxes:
- Brightness: 7
- Contrast: 0
end}
Next, let’s saturate or increase the color of our image to liven it up. Create a Hue/Saturation adjustment layer from the Create New Fill layer/Adjustment layer button.

Input the following settings when the Hue/Saturation box opens:
- Edit: Master
- Hue: 0
- Saturation: +13
- Lightness: 0
Before we proceed to the next steps, it is recommended to save your image first as a PSD file so you may reload the image again if you see the need to edit some areas.

Step 5 – Soften the contrast of the image
What we are going to do here is that we would be softening the contrast of the image to make it look a bit dreamy. Before we move on, make sure you have saved the file as a PSD. Now we will be flattening the layers, to do that, right-click on any layer to bring up its menu and click on Flatten Image.
One response to “Google Map Parody Photo Manipulation”
-
invalid link for the photo resources


Leave a Reply