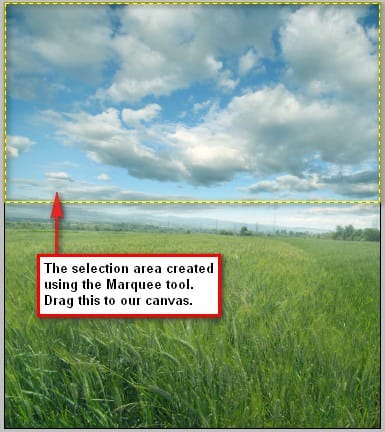
Now the sky from Sunny Field is on our canvas, let’s transform it to the perspective of the “ground” layer. Activate the Transform tool (Ctrl/Cmd + T) and follow the instructions on the image below:

The saturation of the “sky” layer is just a bit too strong; we would need to lessen that. To achieve a lower saturation level, click on the “sky” layer and then press Ctrl/Cmd + U to activate the Hue/Saturation adjustment layer. When the box opens, use the following values:
- Edits: Master
- Hue: 0
- Saturation: -21
- Lightness: 0
Next, we will reduce the opacity of the “sky” layer since it is making the whole image look unreal. On the Layer window, reduce the Opacity to 80%.
When you’re done with that, we will now be erasing the area of the sky to create a horizon. Activate the Eraser tool (E) and use the following settings:
- Brush size: 500 px
- Hardness: 0%
- Opacity: 50%
- Flow: 100%
To reduce the Hardness of the brush, you simply right click on the image while the Eraser tool is activated (this also applies to the Brush tool) and then you would see the Hardness box and from there you can now change the Hardness of the brush.


Now that we’re done, let’s group these layers and rename the group to “background”. To create a Group, simply click on the Folder icon just beside the Create New Fill layer/Adjustment layer button on the Layer window and click on all the layers that we have created and drag them to the created Group.
Step 3 – Create the giant tacks
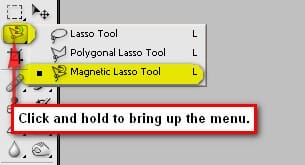
In this step we would be creating the giant pins, so to start, let’s open Earth pin 025. We would need to take that pin away from its background. To do that, let’s activate our Magnetic Lasso tool (L).

Now that it’s activated, left-click on any point on the tack and drag to form a selection area around it until you reach the point where you have started.

When you’re finished with that, let us now transfer that to our canvas using the Move tool (V).

Once it is on our canvas rename this layer to “giant tack”, and then activate the Transform tool (Ctrl/Cmd + T) to rotate our image. See image below:

The color of this tack is a bit unpleasant so we would need to give it a retouch to change its awful hue. Activate the Magnetic Lasso tool (L) and then drag a selection area around the green plastic that holds the tack.
One response to “Google Map Parody Photo Manipulation”
-
invalid link for the photo resources


Leave a Reply