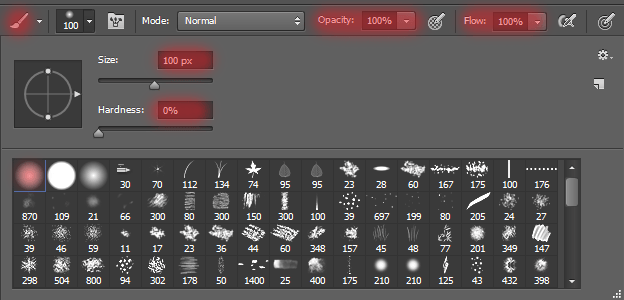
Step 6
On the layer mask partially remove the image. Carefully work through the background that was not prominent features. make it smooth. To help, here so I did. First – this is where I remove, it is the second kind of mask layer.
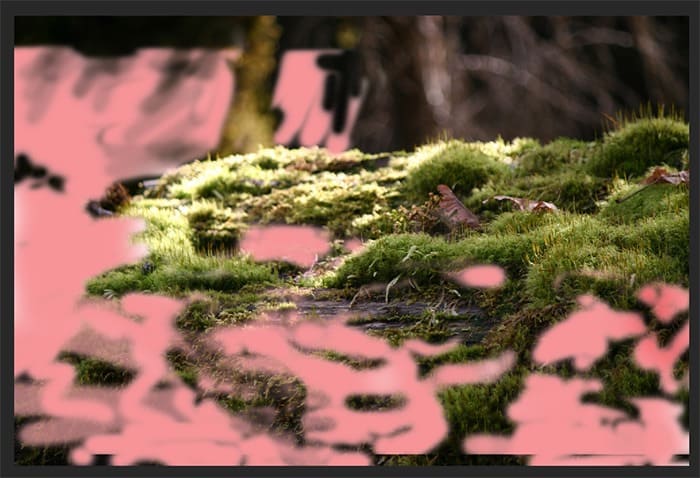

Step 7
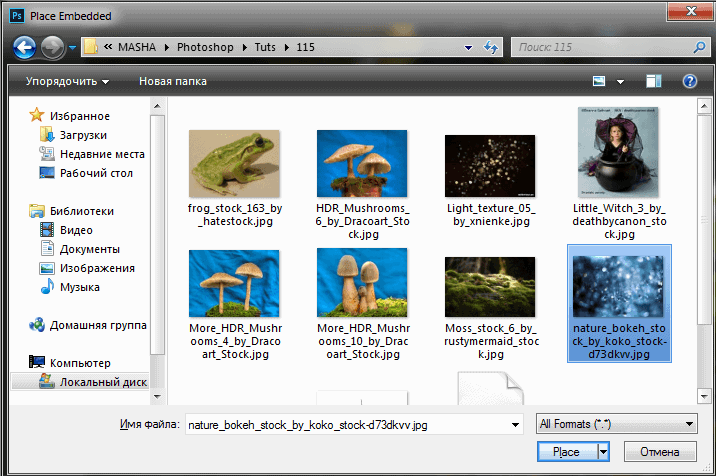
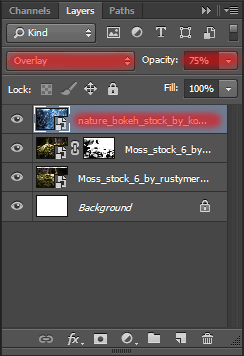
Add texture to convert background. Go to File > Place and select the image “nature_bokeh_stock_by_koko_stock-d73dkvv”.
Transform the texture on all working fields.
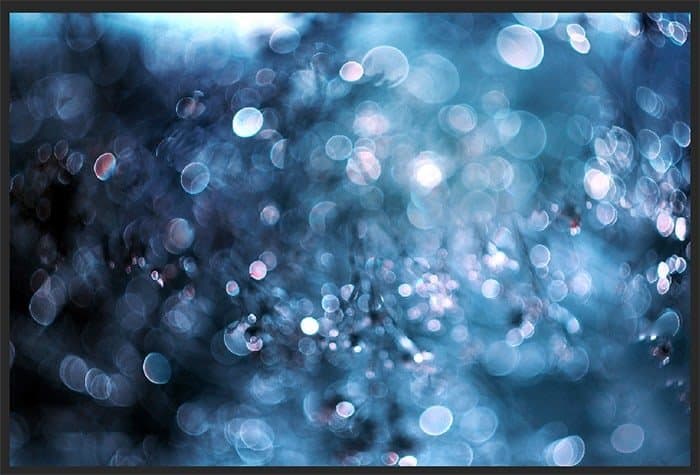
Change the values Opacity to 75%, Blending Mode to Overlay. A similar result can be achieved and adjustment layers, but will not look so impressive and fast. Sometimes I like such surprises. Should pay attention to them!
Step 8
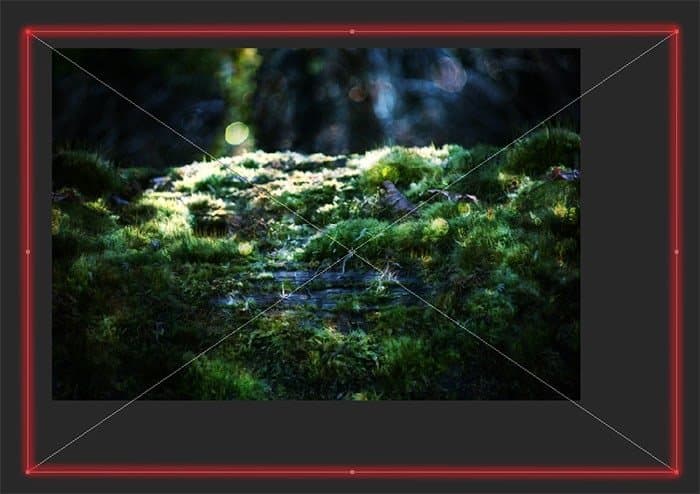
Duplicate this layer (the short key Cmd /Ctrl+ J or go to Layer> Duplicate Layer…). Increase the size and place this layer as shown in Figure. Use the Free Transform tool (Cmd /Ctrl+ T or go to Edit > Transform > Scale). This is in order to make the texture is not the same type.
Step 9
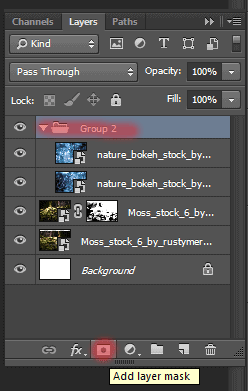
Now merge the layers with texture to the one group, and add to it mask.
Step 10
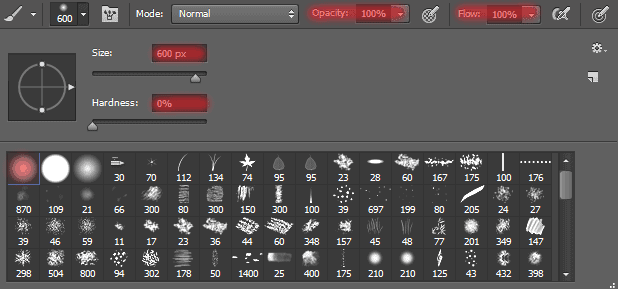
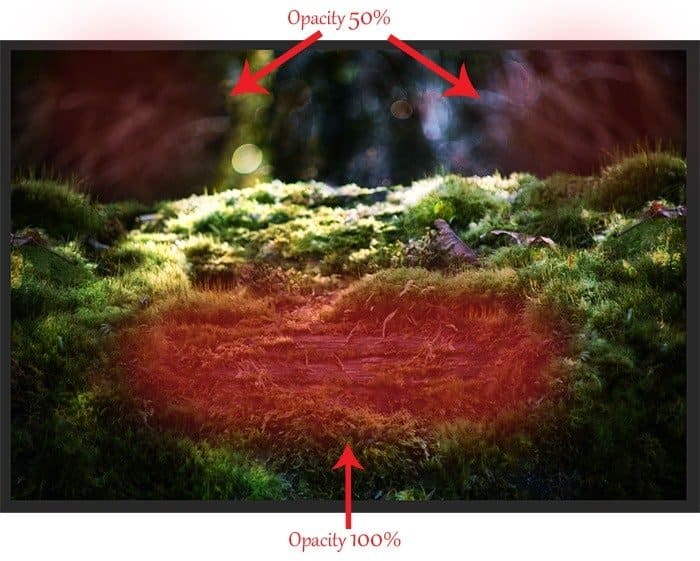
Select the Brush Tool (B) with there settings: Size: 600px, Hardness: 0%, Opacity: 100% – 50%, flow: 100%.
Remove some of the texture from the center (where the girl is sitting, a tree and a little close). Remove the texture on the corners of the image by changing the brush opacity to 50%,
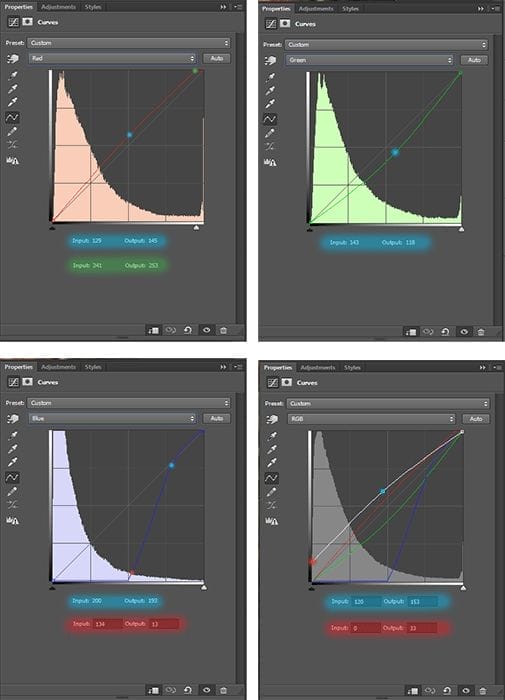
Add to the bottom layer with the texture adjustment layer Curves (Layer > New Adjustment Layer > Curves… or click on icon New Adjustment Layer and in list, select Curves…).

Set points for each channel, as shown in Figure.
Step 11
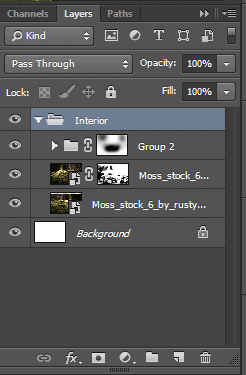
Merge all layers with the background and the group with the texture in the one group “Interior” (Select the desired layers + Cmd/Ctrl + G). In the future we will return to it.
Step 12
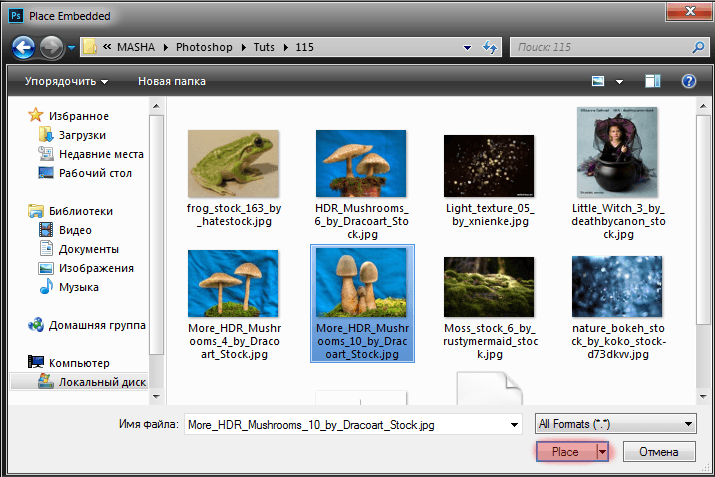
Now add the mushrooms! All we have 3 types of of mushrooms, we do the rest :). Let’s start with outer of mushrooms. Go to File > Place and select the image “More_HDR_Mushrooms_10_by_Dracoart_Stock”.
Step 13
Reduce, rotate them and place as shown in Figure. I chose a place for them in a small clearing moss, so as to create the impression of the incident light from the general atmosphere
23 responses to “Turn Baby Photo into a Fairy Tale “Queen of Fungi” Composite”
-
did phone until I got to the star brush tutorial – that was it, the instructions were not in line with photoshop at all
-
Great tutorial!
-
Thank you for all your hard work and the wisdom you shared.
-
Thank you for all you hard work and the wisdom you shared :)
-
Why isn’t this tut visible? Post is two days ago but the comments dates are from 2014?
-
laborious lesson.It takes many time and a lot of effort to achieve a good result. Thanks for lesson
-
wove
-
Nice technique. Really useful…thanks for the post…
-
I like the idea of this tutorial, it’s very creative and the result looks great
-
Very creative and professional design.
-
Thank you very much! I do it.
-
спасибо за красивые уроки!!!!!!!!!!!!
-
Спасибо большое! Так приятно знать, что они понравились и ,надеюсь, полезны. Уже прочитали их? :) Скоро будут новые уроки! Если у вас будут вопросы, то пишите мне и я с радостью помогу вам.
-
-
Thank you for sharing this great tutorial well explained and I liked perform:
http://cartes-mireilled.eklablog.com/photomontage-magique-reine-des-champignons-a108935666-
Thank you very much! I am very pleased! I tried :) I really appreciate it! :D Unfortunately your link does not open. I would be happy to look your work!
-
-
Nice job
-
Thank you very much! I really appreciate it! :D
-
-
Really Nice.Thanks to share this Tutorial.
-
Thank you very much! I really appreciate it!
-
-
очень красивый урок!!!!!!!!
-
Спасибо большое! Мне очень приятно!:)
-
-
nice
-
Thank you very much!
-


Leave a Reply