Make your artwork look like they're from an alternate universe. These Cyberpunk presets work with Photoshop (via the Camera Raw filter) and Lightroom. Download all 788 presets for 90% off.
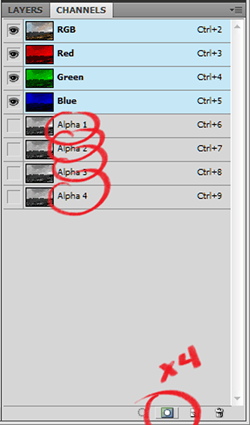
Step 20 - Channels Light Masks, Advanced
With the selection still loaded, select Channel Alpha 2 and press Backspace once. Select Channel Alpha 3 and press Backspace twice then select Channel Alpha 4 and press Backspace 3 times. When you are done, your created Alpha channels should look like this, every next one a little bit lighter that the previous one.
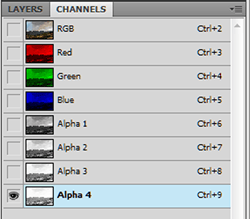
Step 21 - Channels Light Masks, Advanced
We now want to open 4 Levels adjustments with each separate Alpha channel as it's mask. First Select the Channel Alpha 1, click on Load Channel as Selection and then on the Layers Tab, open a Levels Adjustment named Levels 1. Repeat this for channel Alpha 2, to Levels 2 and so on, until you have 4 Levels Adjustments in your layers tab all masked accordingly to your 4 Alpha channels. When you are done, you may delete all the channels you have created but not the Layer 4 mask channel. Your Layers tab should look like this.
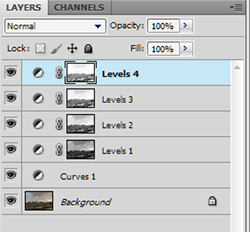
Step 22 - Channels Light Masks, Advanced
By only looking at the highlights of the image, in this case the clouds, I brought the adjustments of those layers to a point were the clouds would show all of their detail. The values given are:
Levels 1 - 90 Black, 0.72 Grey, 227 White
Levels 2 - 40 Black, 0.87 Grey, 255 White
Levels 3 - 12 Black, 0.96 Grey, 244 White
Levels 4 - 8 Black, 1.09 Grey, 255 White
This was achieved by were I felt the clouds to work best and I overdid it a little bit to show the vast difference of those adjustments in the clouds. Here is the picture after those adjustments. The result is that all the clouds are perfect, like in a drawing, but all ground highlights actually got ruined.
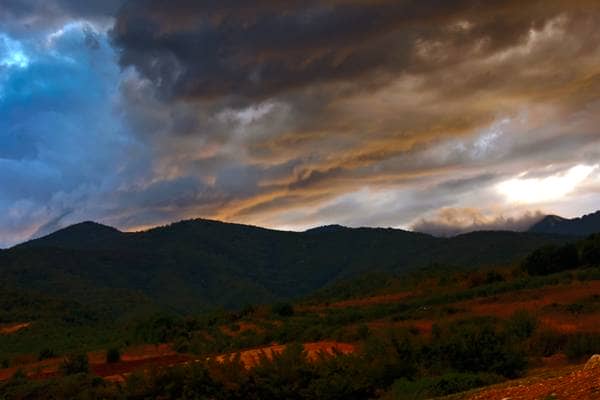
Step 23 - Mask Out the Channels Light Masks effect on Dark Areas
Click ctrl+alt+shift+E (PC) cmd+alt+shift+E (Mac) and merge all work done until now in a new layer. Create a mask for this new Layer and hide all level adjustments.
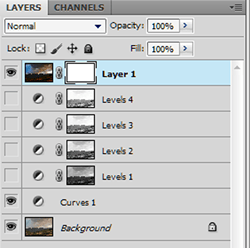
Step 24 - Channels Light Masks - Finished
By either using the Gradient all the Brush tool, dark the bottom area of the mask. I used a Gradient tool, since it won't hurt having a little bit darker highlights in the middle. We only really needed to fix the orange ground areas.
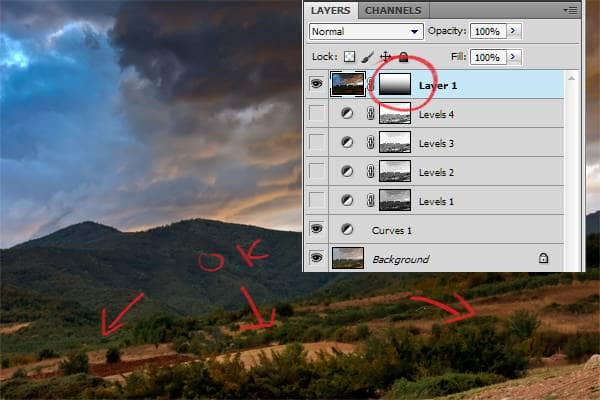
Step 25 - Review
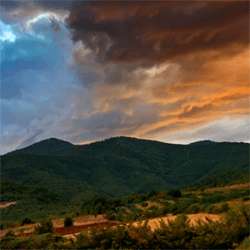
Nadaaa! No we are not done yet. But let's review all the steps done until now. We obviousely have a version of the image that looks much more alive, kept most the pro's of an HDR treatement but none of the cons. The last image is a would be hdr treatment of the original.

10 comments on “Amazing Landscapes using Adobe Camera Raw and Adobe Photoshop”
Wow, this one seems real easy. I am going to save this for future photos that I am editing.
I am having the same problem as Josh in step 20. Can this be achieved without shortcuts? Perhaps they have changed with new versions (I am using CS6 on Windows)
The selection must be active when you press the backspace, otherwise the fill button appear. (I've cc 2014 and work great)
........also you must work on a new\copy layer, and not with the background layer.
On step 20, when I hit the backspace button, I get the fill menu. It does not darken the greyscale. What exactly should the backspace button do in this instance. Is this function somewhere else in PS that backspace is just a shortcut to?
helpful one .. thanks :)
Why don't I get the options "Fill light" and "Recovery"?
I'v gotten lost on the masking process, i followed your steps meticulously, but achieved a big fail. I need a more dumbed-down instruction for the masking, something is missing here.`
Up until step 21 I was going great, I'm using Photoshop CS5 and every time I try to "select Channel Alpha 2 to create a levels 2" i get "Warning: No pixels are more than 50% selected. The selection edges will not be visible."
I was having this problem too, but I FINALLY figured it out. The key is in Step 20: "With the selection still loaded, select Channel Alpha 2 and press
Backspace once. Select Channel Alpha 3 and press Backspace twice then
select Channel Alpha 4 and press Backspace 3 times. When you are done,
your created Alpha channels should look like this, every next one a
little bit lighter that the previous one."
Once I read that and noticed my Alpha channels were getting DARKER with each deletion, I double-checked my foreground and background color. You'll want black as foreground and white as background. Hope this helps!