Make skin look perfect in one-click with these AI-powered Photoshop actions.
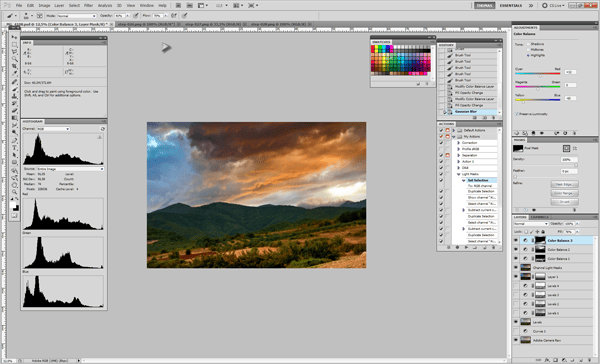
Step 30 - Color Review
This image got a significant amount of life in it! It now showcases a great ground and sky combination of colors and warm casts, with the middle area separating them and keeping a good balance between. Actually it is far closer to what I saw in real when I was taking this picture. The sky warm/cold contrast from right to left significantly creates an astonishing picture, a photograph painting. One final step for this image would be some sharpening of the ground details to get a little bit of crispy clarity down there, like in the HDR comparison.
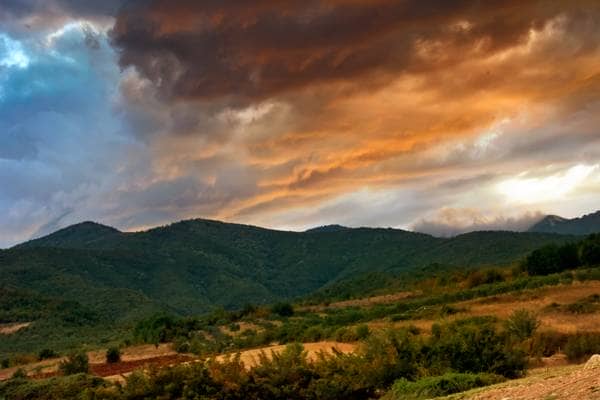
Step 31 - Sharpness
We are going to use a basic and standard tool, although Photoshop offers plenty of sharpening options, in this tutorial we gave much more gravity to exposure treatment and coloring techniques. So for sharpening we will use a simple unsharp mask. After we merge all the layers to a new one, Ctrl+Alt+Shift+E (PC) and Cmd+Alt+Shift+E (Mac), Select from the top menu Filter>Sharpen>Unsharp Mask. Setting the radius somewhere around 5, while adjusting the amount to the point were we get enough detail and minimum noise for that detail.
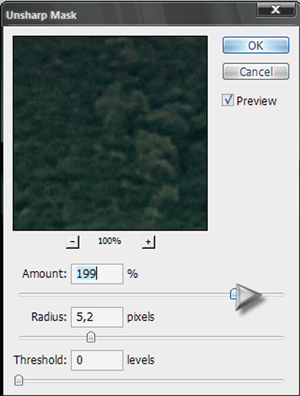
Step 32 - Sharpen Control
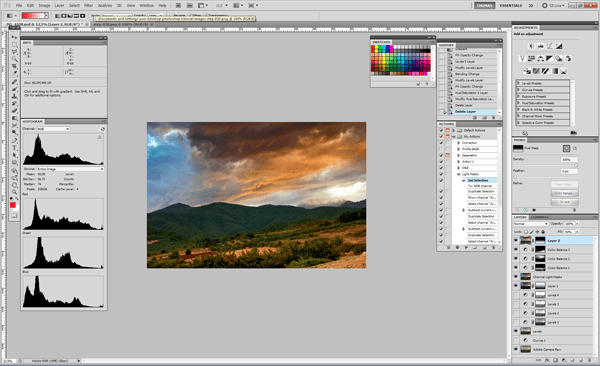
As the Sharpening only looks good for the ground details and we choose the clouds to be soft and pluffy, we create a mask for this layer and use the Gradient Tool to hidethe sharpen effect from the Clouds and only keep it to the ground. Also because in full size looks a bit oversharpened, I adjusted the layer opacity to 50%.
Final Results
![final-results[1] final-results[1]](https://cdn.photoshoptutorials.ws/images/stories/93042c1963c1_1F52/final-results1.png?strip=all&lossy=1&quality=70&webp=70&avif=70&w=1920&ssl=1)
Download the PSD
The PSD is 1500x1000 pixels just for the steps, while this tutorial was done in 5616x3744.
Amazing Landscapes.zip | 20.5 MB
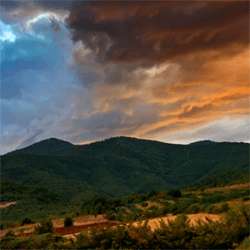
 This tutorial tried to use the best of both worlds of ACR and Photoshop. The benchmark was to beat the HDR proccess in exposure dynamics by doing everything with the maximum control possible and getting a superior result. Also in this proccess we turned a mediocre image into a very good picture that is going to cause a lot of wow effect, compared to it's original state, that was just a compromising capture of dynamics. I hope you enjoyed the tutorial. As it was a little advanced you may need to train your skills a bit more in order to fully comprehend it and keep coming back to refer to it.
10 comments on “Amazing Landscapes using Adobe Camera Raw and Adobe Photoshop”
Wow, this one seems real easy. I am going to save this for future photos that I am editing.
I am having the same problem as Josh in step 20. Can this be achieved without shortcuts? Perhaps they have changed with new versions (I am using CS6 on Windows)
The selection must be active when you press the backspace, otherwise the fill button appear. (I've cc 2014 and work great)
........also you must work on a new\copy layer, and not with the background layer.
On step 20, when I hit the backspace button, I get the fill menu. It does not darken the greyscale. What exactly should the backspace button do in this instance. Is this function somewhere else in PS that backspace is just a shortcut to?
helpful one .. thanks :)
Why don't I get the options "Fill light" and "Recovery"?
I'v gotten lost on the masking process, i followed your steps meticulously, but achieved a big fail. I need a more dumbed-down instruction for the masking, something is missing here.`
Up until step 21 I was going great, I'm using Photoshop CS5 and every time I try to "select Channel Alpha 2 to create a levels 2" i get "Warning: No pixels are more than 50% selected. The selection edges will not be visible."
I was having this problem too, but I FINALLY figured it out. The key is in Step 20: "With the selection still loaded, select Channel Alpha 2 and press
Backspace once. Select Channel Alpha 3 and press Backspace twice then
select Channel Alpha 4 and press Backspace 3 times. When you are done,
your created Alpha channels should look like this, every next one a
little bit lighter that the previous one."
Once I read that and noticed my Alpha channels were getting DARKER with each deletion, I double-checked my foreground and background color. You'll want black as foreground and white as background. Hope this helps!