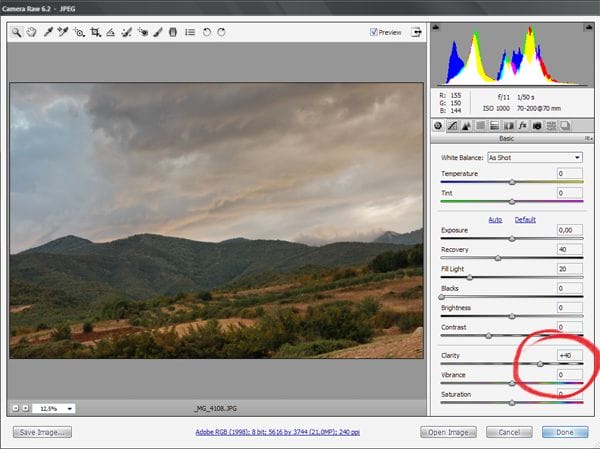
Step 9 – Adobe Camera Raw, Noise Reduction
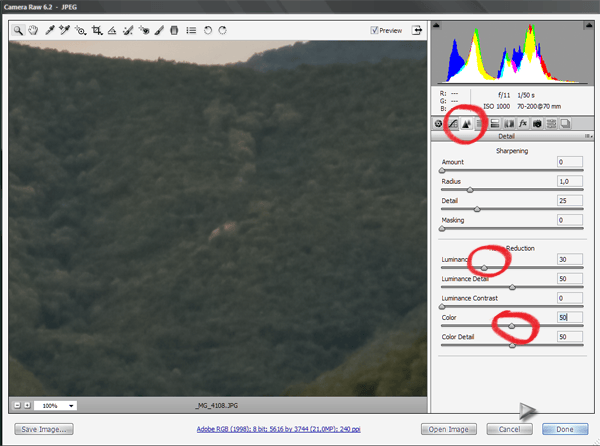
…while in the Sharpnening tab we adjust luminance and color noise reduction levels to 30 and 50 with their details set to 50. Please note that you will adjust this in 100% zoom of the image as you can see noise and how luminance reduces it. Color noise reduction evens out the color in the image. Both those values are not exact, other images may need more or may need less.
Step 10 – Moving on to PS
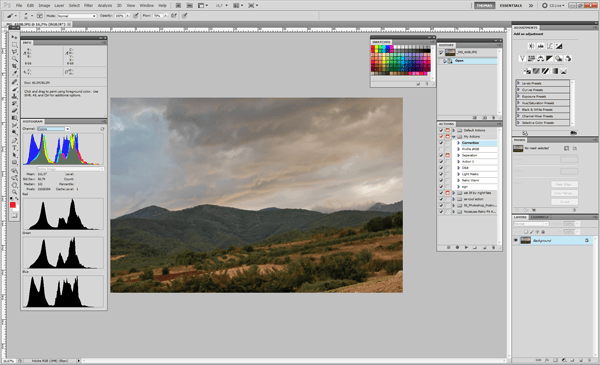
Now is the time to open our image in Photoshop. This tutorial used Adobe Photoshop CS5. You can see a brief snap in my favorite layout, always keeping histograms open, as well as actions, history, info panel, layer, mask and adjustment tabs. Swatches is a handy as I always pick some color to do small tasks, like in this case I am using red to mark spots.
Step 11 – Curves
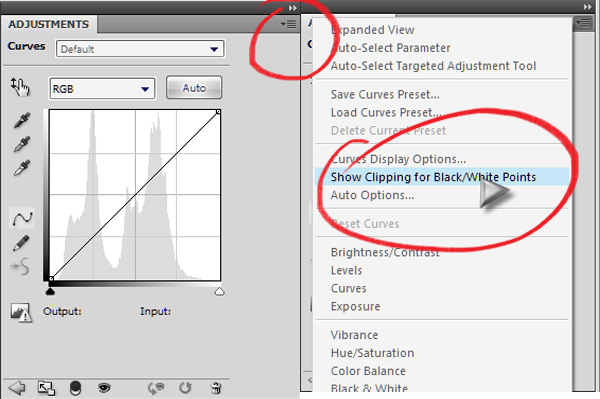
In photoshop we begin with a Curves. Our first goal is to have a proper white balance, in black and white points, since there are slight casts in this image. In order to have the black and white points adjusted, we must first see where are the most black and the most white point in the picture. We open a Curves adjustment tab. In the upper right corner we click on the drop down menu and select Show Clipping for Black/White Points.
Step 12 – Curves, black point
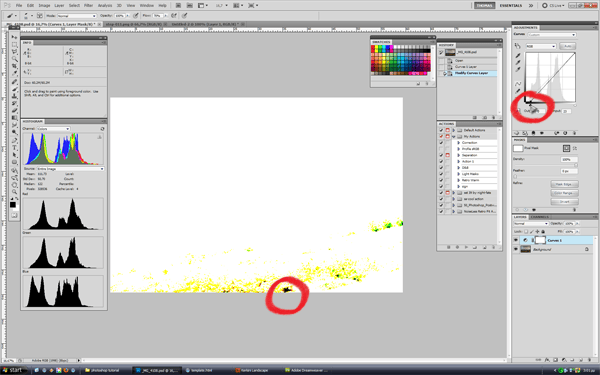
By the previous step we are now able to click and drag the black and white points and see where are those spots. First we perform in with the black point, while looking at the picture for the clipping point of black. I mark the blackest point in this picture by a red circle. Move the black point cursor back at it’s initial place after you located the spot.
Step 13 – Curves, black point
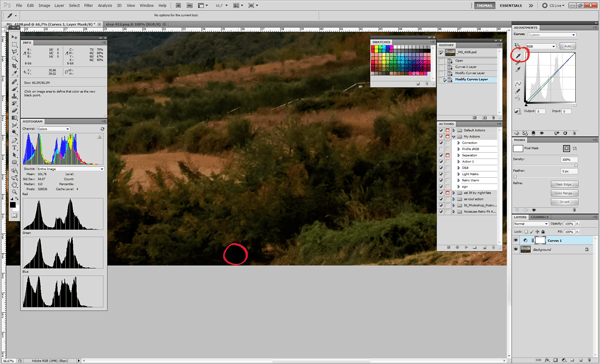
Now select the black point from the curves adjustment tab and click on that spot. This affects all RGB values of that black point and evens them out, so that we make sure that our black is a true black and there are no color casts in it.
Step 14 – Curves, white point
We are going to perform this for the white point as well, exactly the same way as we did it for the black point. We must find the most white point in this picture. And there it shows clipping. Move the white point back and select the white point sampler.
10 responses to “Amazing Landscapes using Adobe Camera Raw and Adobe Photoshop”
-
Wow, this one seems real easy. I am going to save this for future photos that I am editing.
-
I am having the same problem as Josh in step 20. Can this be achieved without shortcuts? Perhaps they have changed with new versions (I am using CS6 on Windows)
-
The selection must be active when you press the backspace, otherwise the fill button appear. (I’ve cc 2014 and work great)
-
……..also you must work on a new\copy layer, and not with the background layer.
-
-
On step 20, when I hit the backspace button, I get the fill menu. It does not darken the greyscale. What exactly should the backspace button do in this instance. Is this function somewhere else in PS that backspace is just a shortcut to?
-
helpful one .. thanks :)
-
Why don’t I get the options “Fill light” and “Recovery”?
-
I’v gotten lost on the masking process, i followed your steps meticulously, but achieved a big fail. I need a more dumbed-down instruction for the masking, something is missing here.`
-
Up until step 21 I was going great, I’m using Photoshop CS5 and every time I try to “select Channel Alpha 2 to create a levels 2” i get “Warning: No pixels are more than 50% selected. The selection edges will not be visible.”
-
I was having this problem too, but I FINALLY figured it out. The key is in Step 20: “With the selection still loaded, select Channel Alpha 2 and press
Backspace once. Select Channel Alpha 3 and press Backspace twice then
select Channel Alpha 4 and press Backspace 3 times. When you are done,
your created Alpha channels should look like this, every next one a
little bit lighter that the previous one.”Once I read that and noticed my Alpha channels were getting DARKER with each deletion, I double-checked my foreground and background color. You’ll want black as foreground and white as background. Hope this helps!
-


Leave a Reply