In this tutorial, I’ll show you how to create a sci-fi lighting scene. First, we’ll create the base scene using a desert image and a space background. After that, we’ll import the hole and use several ways to make the light. Later, we’ll add the man and enhance the light effect to complete the final result.
Preview of the Final Result

Tutorial Resources
Step 1
Create a new 1500×1200 pxdocument in Phottoshop and fill it with white. Open the ground image and drag it into the white canvas using the Move Tool (V).

Step 2
Click the second icon at the bottom of the Layerspanel to add a mask to this layer . Use the Magnetic Lasso Tool (L)to select the sky area and on this layer mask, turn the foreground to white. Click Deleteto remove the sky and reveal the white background.


Step 3
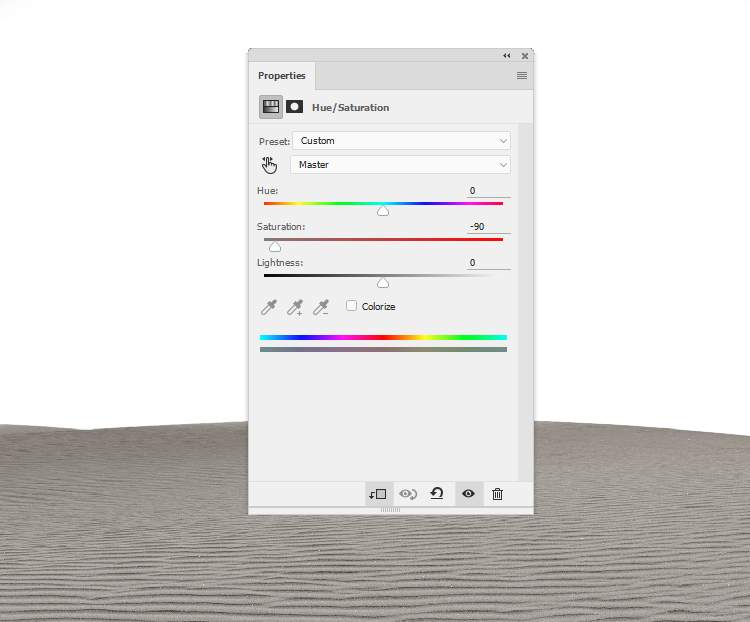
Go to Layer > New Adjustment Layer > Hue/Saturationand set it as Clipping Mask. Bring the Saturationvalues down to-90.

Step 4
Make a Color Balanceadjustment layer (set as Clipping Mask) and change the Midtonessettings to give the ground some blue/cyan .

Step 5
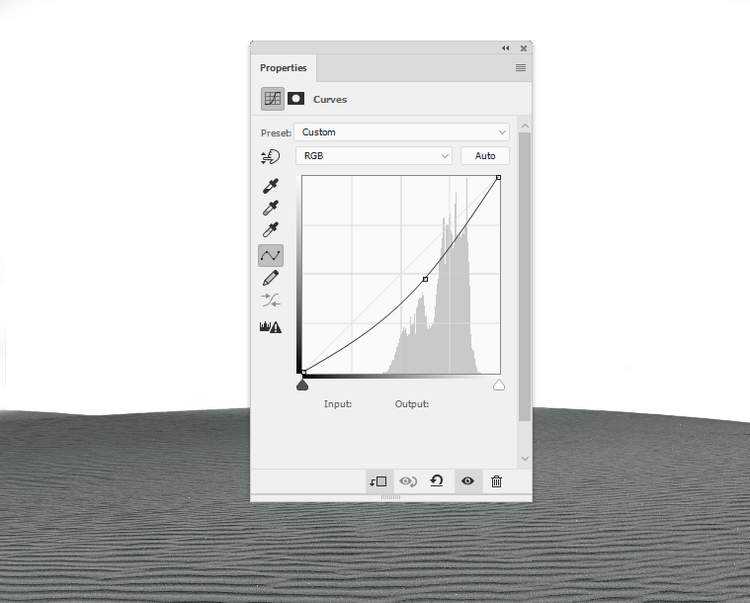
Create a Curvesadjustment layer to darken the ground. On this layer mask, activate the Brush Tool (B)and select a soft round one with black color to erase the midground and foreground to keep its lightness as we aim to add the main light there.


Step 6
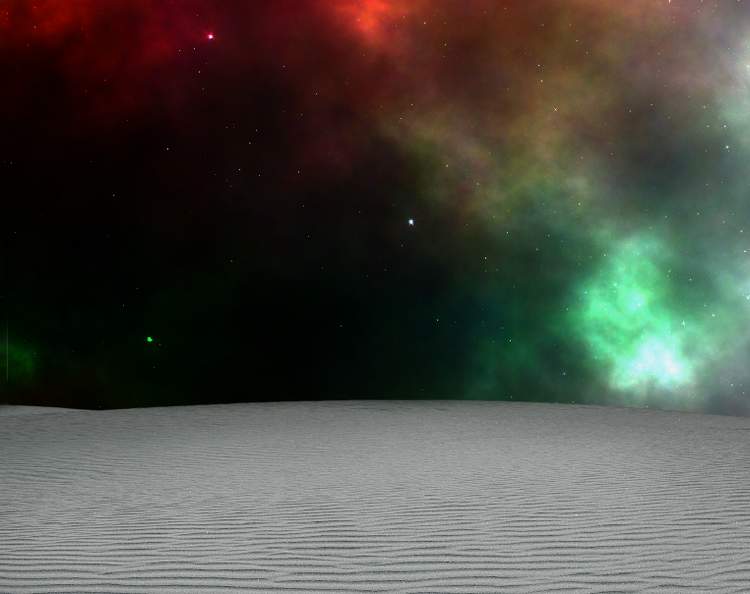
Place the space background in the white canvas and set this layer below the ground one. There is an unwanted light area on the lower right of the background. To fix it, duplicate this layer and move it to the indicated area. Add a mask to this layer and use a soft black brush to remove the hard edges around and cover the indicated light part.


Step 7
Make a new layer and activate the Clone Tool (S) and use this brush to hide the light detail on the top middle as it will affect the main light effect on this place (we’ll see in the next steps).


Step 8
Select the space and cloning layers and hit Ctrl+Gto make a group for them. Change the group’s mode to Normal 100%and make a Hue/Saturationadjustment layer to desaturate the background. Bring the Saturationvalues down to maximum.

Step 9
Create a Color Balanceadjustment layer to change the background layer. Alter the Midtonessettings:
3 responses to “How to Create a Sci-Fi Lighting Scene with Photoshop”
-
thank you so much for your efforts!
-
Very NICE!! I love your tutorials!
Thank you! -
Amazing..

Leave a Reply