
Make your artwork look like they're from an alternate universe. These Cyberpunk presets work with Photoshop (via the Camera Raw filter) and Lightroom. Download all 788 presets for 90% off.
Spirographs and fractals look complicated but are actually very easy to create - it only takes a bit of experimentation. These fractals then can be used as artwork itself or as elements in photo manipulations, backgrounds, and graphic design related works.
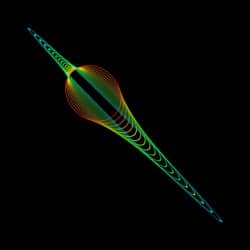
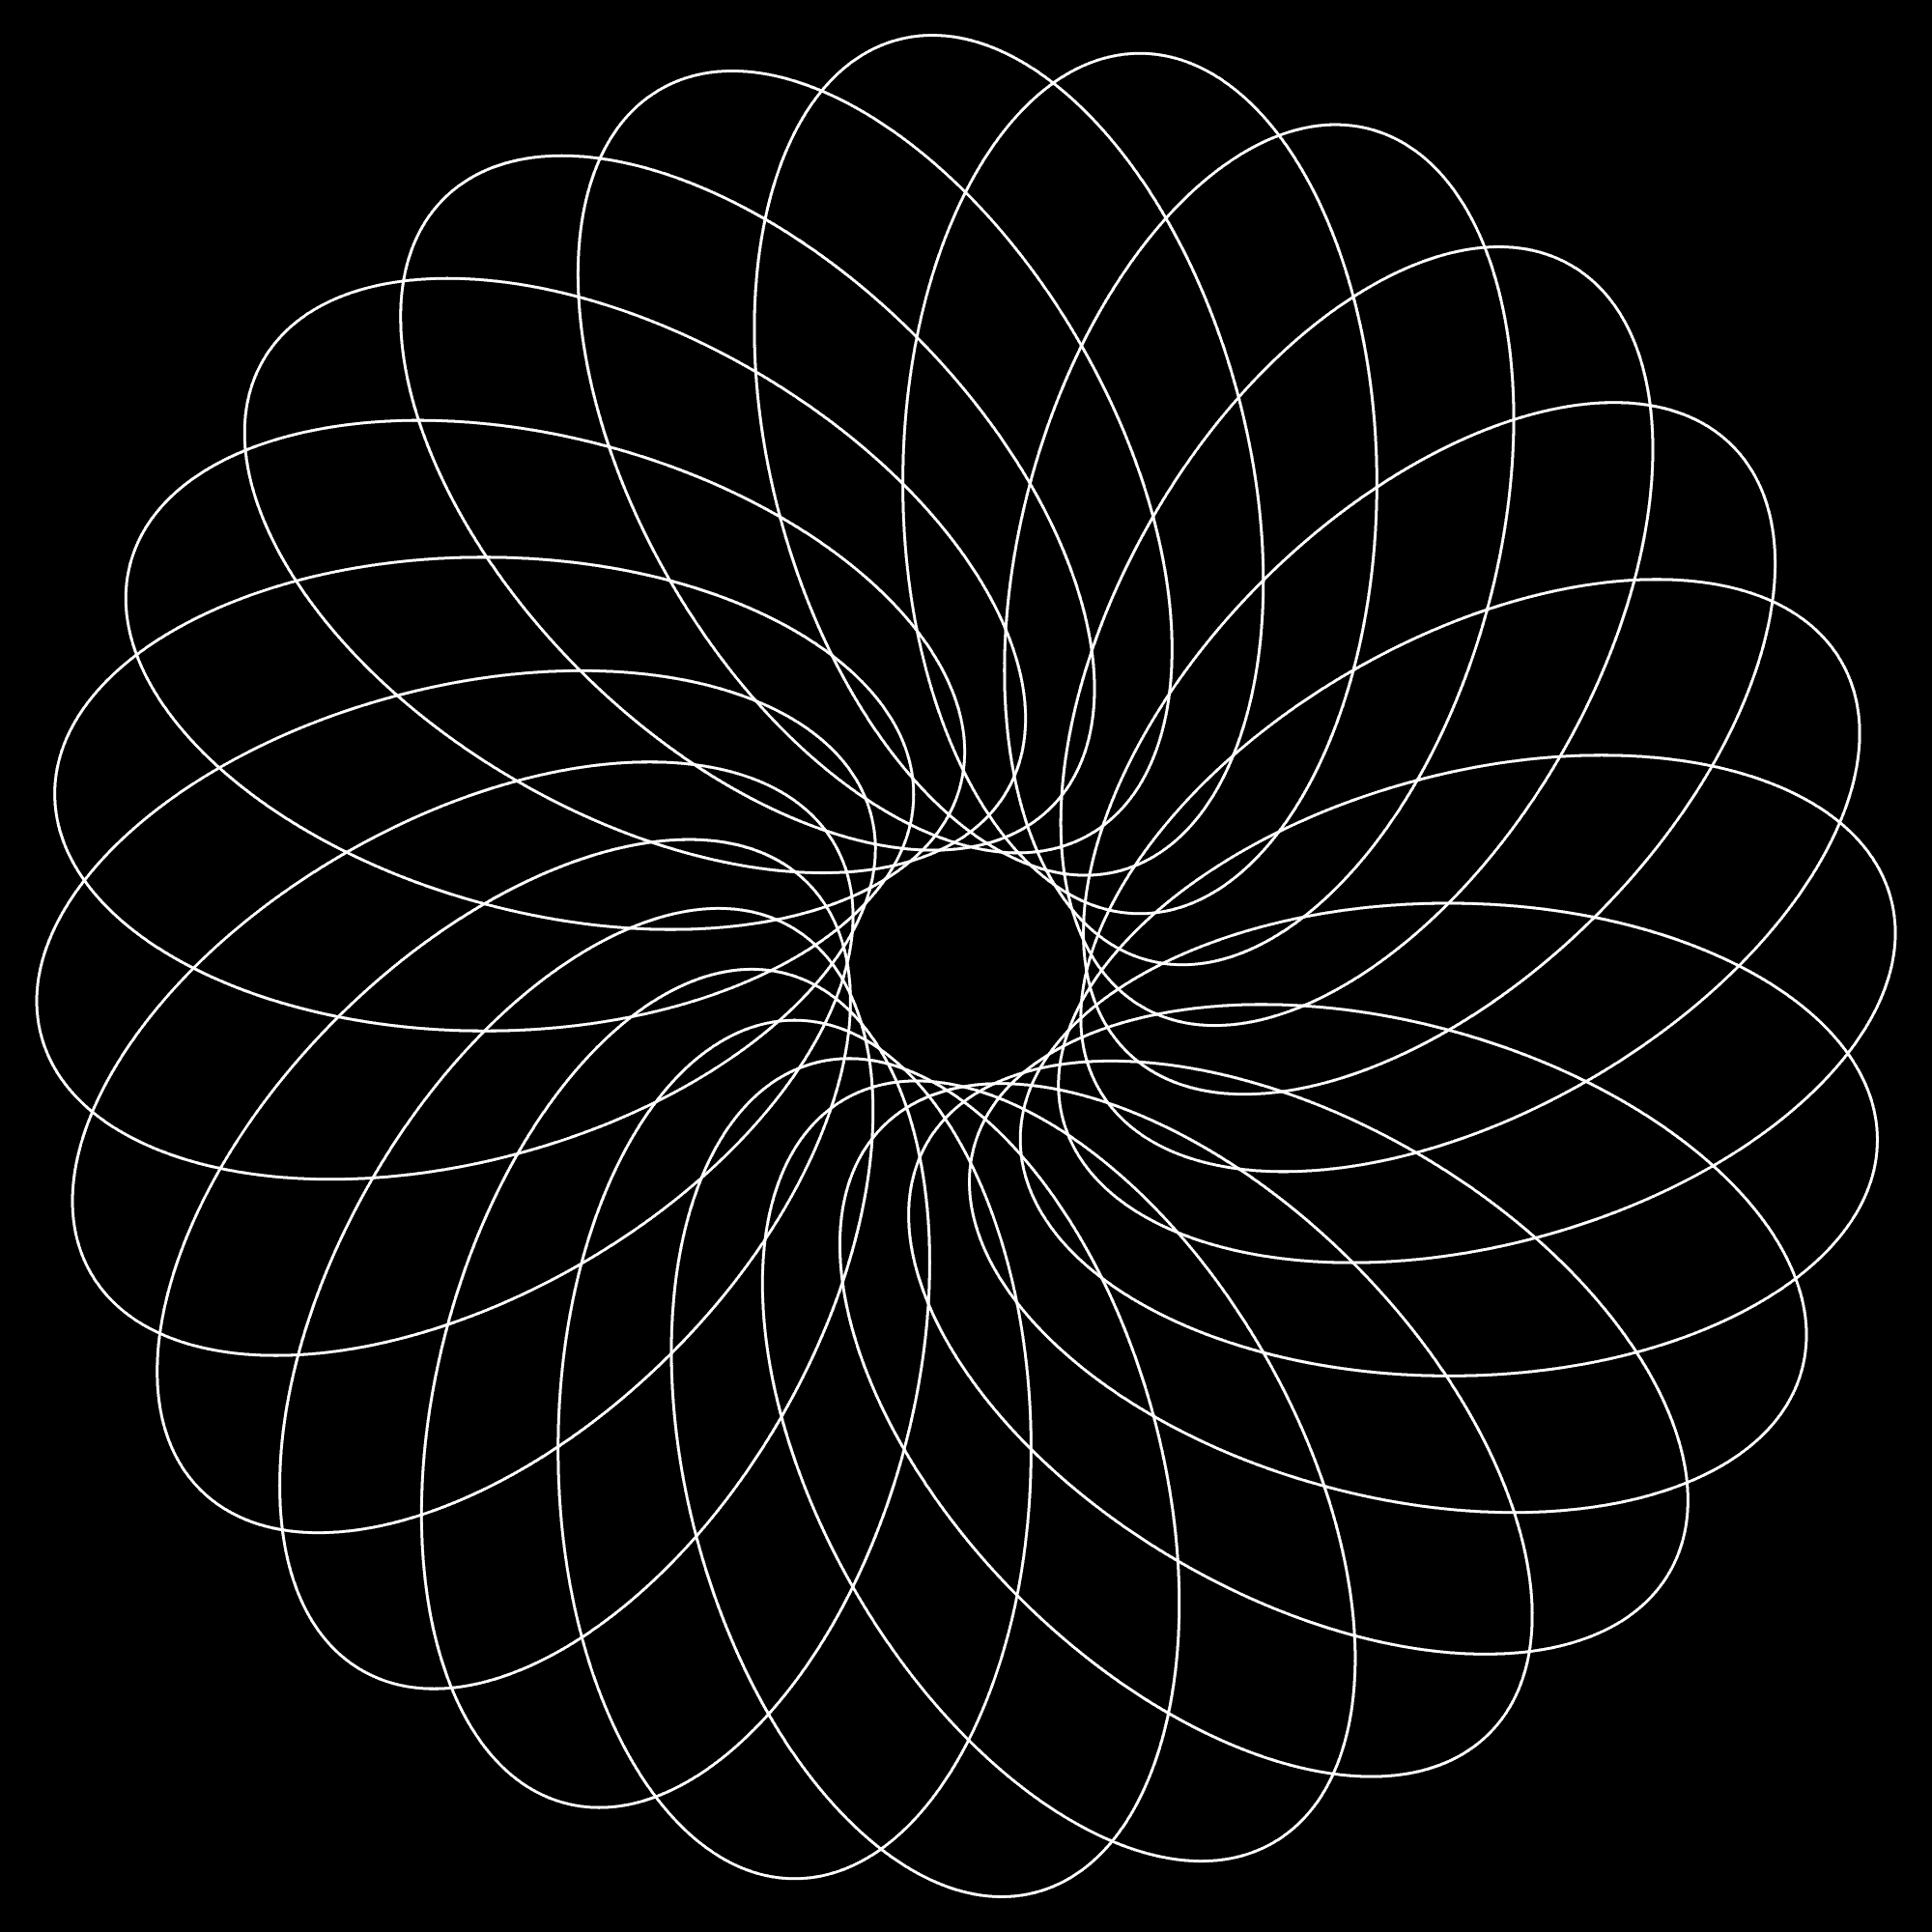
Preview of Final Results


Step 1
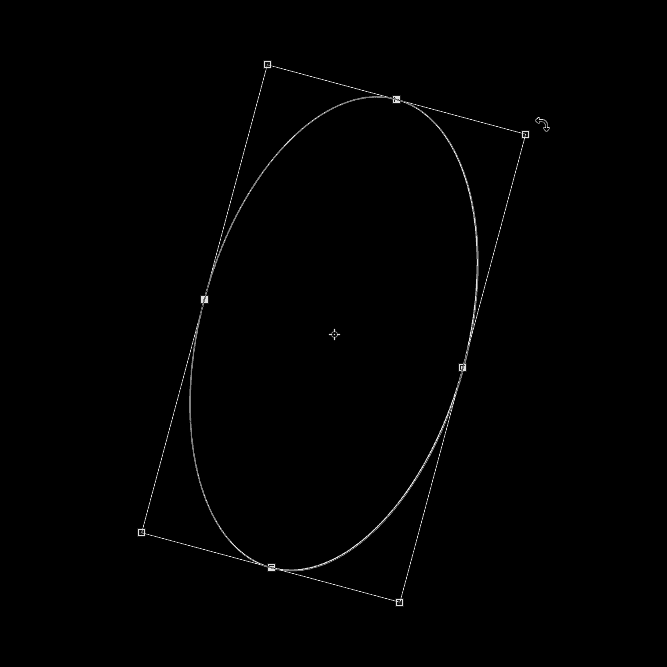
We're going to start by creating a 2000x2000 pixels document with a black background. You can use any image size that suits your artwork. Create a new layer and draw any shape you like. To make things simple, we'll be using the Ellipse Tool. Set the mode to "Shape", fill to none, and stroke to white.

Draw the shape in the middle of your document.

Step 2
Switch back to the Move tool (V) then activate the Free Transform tool (Ctrl/Cmd+T or Edit > Free Transform). Drag anywhere outside of the transform box to rotate it. You can hold the shift key while dragging to snap the rotations to 15º increments. Press enter to apply the transformation.
Step 3
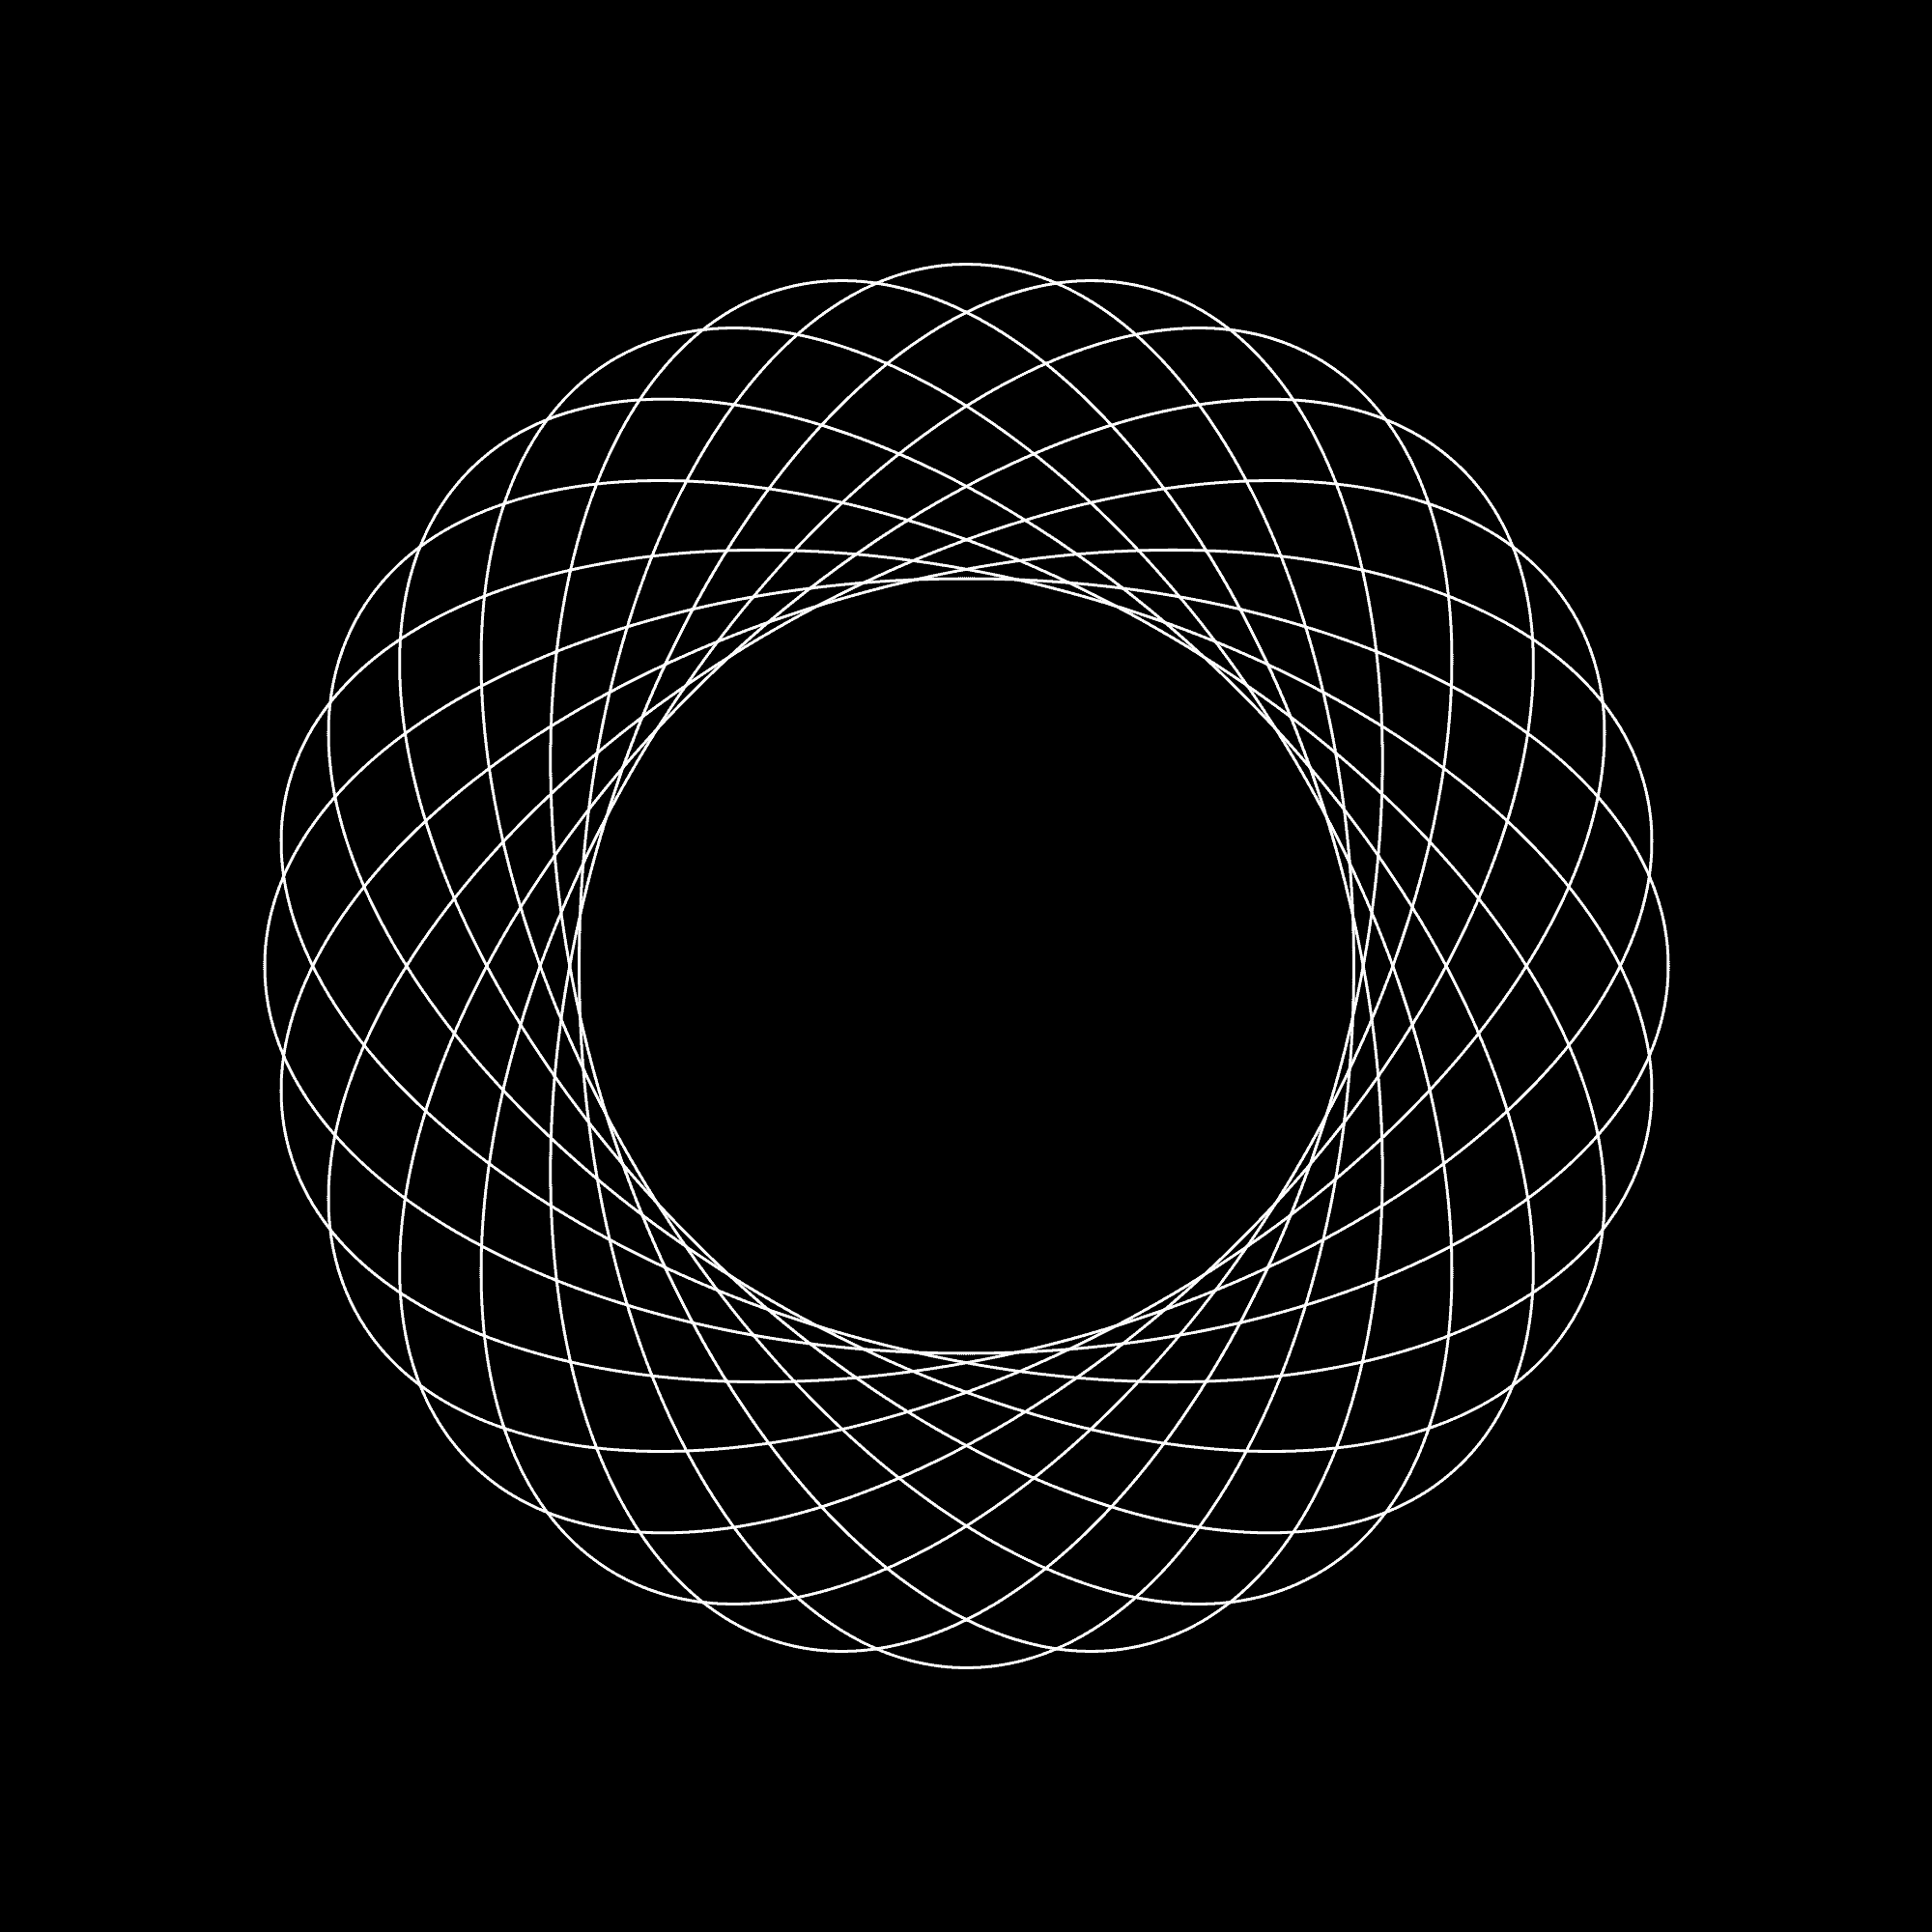
At this point, you probably already guessed how we'll be creating this spirograph - duplicating and rotating the object until it makes a full circle. This takes awhile but thankfully there's a very useful hotkey that will automate this process. Switch to the Move tool (V) then simply press Ctrl+Shift+Alt+T (Command+Option+Shift+T on Macs) repeatedly until you form a circle.
Step 4
That was just a simple spirograph. Try experimenting with different transformations. Here are some examples of alternate settings you can play around with:
Changing the reference point location:
Changing width and height:
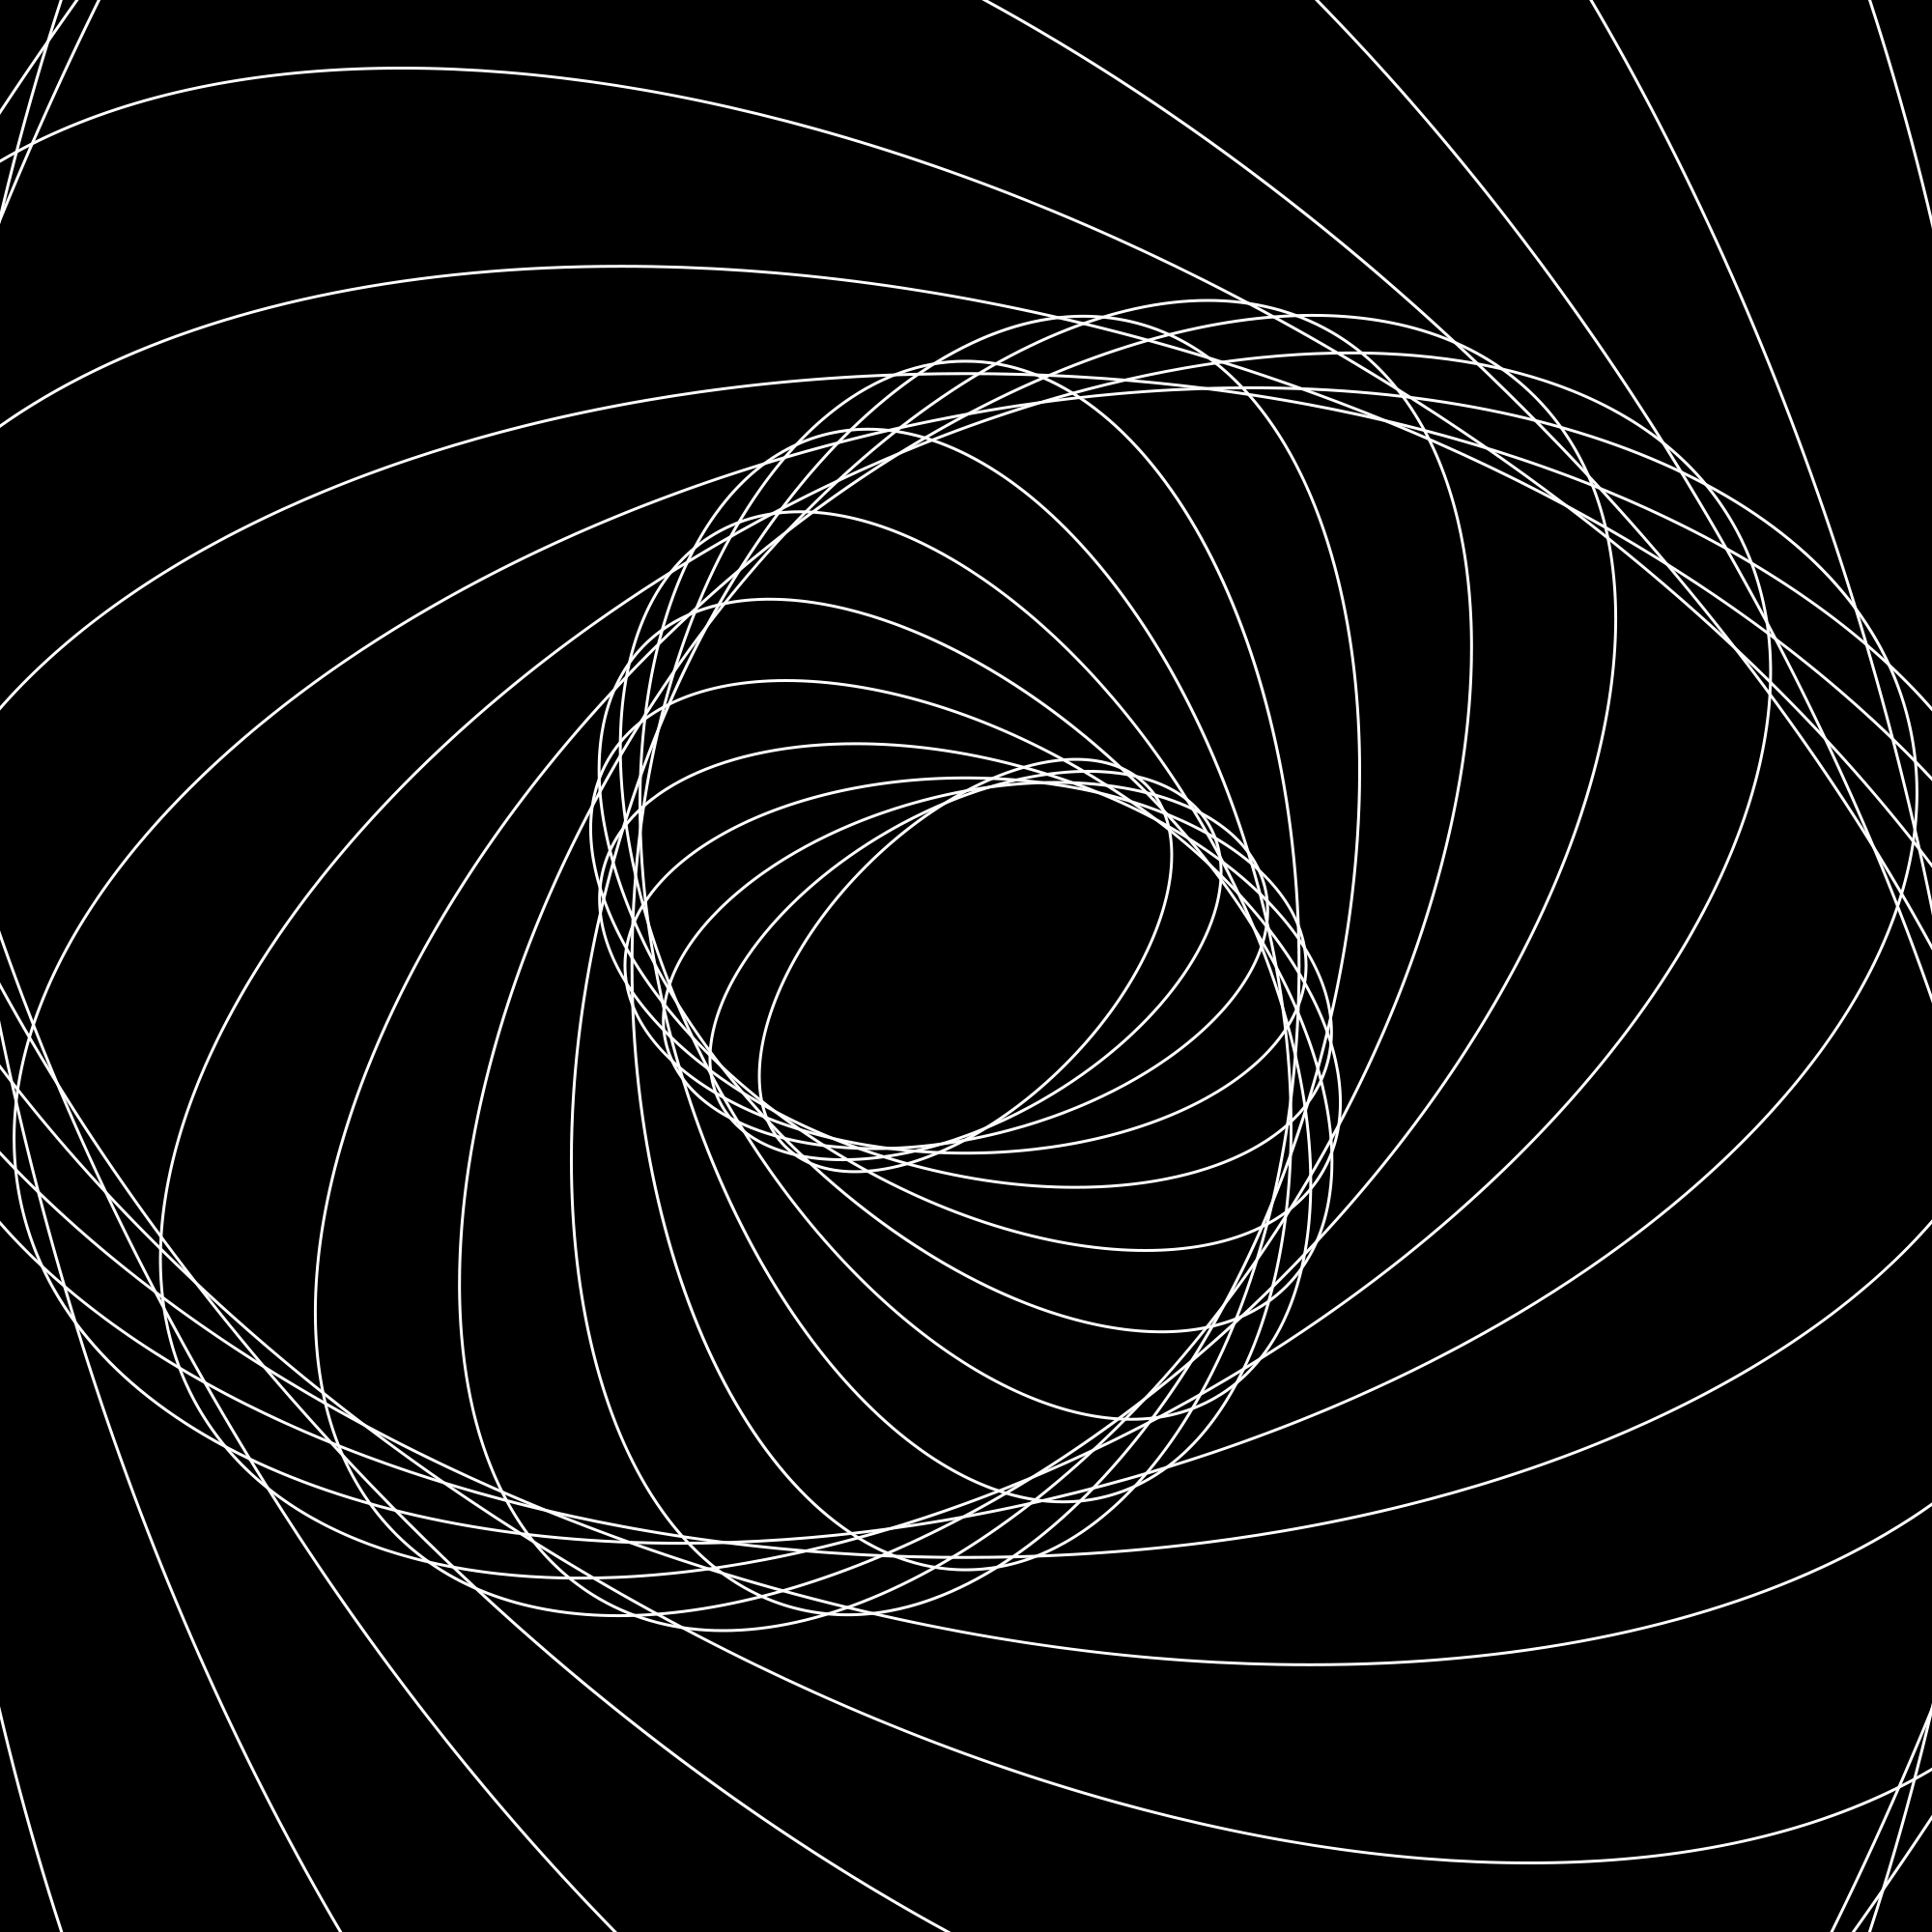
Changing rotation and skew


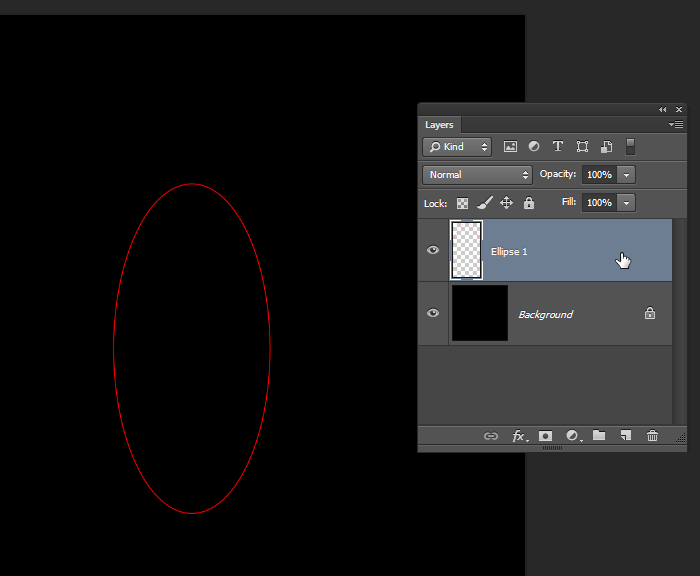
Step 5
Now that you've experimented with different settings, it's time to take it to the next level. In the next steps, you'll learn how to create spirographs with actions to give you even more customization. Using actions, you can change the color, opacity, and many other settings in addition to the transform settings you did earlier.
Start by creating another outline using any tool. Make sure that the layer is rasterized if you created the shape with any of the vector tools. To do this, right-click on the layer and choose Rasterize Layer. I drew a simple red oval outline.
Step 6
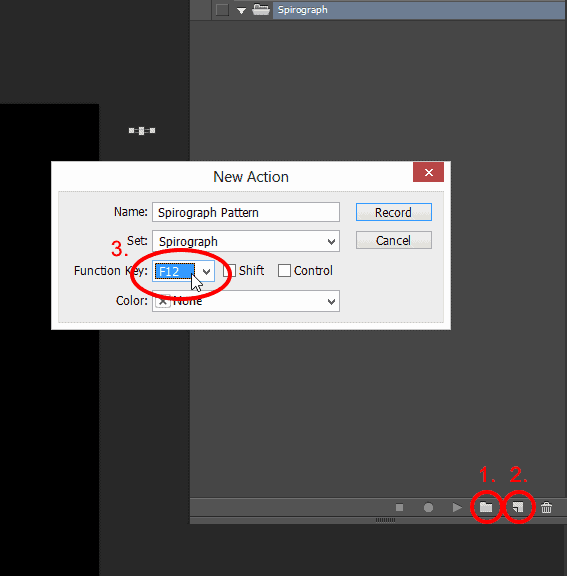
Next, create a new action in the Actions panel (Window > Actions). To create a new action, start by clicking on the "Create New Set" ![]() button in the Actions panel. Give this action set any name you like - I called mine "Spirograph". Next, click on the "Create New Action"
button in the Actions panel. Give this action set any name you like - I called mine "Spirograph". Next, click on the "Create New Action" ![]() button. Name this action anything but pick any hot key in the Function Key area. I chose F12. Click the Record button
button. Name this action anything but pick any hot key in the Function Key area. I chose F12. Click the Record button
Step 7
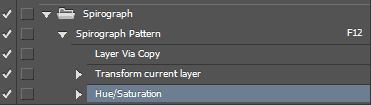
Your action is now recording all your actions. Follow these steps to record your actions
- Press Ctrl/Cmd+J to duplicate the current layer.
- Press Ctrl/Cmd+T to activate the Free Transform tool. Make any transformation you like. I made my ellipse rotate by 15º and skew vertically by 15º.
- Press Ctrl/Cmd+U to access the Hue/Saturation tool. Make any adjustment you like. I simply set the hue to 8.
When you're done, press the "Stop" ![]() button in the Actions panel. You now have a new action that you can play simply by pressing the function key that you assigned earlier (mine was set to F12).
button in the Actions panel. You now have a new action that you can play simply by pressing the function key that you assigned earlier (mine was set to F12).
Step 8
Press the function key you assigned (mine was F12) until your spirograph is built. Here's what my spirograph looks like. It's not really that amazing but we can always try different settings.

To change the settings, you can simply double-click on any of the steps inside your action.
26 comments on “Quick Tip: How to Create Fun Spirographs and Fractals”
Is there a way to input a random integer in the Photoshop actions? I am trying to achieve an effect like this: https://solanart.io/collections/frakt
Unfortunately that's not possible.
on CS6 I can't see in the filter>other>offset option the top and right pixels ..........it's showing me exactly opposite to put values ..........down and left...ugh
You reveal all of Photoshop Filters you first need to go to Edit - Preferences - Plug-Ins... and check Show All Filter Gallery Groups and Names.
It seems to have been removed.
Dear,
I am 2nd example not understood , so please suggest.
BR
Ravi
Thank youuuuuu brooo
Very easy to follow tutorial, thank you for posting!
I love your all icon sets….and start to bookmark this!!!
loved it :)
Very interesting possibilities. Thanks for sharing.
Nice and easy enough.
Thanks
I've surf many webs for best and easy tricks. This is one of the most top website for tuts.
where is the vector path option in photoshop and how to de select it and how to create only outlines of the shape.......... I use CS5 portable version
They're using cs6. cs5 doesn't have the option to make vectors into their own shapes.
very lovely and fun.tank you very much
hears a nother fun way to make fractals in photoshop
http://www.youtube.com/watch?v=HzBwVCSFZPY
What is the name of this program
-_- Photoshop... Duh!
Do people a favor and test your tutorials next time. The ellipse rotation tutorial gives indeed the result that we see in the screenshot, but once you press ENTER, everything inside disappears and what is left is only the outline of that image.
Thanks for the tip! You need to have your vector paths deselected. We updated the instructions to make it more clear.
Great tutorial but I too always end up with the outline of the image.
rude
You can do this in Illustrator too. Press CMD-D or record action.
dowlott hom
Nice. The effect of a simple pattern can be really amazing.
thank you for sharing,