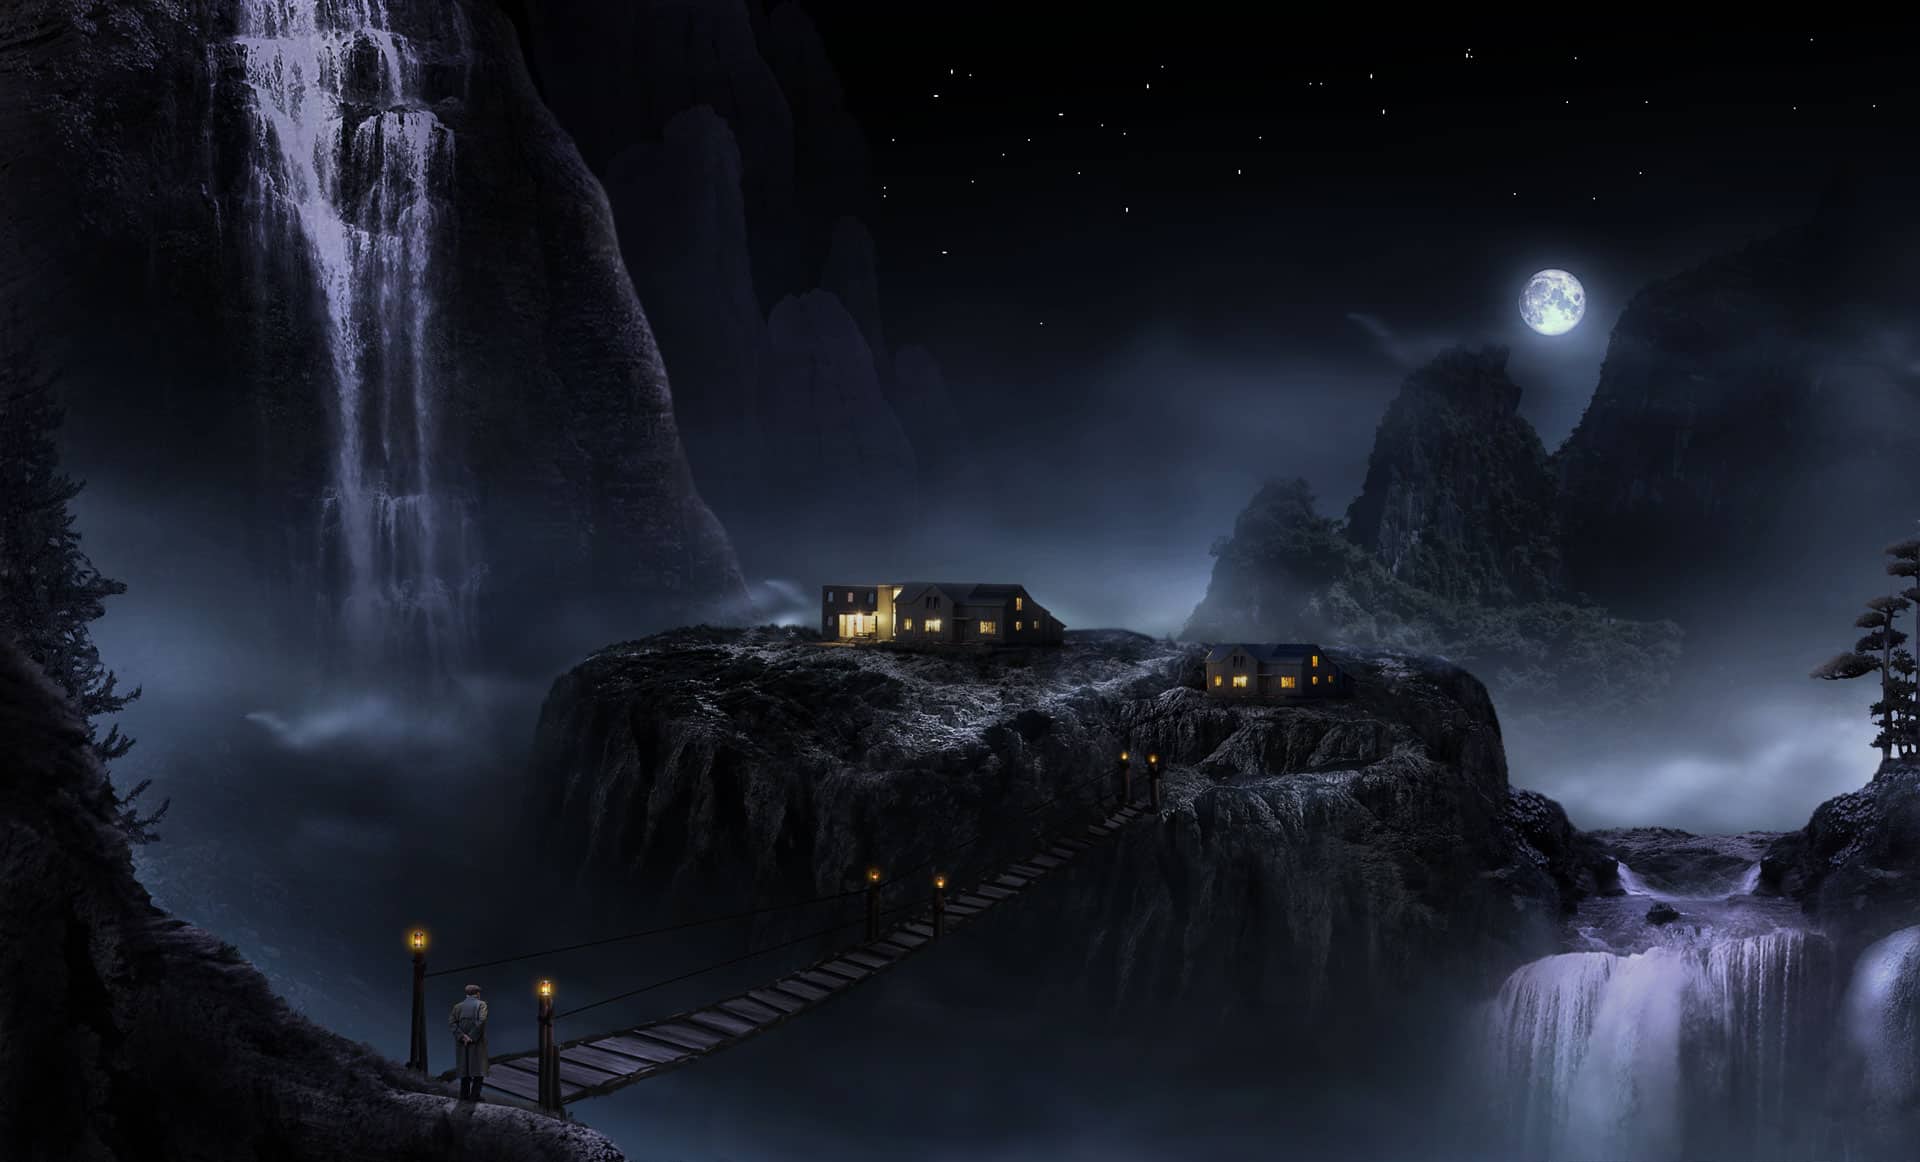
Create an atmospheric mountainous landscape with this Photoshop tutorial! You’ll learn how to create any own mountain scenes by combining several photos together, add a bridge with lanterns, color balance images, dodge & burn, and many other techniques. A free PSD download is included with this tutorial.
Preview of Final Results

Tutorial Resources
- Waterfall 1 Credit to Mysticmorning– Deviantart
- Waterfall 2 – PD4 Pic
- Background lady symphonia – Deviantart
- Lamp chop stock – Deviantart
- Hut – Pixabay
- Moon – Pixabay
- Rock 1 – Pixabay
- Rock 2 – Pixabay
- Rock 3 – Pixabay
- Rock 4 – Pixabay
- Rock 5 – Pixabay
- Rock 6 – Cgtextures
- Tree brushes falln stock- Deviantart
- Tree noireuse – Deviantart
Step 1
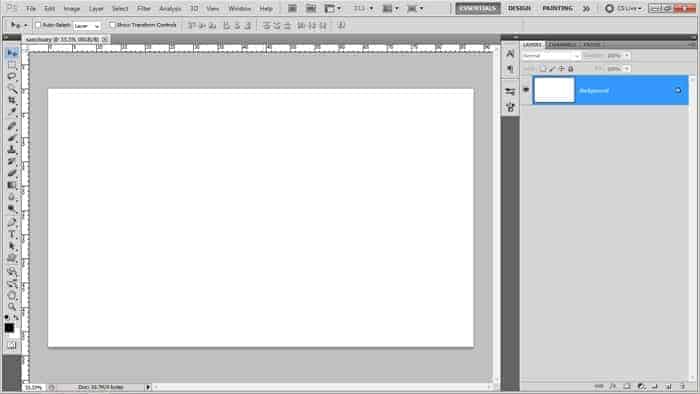
Start by creating a blank document with a size of 2490 pixels wide and 1507 pixels high by hitting the short key Ctrl+N. I named the document sanctuary.

Here is the document will be:

Step 2
Make sure we have downloaded all the tutorial assets needed and saved them in a folder on our computer. In these early steps, we will create our custom rocky mountain using several stock images prepared. Start by opening one of the mountain stocks in Photoshop by hitting the short keys Ctrl+O. This will lead us to the folder in the computer where we have saved the image.


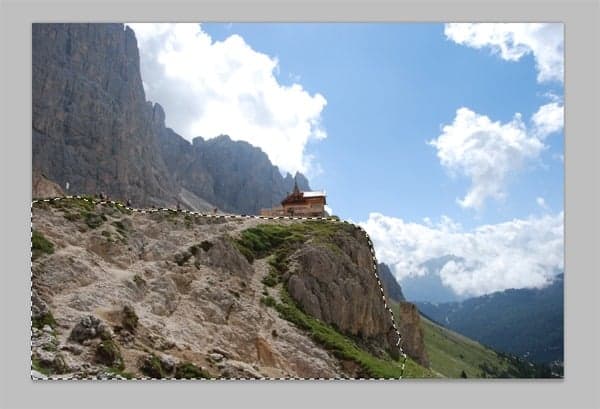
Next, we will cut out some parts of the image. Take the lasso tool in the tool panel. We will use this tool to cut out the part.

The part we are going to cut out is the one outlined in red. To cut the part, start clicking, holding and dragging the tool on the red outline to trace it.

After tracing the outline, the part will be selected which is indicated by blinking small black and white lines around it.

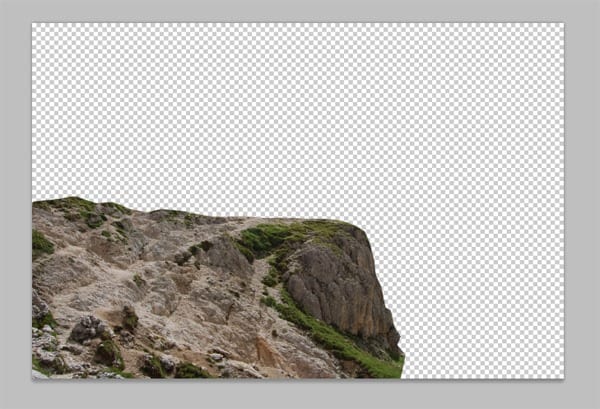
Hit Ctrl+J to duplicate the selection into a new single layer. Now we have the cut out of the mountain image.

Step 3
Copy-paste the cut out into the main blank document. When the cut out is in the main document, this will be a new layer named layer 1. We will work with many layers, so to specify them, I will name them accordingly. For this layer, I named it to rock. (Well, sorry if I may sound fussy at this tutorial, but I have to by consideration this tutorial is supposed to be read by fresh new Photoshop users to advanced ones. I hope this tutorial will not be tricky) Now go back to our main document where we have had the rock layer. Activate the free transform tool by hitting Ctrl+T on the keyboard. The rock image is still very large so we need to scale it down to the size desired. To do this, press the Shift key on the keyboard and click, hold and drag the upper left transforming point until we have the desired size.
27 responses to “How to Create a Marvellous Night Landscape with Waterfalls”
-
the download link won’t work
-
Thanks Zach! It’s fixed now
-
-
Very awesome tut here. Sometimes I wanna make my images a little more “fantasy”, but I always feel like I lack the creativity.
-
stunning
-
i am triying to remove background
-
Great article! Thank you!
-
thank you
-
I was unable to get the 2 waterfalls as my security wont let me and the Rock6 was not sure which one you wanted…really want to learn this but am having issues ~ thank you
-
wooooooooooooowwwww awesome
-
awesome and unique collection of sequence photography i love it.
Thank for sharing. -
sorry, i didnt get step 16…i hit -100 on HS but the color changed to totally black n white! whats wrong?
-
this is what we call it “creative mind”
-
This is amazing! I’m going to try it out soon! Thanks Dek.
-
AWESOME.PERIOD
-
You did an excellent job of step by step tutorial with pics which helped me understand why and the reason for each.
Thanks ;) -
I like your tutorial a lot!
But, sorry if it sounds dumb, how do i copy-paste the cut out into the main document (step 3)? It doesn´t work with ctrl+c/ctrl+v…
-
firstly select the cut out (hold-press Ctrl and click the thumbnail of the cut out layer. when it is selected, hit Ctrl+C and then be active on the main document, paste (ctrl+v) the layer on it.
-
-
very good tutorial I love your technique
-
thanks for share
-
Excelente tutorial, el modelo nolo encuentro, saludos desde España
-
Hola malissimo,
Aquí lo puedes encontrar: http://photoshopworld.ru/lessons/507/old_man.jpgUn saludo desde Francia
___
Btw, thank you for this tutorial. This is impressive. And I learnt new useful techniques.
-
-
how do you get of masking??????????
-
If you see red than press Q to get out of quick mask. If you dont see red, just click on the left thumbnail of your layer… the left one not the right thumbnail.
-
-
pathi thane sollirukinga
-
This is a magnificent masterpiece. Excellent explanation. Thank you very much.
-
Duuuuuuuuuuhhhhhhhhhhhh!!!!!!!!!!!!!!!!!! Mwanangu jembe unatisha kinoma
-
I like yer tut… good

Leave a Reply