After we have the size, hit Ctrl+J to duplicate the rock layer. This will be a new layer in the layer panel named rock copy. With the rock copy layer selected and the free transform tool is still activated, right-click on the document to show up the transforming option box. Choose Flip Horizontal to flip the image horizontally.

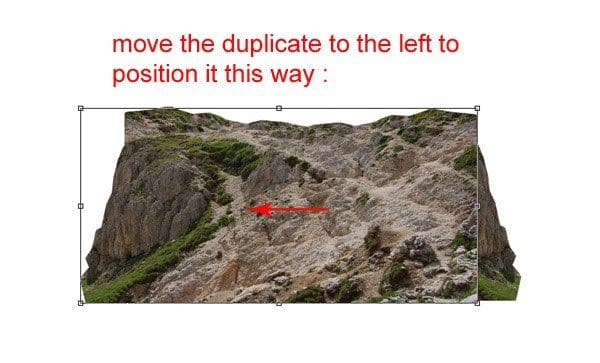
Then, move the duplicate (rock copy layer) to the left a bit to get the position like the one shown in the screenshot:

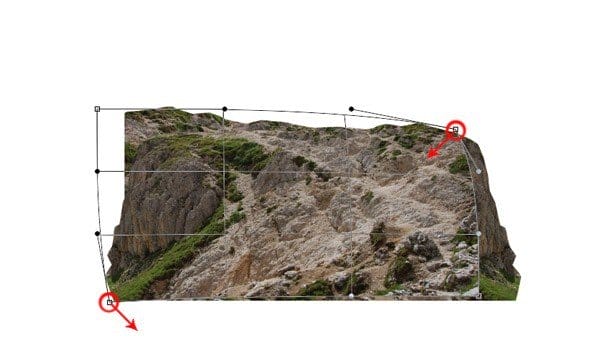
When we have the desired position and the transform tool is still activated, right-click again on the document to show up the transforming option box. This time, choose Warp. Now try to alter the shape of the rock by warping it. To do this, click, hold, and drag the upper right transforming point to the direction shown in the screenshot below. Do a similar way to the lower left transforming point.

Next, select the original rock layer which is under the rock copy layer in the layer panel. Alter its shape the same way as the previous rock copy layer.

Step 4
We have tried to combine the two rock layers. However, the combination is not well blended yet. To fix this, we will mask some part of the upper layer is that the rock copy layer. Make sure we are still active in the rock copy layer. Give this layer a layer mask which is simply achieved by clicking the layer mask icon located in the bottom of the layer panel. After clicking the icon, this will give a layer mask on the selected layer indicated by a white thumbnail next to the layer.

Make sure that the foreground is set to black and the background is to white by hitting D key on the keyboard.

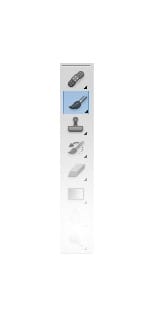
Next we have to set the brush. Take the bush tool in the tool panel.

In the brush options bar, click the small triangle to open the brush picker box. Choose a very soft round brush meaning that the brush is set to 0% hardness. Set the opacity of the brush to about 20-25% and about 200 pixels size.

Now we are ready to mask the unneeded parts of the rock copy layer. Click the mask thumbnail to be active on the layer mask. With black color, stroke the brush on the parts of the rock copy layer in the document. This will hide the parts completely or make them transparently visible depending on the opacity of the black color stroked to them. The blacker the stroke is, the less visible they will be. I always start using a brush of low opacity (20-25%). After stroking the black brush on an image with a layer mask, there will be a black or gray spot on the mask thumbnail indicating that the parts are intentionally masked to hide or make them transparent. On the contrary, we can reveal the masked parts by stroking back white brush over them. The whiter the stroke is, the more visible they will be. Well, sorry again if I may sound fussy instructing this layer mask matter ;-) I just want to pay more intention on this layer mask because we will use much masking in the next steps and the result of this tutorial is greatly achieved by this masking is that how we hide parts of an image with a layer mask or how much we want to make them transparent. Go back to the rock copy layer, mask some parts of the image. The red mark indicates the parts we should stroke with a black brush to mask them. See the screenshot below:
27 responses to “How to Create a Marvellous Night Landscape with Waterfalls”
-
the download link won’t work
-
Thanks Zach! It’s fixed now
-
-
Very awesome tut here. Sometimes I wanna make my images a little more “fantasy”, but I always feel like I lack the creativity.
-
stunning
-
i am triying to remove background
-
Great article! Thank you!
-
thank you
-
I was unable to get the 2 waterfalls as my security wont let me and the Rock6 was not sure which one you wanted…really want to learn this but am having issues ~ thank you
-
wooooooooooooowwwww awesome
-
awesome and unique collection of sequence photography i love it.
Thank for sharing. -
sorry, i didnt get step 16…i hit -100 on HS but the color changed to totally black n white! whats wrong?
-
this is what we call it “creative mind”
-
This is amazing! I’m going to try it out soon! Thanks Dek.
-
AWESOME.PERIOD
-
You did an excellent job of step by step tutorial with pics which helped me understand why and the reason for each.
Thanks ;) -
I like your tutorial a lot!
But, sorry if it sounds dumb, how do i copy-paste the cut out into the main document (step 3)? It doesn´t work with ctrl+c/ctrl+v…
-
firstly select the cut out (hold-press Ctrl and click the thumbnail of the cut out layer. when it is selected, hit Ctrl+C and then be active on the main document, paste (ctrl+v) the layer on it.
-
-
very good tutorial I love your technique
-
thanks for share
-
Excelente tutorial, el modelo nolo encuentro, saludos desde España
-
Hola malissimo,
Aquí lo puedes encontrar: http://photoshopworld.ru/lessons/507/old_man.jpgUn saludo desde Francia
___
Btw, thank you for this tutorial. This is impressive. And I learnt new useful techniques.
-
-
how do you get of masking??????????
-
If you see red than press Q to get out of quick mask. If you dont see red, just click on the left thumbnail of your layer… the left one not the right thumbnail.
-
-
pathi thane sollirukinga
-
This is a magnificent masterpiece. Excellent explanation. Thank you very much.
-
Duuuuuuuuuuhhhhhhhhhhhh!!!!!!!!!!!!!!!!!! Mwanangu jembe unatisha kinoma
-
I like yer tut… good


Leave a Reply