Make your artwork look like they're from an alternate universe. These Cyberpunk presets work with Photoshop (via the Camera Raw filter) and Lightroom. Download all 788 presets for 90% off.
Step 19
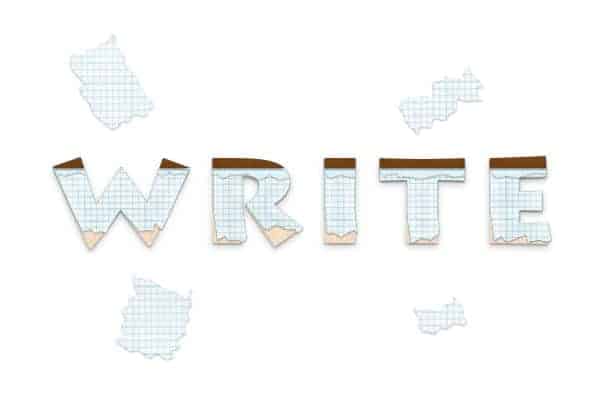
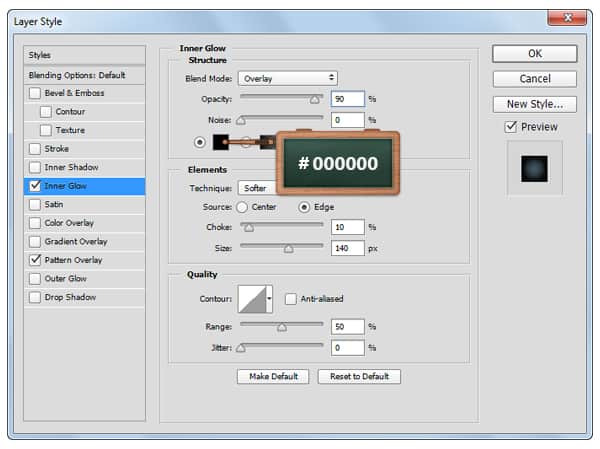
Open the Layer Style window for the paper texture made in the previous step and enter the settings mentioned in the next images.
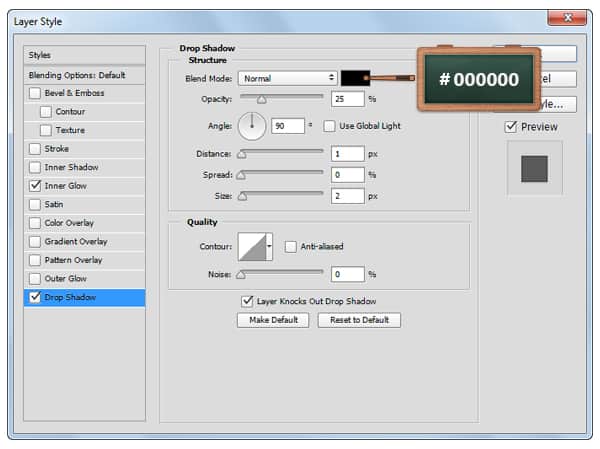
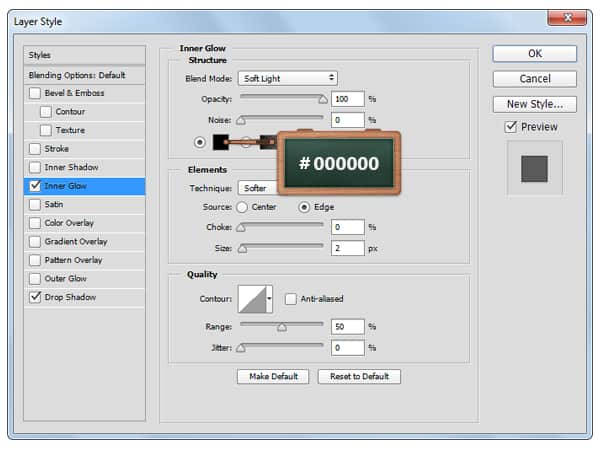
Step 20
Finally, we'll add the background.
Focus on the Layers panel, select the Background layer and click on the padlock icon to unlock the layer. Set the foreground color to #678F84, grab the Paint Bucket Tool and fill the canvas with your color.
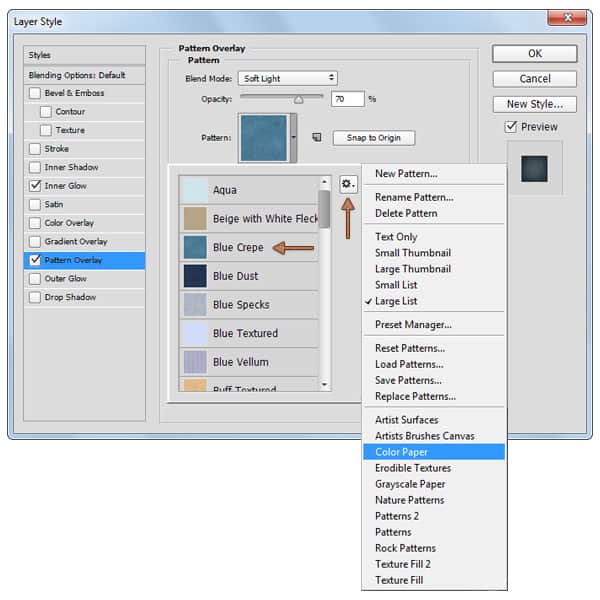
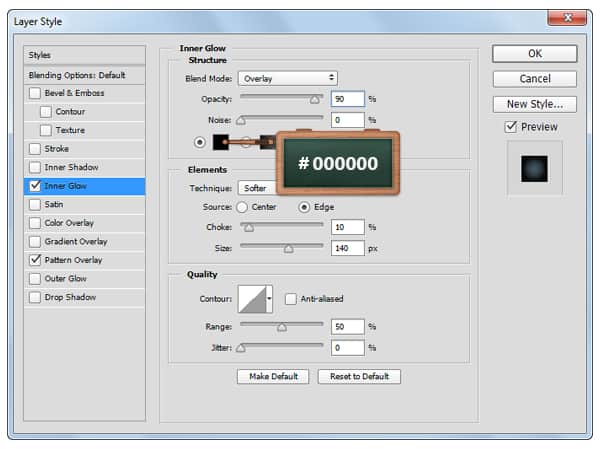
Open the Layer Style window for this layer and enter the settings mentioned below.

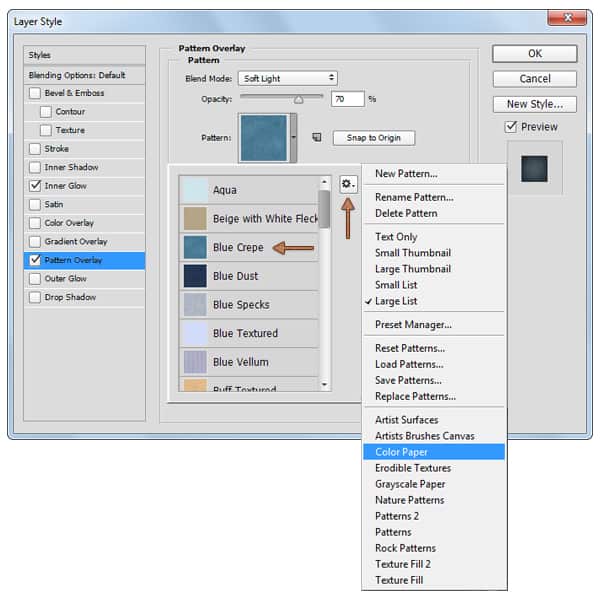
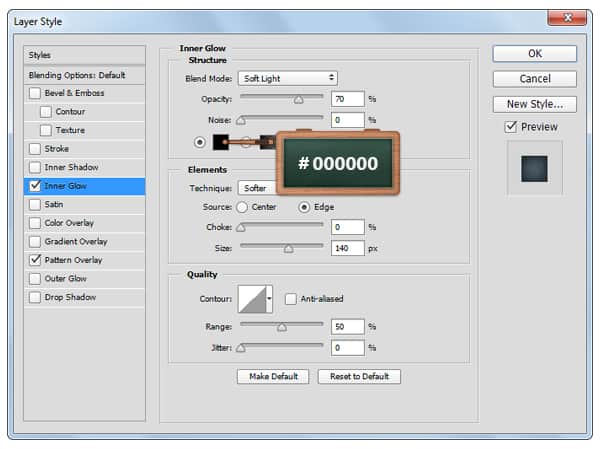
Step 21
If you like the beige color simply fill the canvas with this color #D3C2B4, open the Layer Style window and enter the settings mentioned below.
Step 22
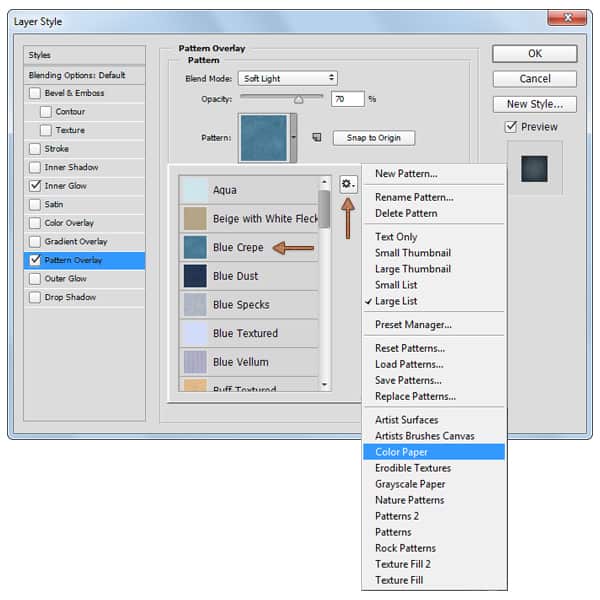
If you prefer the blue color, fill the canvas with this color #AECCE6, open the Layer Style window and enter the settings mentioned below.

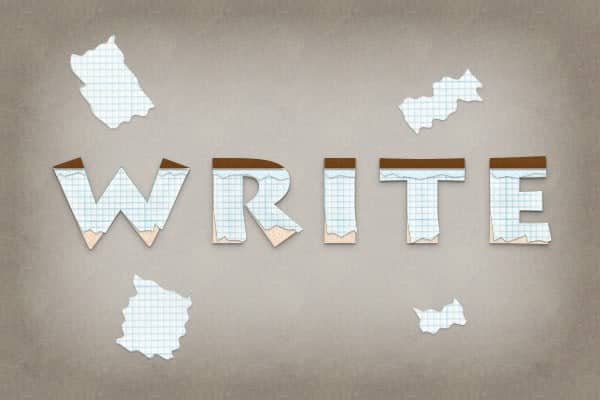
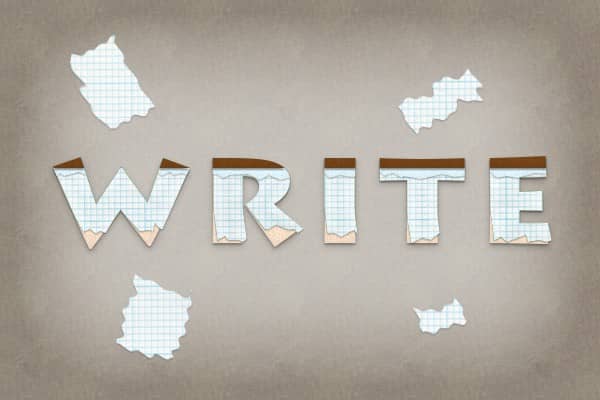
Final Results


Download the PSD
[vc_column width="1/1" el_position="first last"] [vc_cta_button title="Download" href="https://downloads.photoshoptutorials.ws/Notebook.zip" color="btn" size="btn-large" icon="none" target="_self" position="cta_align_right" call_text="Notebook.zip | 1.11 MB" width="1/1" el_position="first last"] [/vc_column]
Tutorial by Razvan Gabriel


One comment on “Create a Notebook Text Effect in Photoshop”
This one was fun to make! Thank you for this awesome tutorial.