Make skin look perfect in one-click with these AI-powered Photoshop actions.

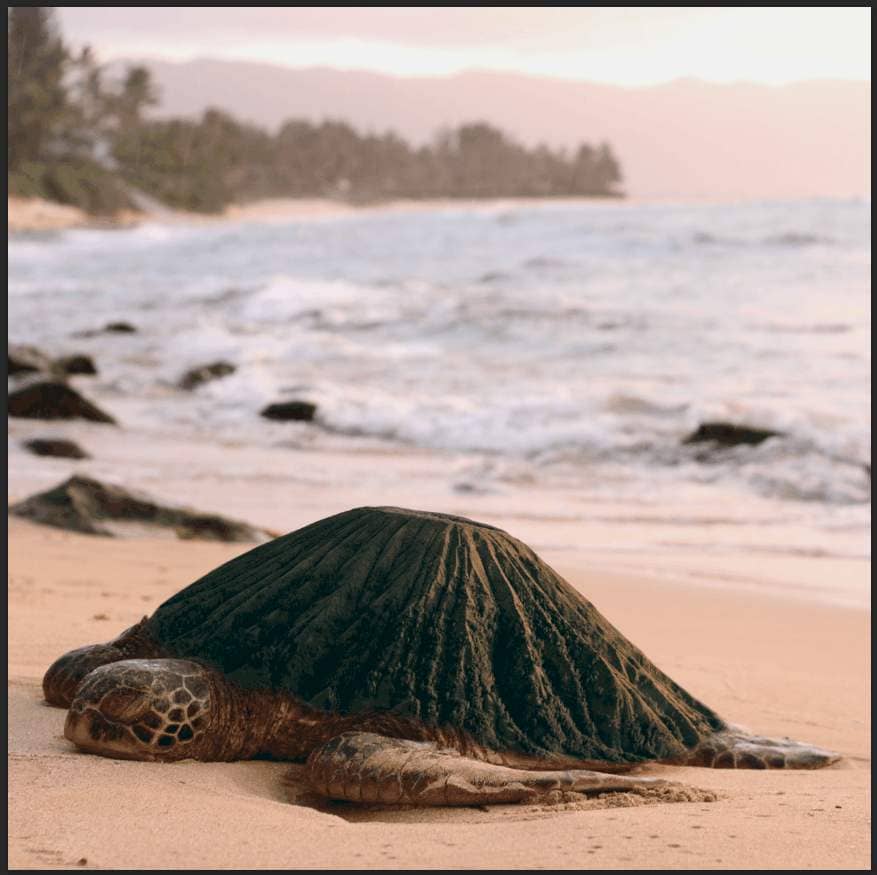
Step 7
Add Adjustment Layer "Color Balance"
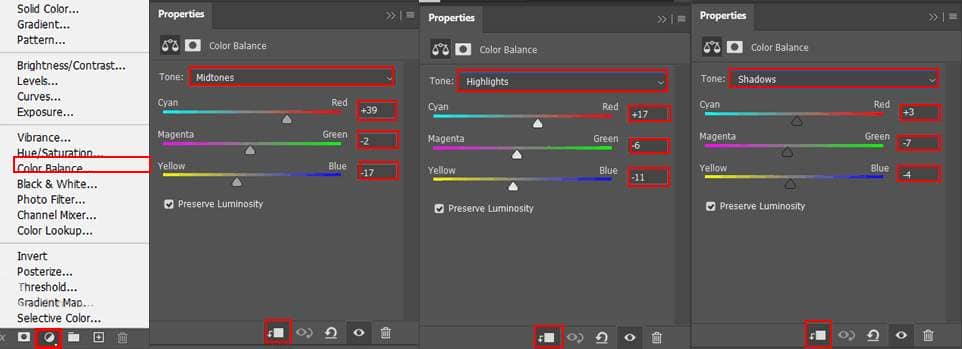
Step 8
Add Adjustment Layer "Hue/Saturation"
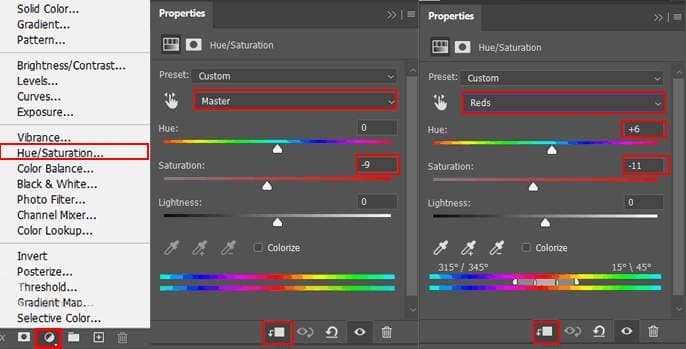
Step 9
Add Adjustment Layer "Exposure"
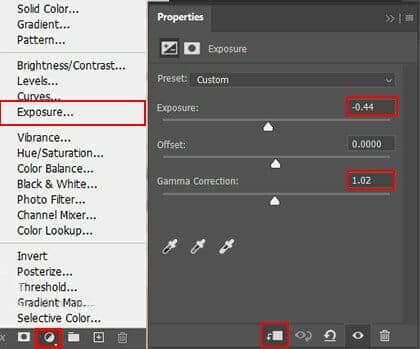
Step 10
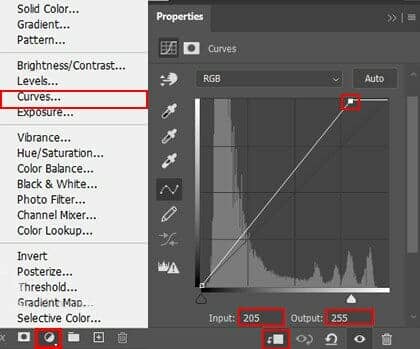
Add Adjustment Layer "Curves"
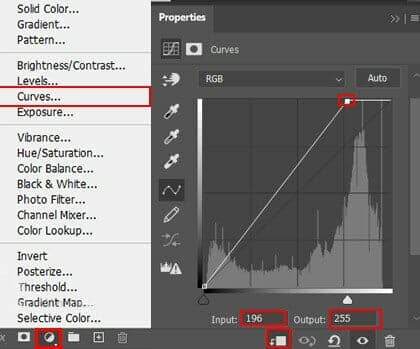
Step 11
Add Adjustment Layer "Curves"
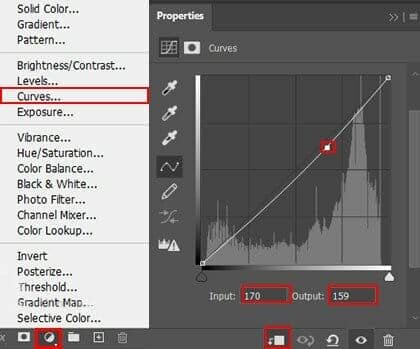
Step 12
Add Adjustment Layer "Selective Color"
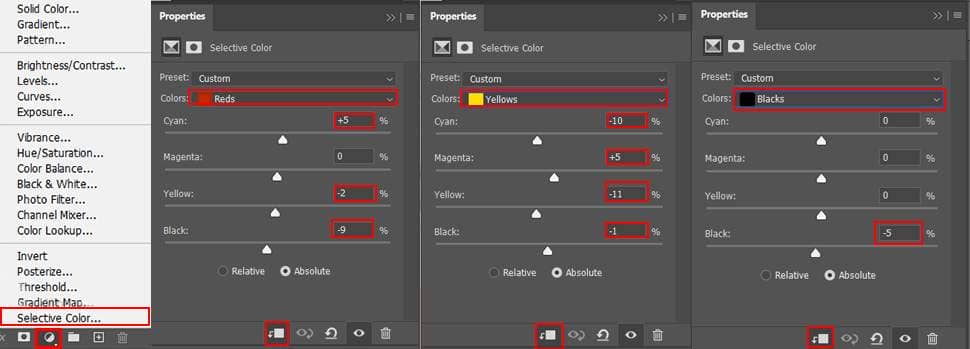
Step 13
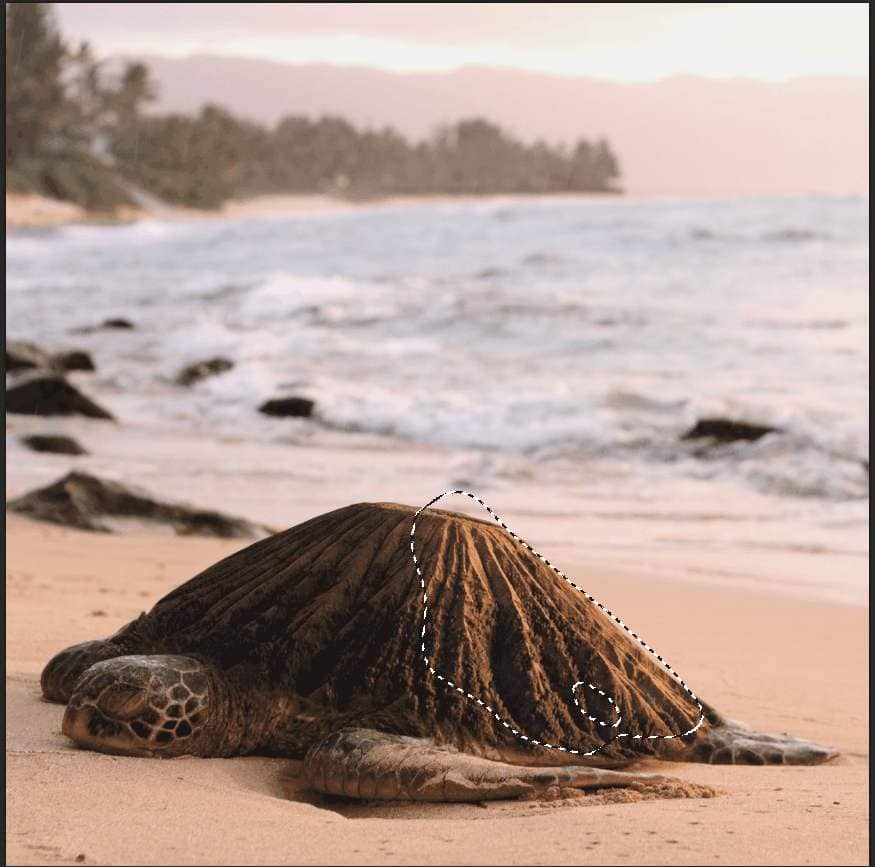
Add Adjustment Layer "Curves" and press Ctrl/Cmd + I to invert. Then use Brush Tool(B) Soft Round with foreground color white and paint on right side of Volcano. Opacity set to 50%.
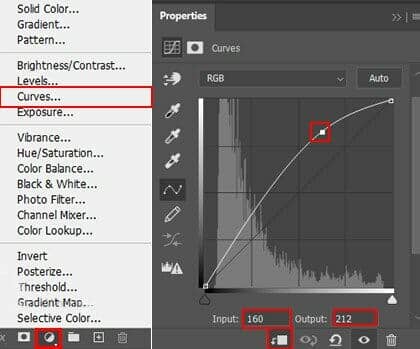
Step 14
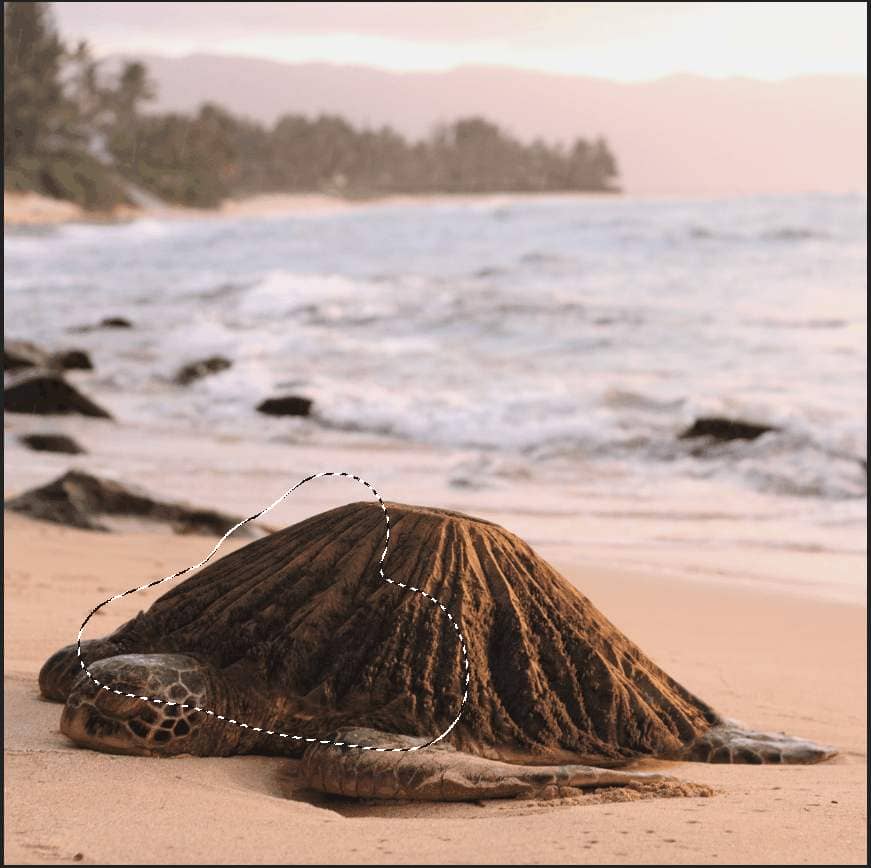
Add Adjustment Layer "Curves" and press Ctrl/Cmd + I to invert. Then use Brush Tool(B) Soft Round with foreground color white and paint on left side of Volcano.
Step 15
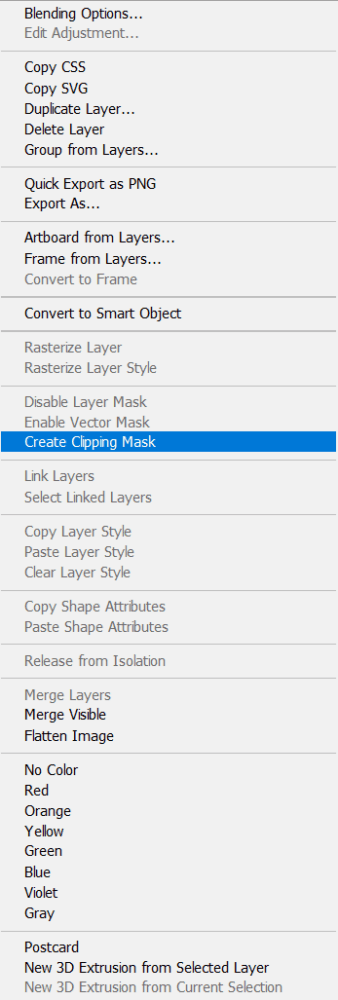
Create a new layer and change Blend mode to Soft Light and Opacity 30% then use a Brush Tool(B) Soft Round with foreground color white. Then paint to right corner.
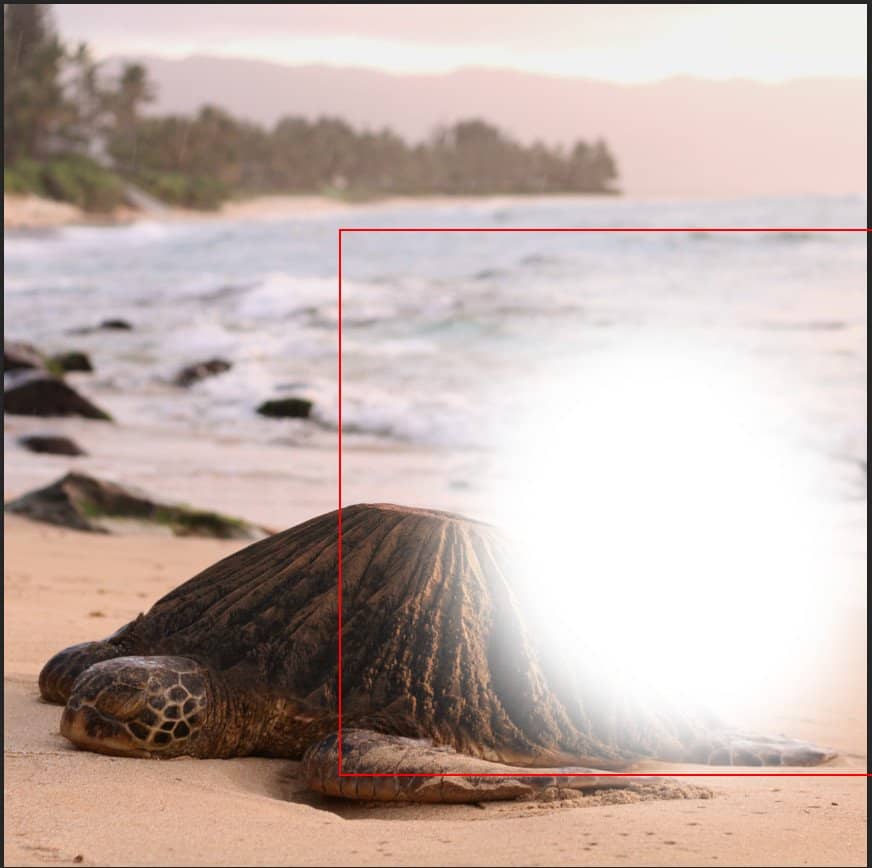
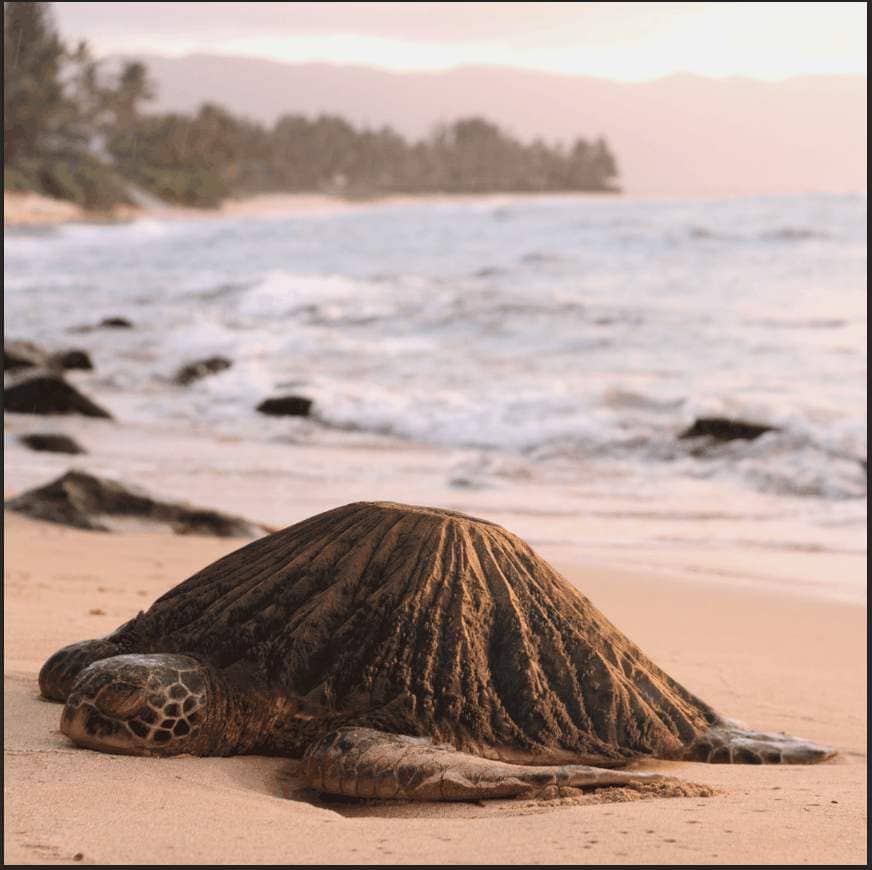
Step 16
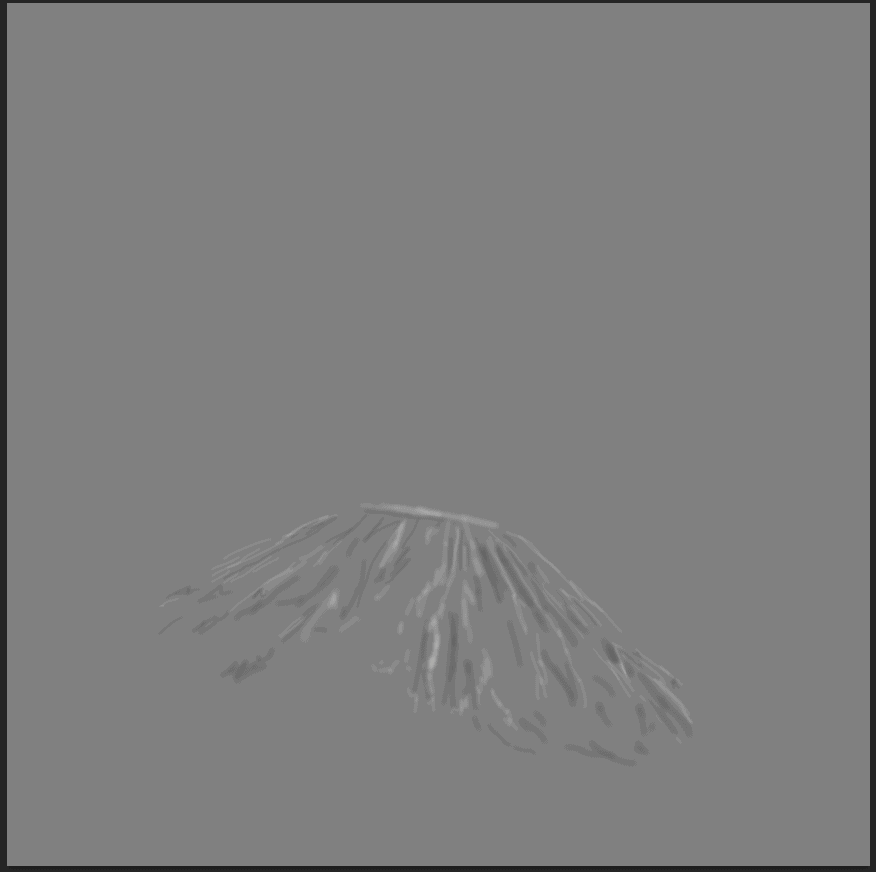
Now, create more lights. Create a new layer then go to Edit > Fill and Contents: 50% Gray and press Ok.

Now use Brush Tool(B) Soft Round with foreground color white and Brush Opacity set to 10-20%. Then start painting. Take a look at the example in the picture below how much you need to paint, where there is the most white color, draw the most. Then change foreground color to black and paint dark parts. Blend mode change to Overlay.
Step 17
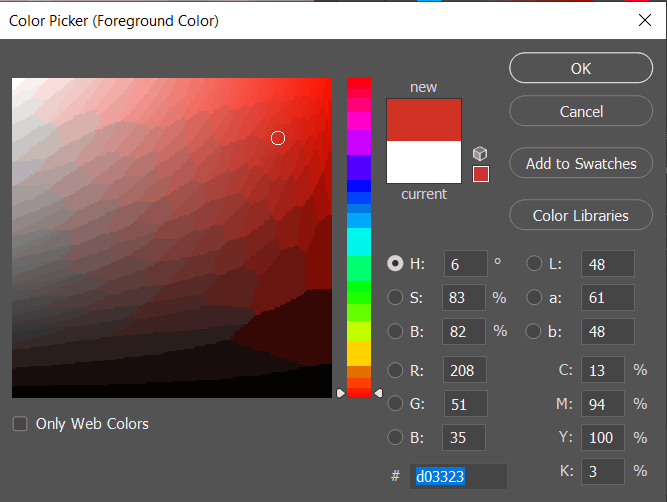
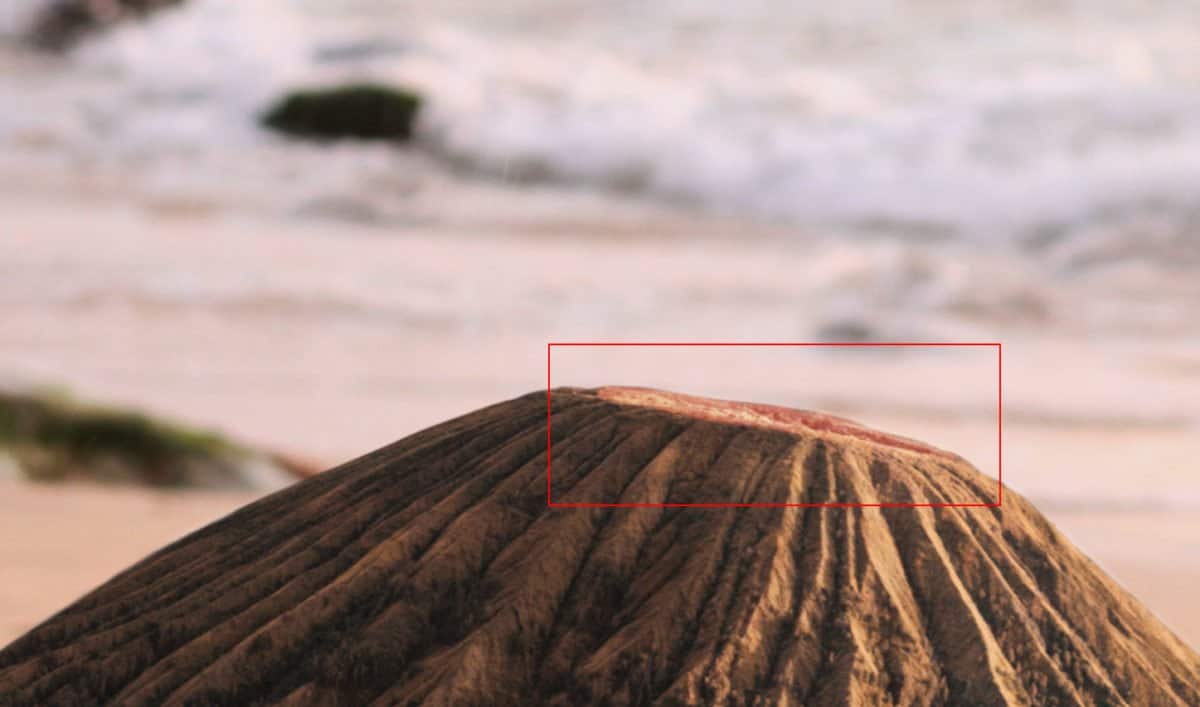
Now create a new layer and use Brush Tool(B) Soft Round with foreground color Red #d03323 and paint on a hole in the volcano. Blend mode change to Color Dodge and Opacity set to 50%.
Step 18
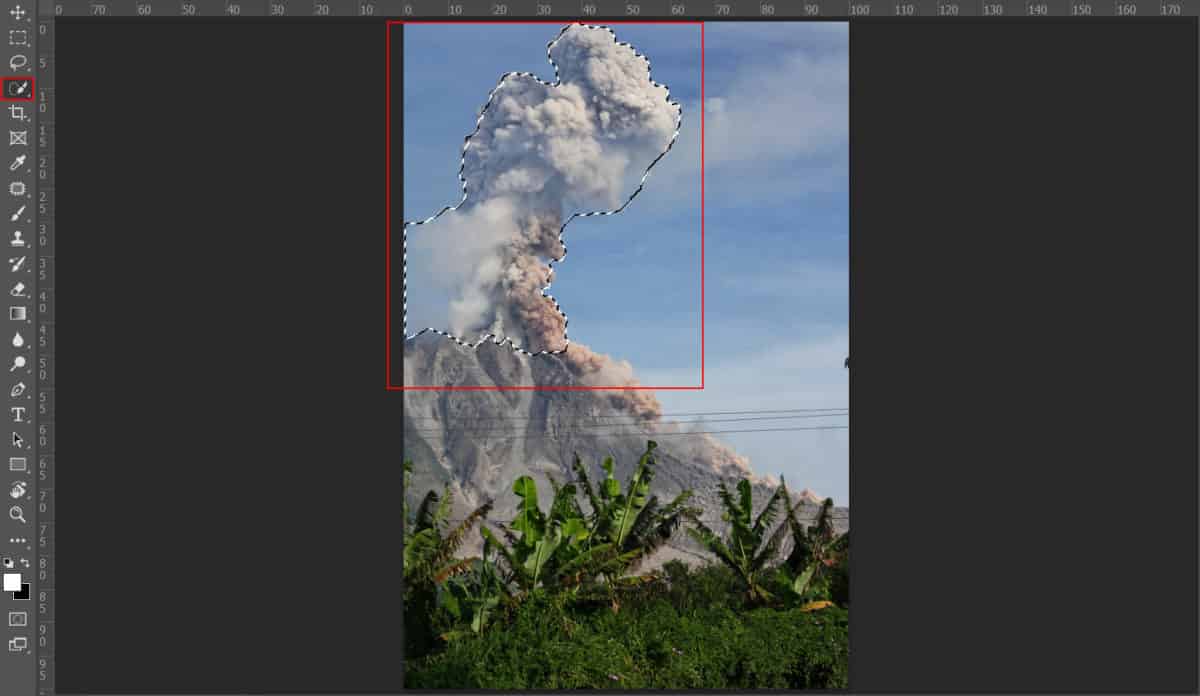
Now we will add smoke, Go to File > Open and select Smoke. After you open the image, use Quick Selection Tool(W) and start selecting. After the selection area has been created, simply copy (Ctrl / Cmd + C) and Paste (Ctrl / Cmd + V) it to our work canvas. Then position the image with the transform tool (Ctrl / Cmd + T). Hold Alt + Shift and resterize like image below. In Photoshop CC only hold Alt to resterize al sides together
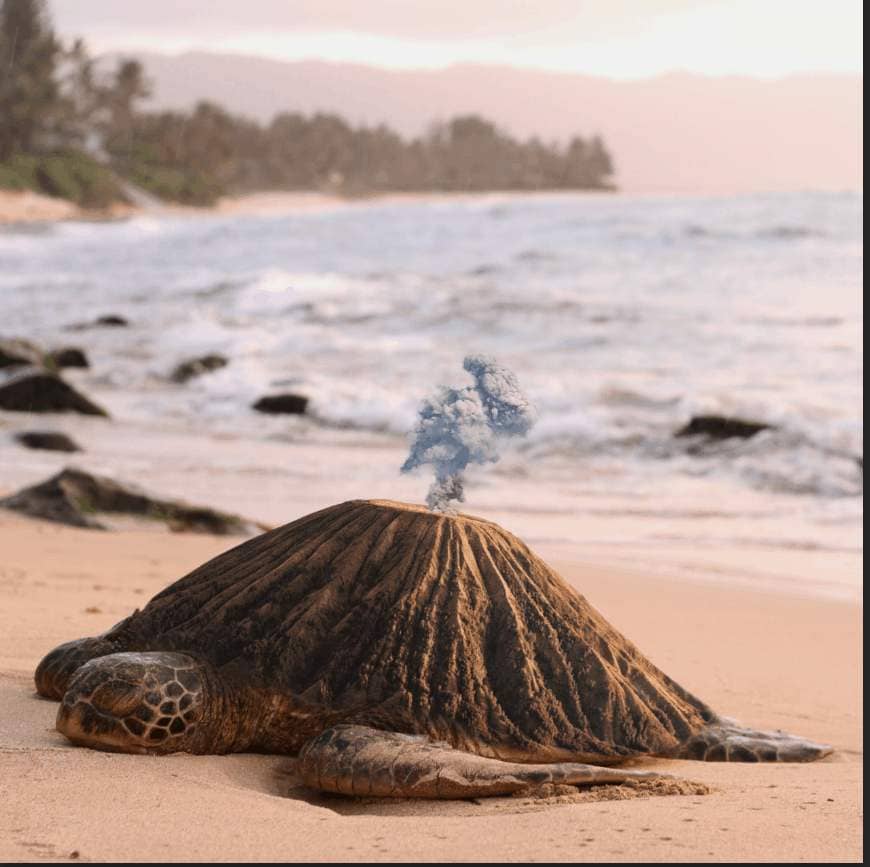
Next, we need Clouds for brush but first we need to import brushes. Select a Brush Tool(B) and right click on background. Now click on the gear icon and Import Brushes (Select a downloaded brush).


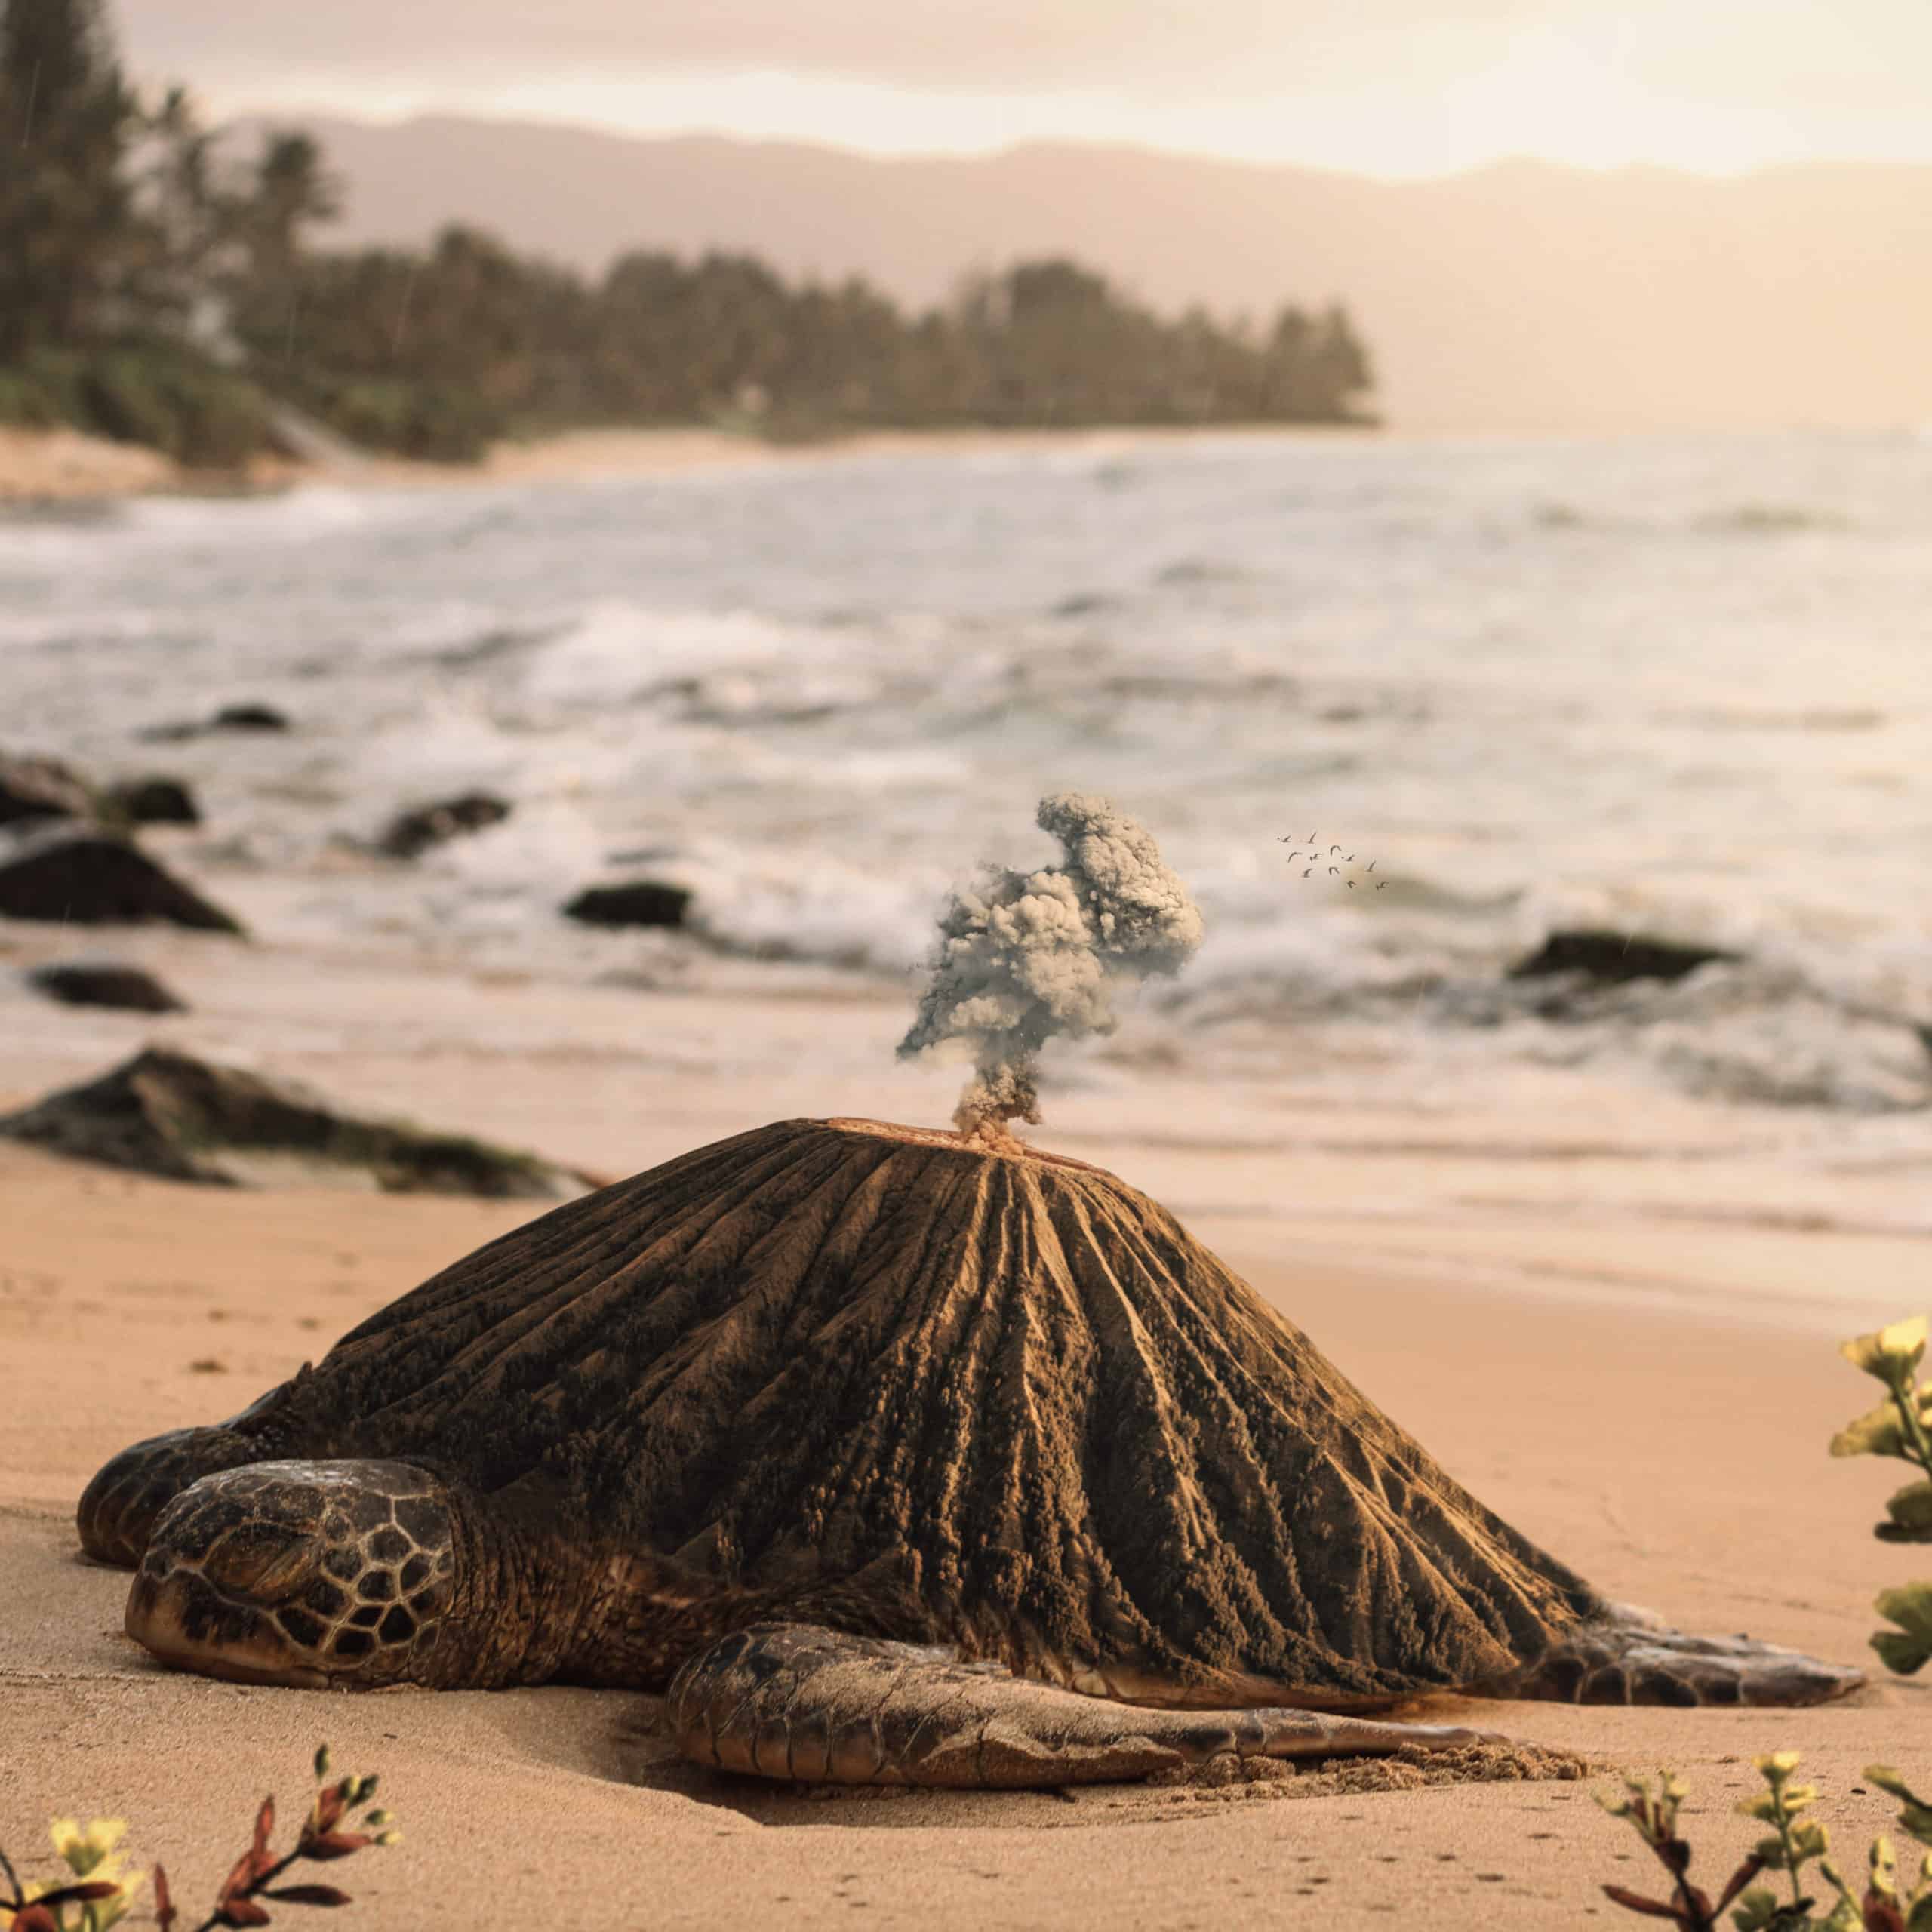
Next, use Brush Tool(B) select the first clouds brush and create a layer mask then start painting around the smoke. Look picture below...


2 comments on “Create a Surreal scene of Turtle Volcano”
very good tutorial, great photoshop file
Magnifique, très bonnes explications Bravo