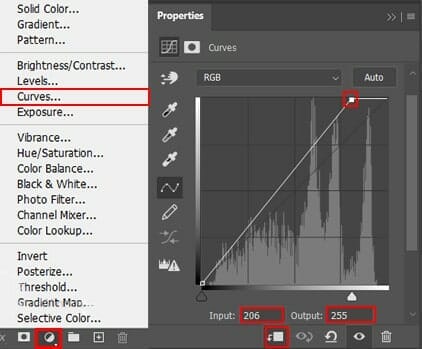
Step 29
Add Adjustment Layer “Exposure”

Now select Ivy layer and adjustment layer then put to folder (Ctrl/Cmd +G)

Step 30
Now make two more copies (Ctrl/Cmd +J) Then position the image with the transform tool (Ctrl / Cmd + T). Hold Alt + Shift and resterize like image below. In Photoshop CC only hold Alt to resterize al sides together.


Step 31
Add Adjustment Layer “Color Fill”. Blend mode change to Hue with Opacity 30%.

Step 32
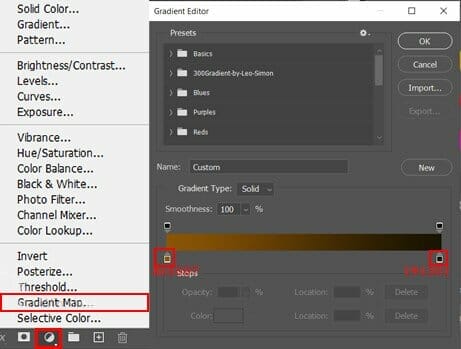
Add Adjustment Layer “Gradient Map” Blend mode change to Soft Light with Opacity 50%.

Step 33
Add Adjustment Layer “Color Lookup” 3DLut File set to Futuristic Blake. Opacity reduce to 50%.

Step 34
When we finished all this, now merge all layers to one. Slecet the last layer and hold CTRL/CMD + SHIFT + ALT + E. Now we have a final layer, right click on mouse and select Convert to Smart Object. Then go to Filter > Camera RAW Filter. At its most basic, the Photoshop Camera Raw filter allows you to use the functions of the ACR interface at any time within Photoshop.

Step 35
Now in Camera Raw Filter, set the Value: Basic
- Temp: -4
- Tint: +1
- Exposure: -0.10
- Contrast: +4
- Highlights: +14
- Shadows: +9
- Whites: +14
- Blacks: -4
- Texture: +10
- Clarity: +20

Curve
- Highlights: +12

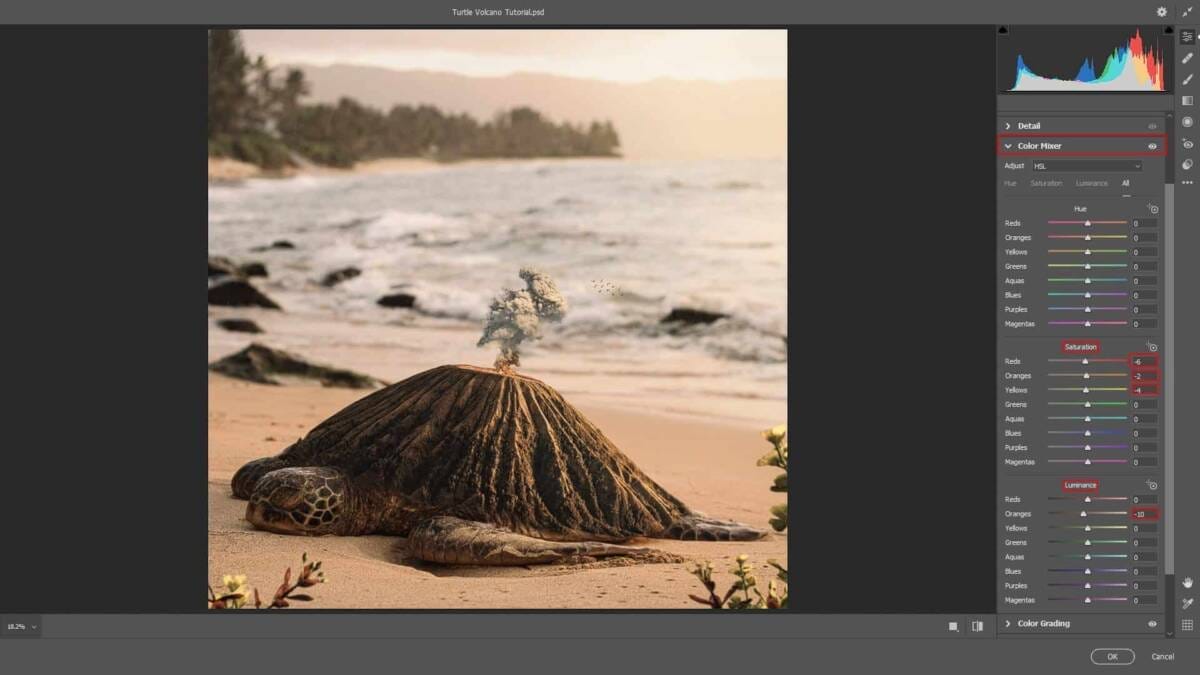
HSL Adjustments
Saturation
- Reds: -6
- Oranges: -2
- Yellows: -4
Luminance
- Oranges: -10

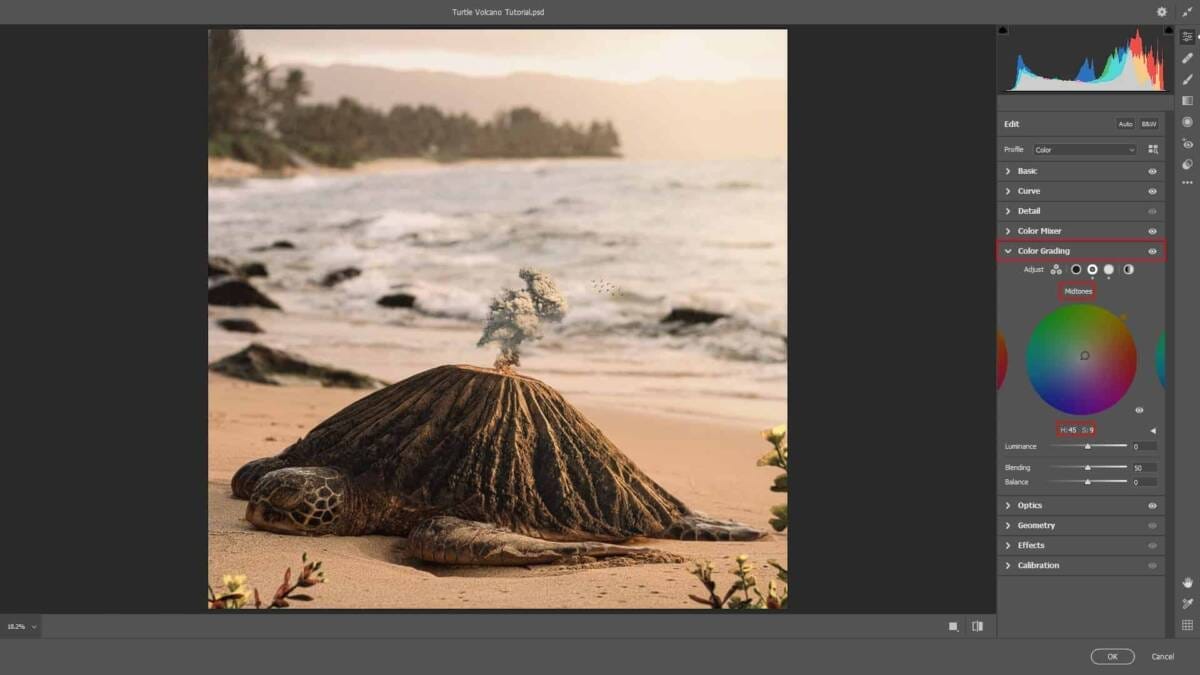
Color Grading
- Midtones: H45 S9

Color Grading
- Highlights: H40 S17

Optics
- Vignette: -12

And finally, everything should look like this.

Final Results

Download the PSD
2 responses to “Create a Surreal scene of Turtle Volcano”
-
very good tutorial, great photoshop file
-
Magnifique, très bonnes explications Bravo


Leave a Reply