Turn any photo into a dot grid artwork with these Photoshop actions. You'll get great results with dots that change size. They get larger in brighter areas and smaller in darker areas. Free download available.
In this tutorial, I'll show you how to create a fantasy scene featuring a flying turtle. First, we'll build the base scene using two images of sky and landscape. After that, we'll add the turtle, wings, child, and birds. Later, we'll create some soft, dreamy effects and use several adjustment layers to enhance the final effect.
Read more: How to Create a Fantasy Flying Turtle with Adobe PhotoshopPreview of the Final Result

Tutorial Resources
Step 1
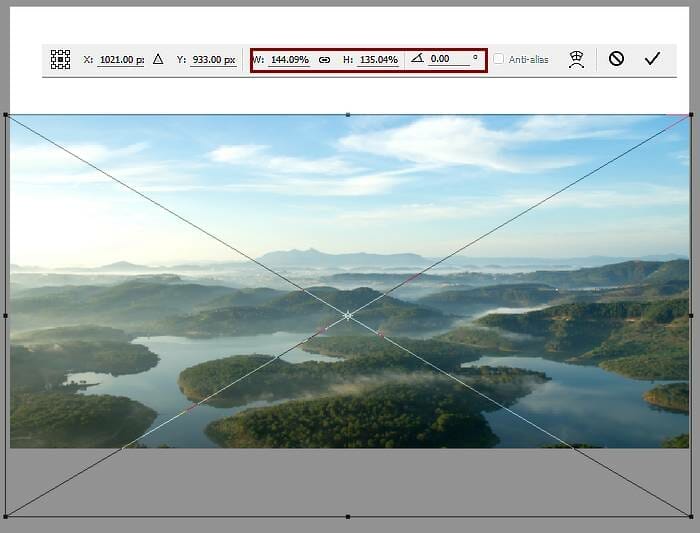
Create a new 2052x1333 px document and fill it with white. Open the landscape image and drag it into the white canvas using the Move Tool (V). Use the Free Transform Tool (Ctrl+T) to stretch the width of the image a bit to be larger than the original.
Step 2
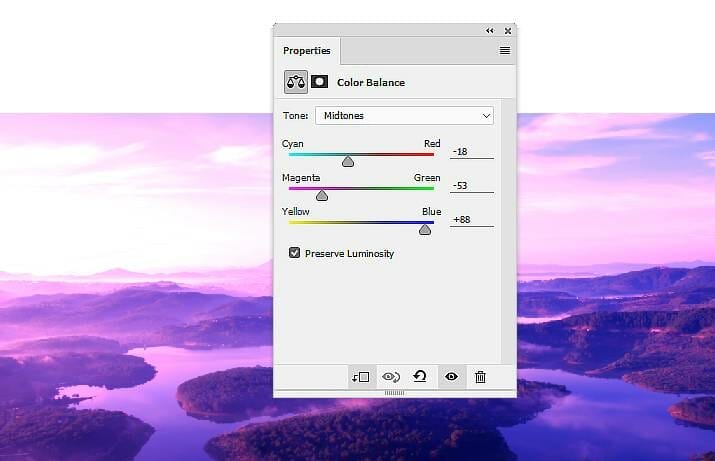
Go to Layer > New Adjustment Layer > Color Balance and set it as Clipping Mask. Change the Midtones and Highlights settings:

Step 3
Create a Photo Filter adjustment layer (set as Clipping Mask) and pick the color #4379ab:

Step 4
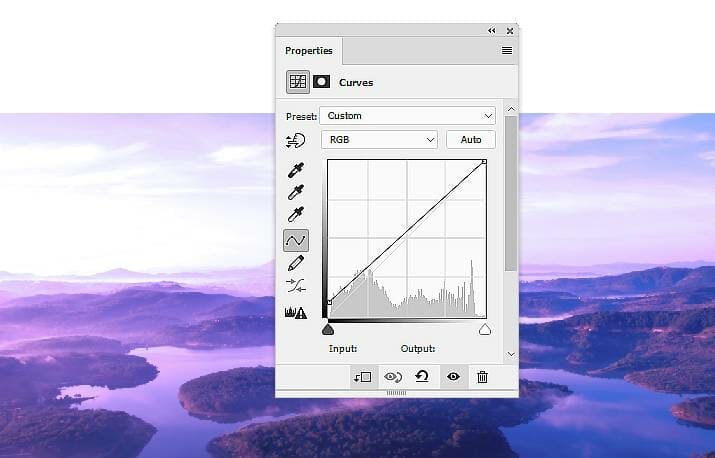
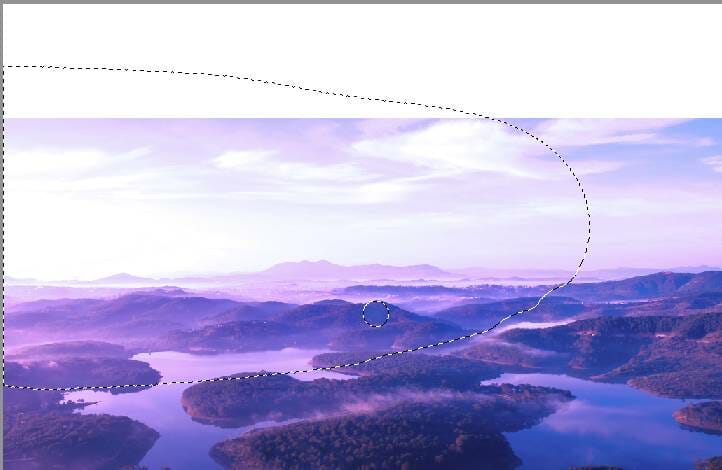
Make a Curves adjustment layer and increase the lightness a bit to reduce the contrast and shadow of the islands on the right. On this layer mask, activate the Brush Tool (B) and select a soft round one with black color. Use this brush to erase the light effect on the left .
Step 5
Add a Levels adjustment layer with the same purpose. On this layer mask, use a soft black brush to remove the misty effect on both left and right sides of the landscape.

Step 6
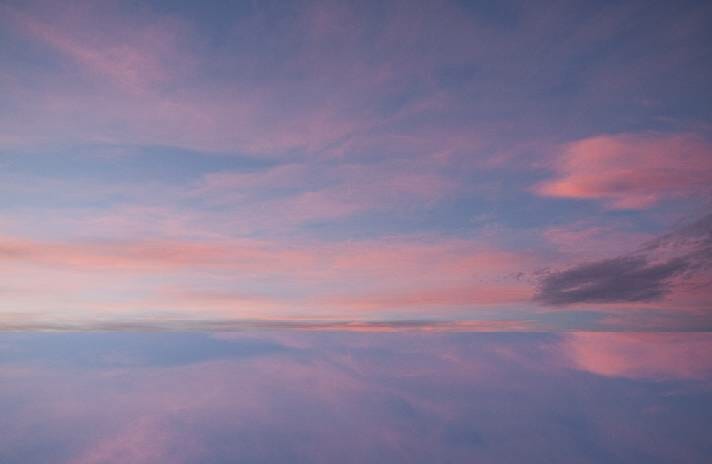
Open the sky image and use the Rectangular Marquee Tool (M) to select the sky part and place it onto the upper of the main document using the Move Tool. Press Ctrl+J to duplicate this layer and flip it vertical (Edit > Transform > Flip Vertical) to create the reflection of the sky. Set this layer below the first one and move it down as the screenshot below shows:

Step 7
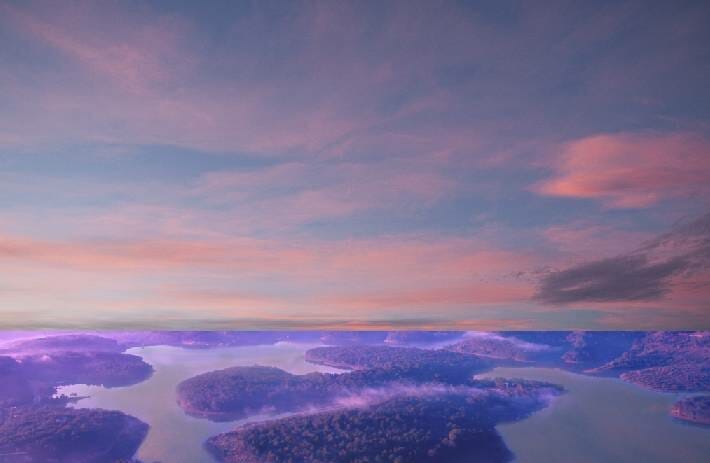
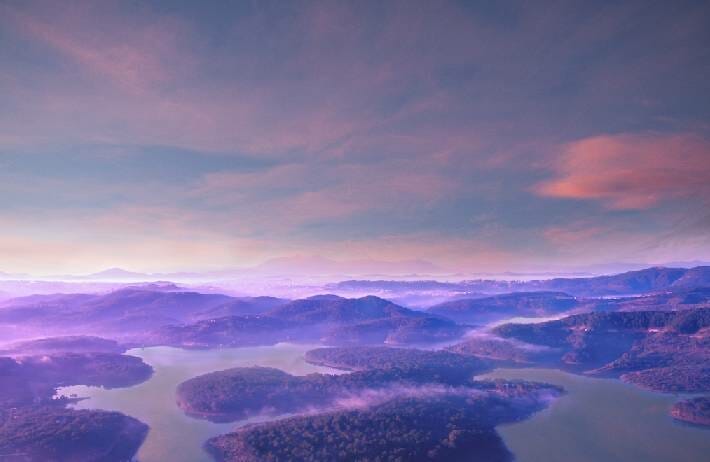
On each of the sky and its reflection layers, click the second button at the bottom of the Layers panel to add a mask to these layers. On the reflection layer, use a soft black brush to reveal the islands except some on the bottom right of the canvas as they're too small . On the sky layer, use a soft black brush to erase the sky part covering the islands.
Step 8
Select the sky and the reflection layers and hit Ctrl+G to make a group for them. Change the group's mode to Normal 100% and make a Curves adjustment layer within this group. Increase the lightness and on this layer mask, use a soft black brush to erase the bright effect on the bottom of the reflection.

Step 9
Create a Color Balance adjustment layer and change the Midtones and Highlights values to make the color and lightness of sky and its reflection match the landscape.


Step 10
Cut out the turtle and place him in the middle of the canvas.

Step 11
Make a Hue/Saturation adjustment layer (set as Clipping Mask) and change the Master, Yellows and Cyans settings:


Step 12
Create a Color Balance adjustment layer and alter the Midtones values:

Step 13
Add a Photo Filter adjustment layer and pick the color #7928ff:

Step 14
Make a Curves adjustment layer to brighten the contour of the turtle to fit the main light source (from the left). On this layer mask, use a soft black brush to paint on the rest of the turtle to keep their lightness and contrast.

Step 15
Create another Curves adjustment layer to bring more light to the bright side of the turtle. The selected areas show where to paint on the layer mask.

Step 16
Open the wings image and isolate the wings only to add to the back of the turtle. Flip them horizontally by choosing Edit > Transform > Flip Horizontal. Add a mask to this layer and use a medium-hard black brush to erase some unwanted details to blend the wings with the back.


Step 17
Make a Color Balance adjustment layer to change the color of the wings:


Step 18
Create another Color Balance adjustment layer to give more magenta to the wings:


Step 19
Add a Hue/Saturation adjustment layer to change the color of the bottom of the wings a bit. Paint on the rest so it won't be affected by this adjustment layer.

Step 20
Make a Curves adjustment layer to brighten the contour of the wings/feathers. On this layer mask, paint on the back side to keep it lightness and shade.

Step 21
Create a new layer and use a very small brush with the color #f9f9fd to paint highlights along the contour of the wings/feathers.

Step 22
Isolate the child and place her into the middle of the wings, remembering to flip her horizontally. Add a mask to this layer and use a small hard black brush to erase a part of her legs and body to hide them behind the wings.


Step 23
Create a Color Balance adjustment layer and change the Midtones settings:

Step 24
Add another Color Balance adjustment layer to continue changing the color of the child.

Step 25
Make a Hue/Saturation adjustment layer to change the color of her jeans.

Step 26
Create a Curves adjustment layer to brighten the contour and the areas of the child which are illuminated by the light from the background. The selected areas show where to paint on the layer mask.

Step 27
Make a new layer, change the mode to Overlay 100% and fill with 50% gray. Activated the Dodge and Burn Tool (O) with Midtones Range, Exposure about 15-20% to refine the light and shadow on the child. You can see how I did it with Normal mode and the result with Overlay mode.


Step 28
Open the birds image and take different ones to add to the our main document. Place them along the way of the flying turtle.

Step 29
Create a group for the bird layers and change the group's mode to Normal 100%. Add a Color Balance adjustment layer and change the Midtones values:

Step 30
Make another Color Balance adjustment layer to continue changing the color of the birds.

Step 31
Add a Curves adjustment layer to brighten the birds. On this layer mask, use a soft black brush to erase the effect on the bright parts of some birds.

Step 32
Create another Curves adjustment layer to increase the light and change the color of the birds. The selected areas show where to erase to remove the effect on the parts which are bright enough.

Step 33
Add a mask to the birds' group and use a soft black brush with the opacity about 10-15% to reduce the visibility of the birds to make them blended better with the sky.

Step 34
Create a new layer on top of the layers and use a soft brush with the color #f9f9fd to paint on the birds' body to add more light and the dreamy effect to them. Change this layer mode to Hard Light 100%.

Step 35
Make a new layer and use the same brush to paint some soft and dreamy effect around the head of the turtle. Change this layer mode to Soft Light 20%.

Step 36
Add a Color Balance adjustment layer on top of the layer and change the Midtones settings:

Step 37
Make a Gradient Map adjustment layer and pick the colors #0b553f and #fcff00. Lower the opacity of this layer to 20%.

Step 38
Create a Selective Color adjustment layer and change the Greens and Cyans values. On this layer mask, use a soft black brush with the opacity about 15% to reduce the color's effect on the island on the middle of the foreground.


Step 39
Add another Selective Color adjustment layer and alter the Cyans settings:

Step 40
Continue with a new Selective Color adjustment layer to change the color of the mist on the left to fit the background. Paint on the rest so it won't be affected by this adjustment layer.

Step 41
Create two Vibrance adjustment layer s to enhance the color and light of the whole scene. On the second layer, use a soft black brush to erase and reduce the effect on some areas of the canvas.


Step 42
Make a new layer and use a soft brush with the color #1d173c to paint shadow of the child and the wings on the turtle's back.

Final Result

3 comments on “How to Create a Fantasy Flying Turtle with Adobe Photoshop”
Hallo , please i wanted download psd of the tutorial 'flying turtle '
But is not available.
any help please ?
kind regards
[email protected]
Thank you in advance
Thanks for letting us know, the link has been fixed!
link psd broken :(