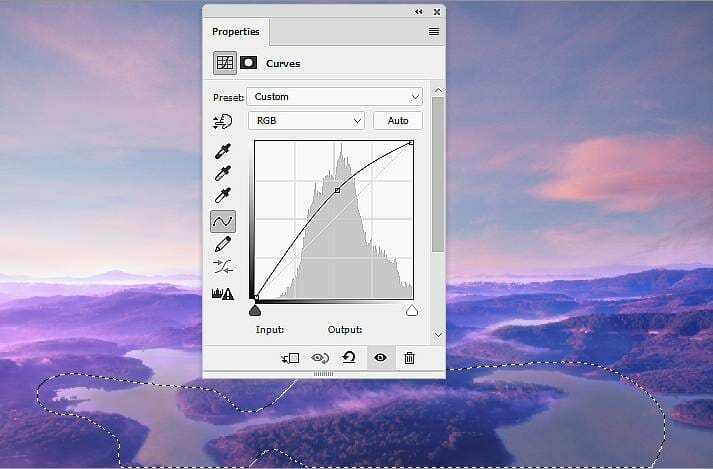
Step 9
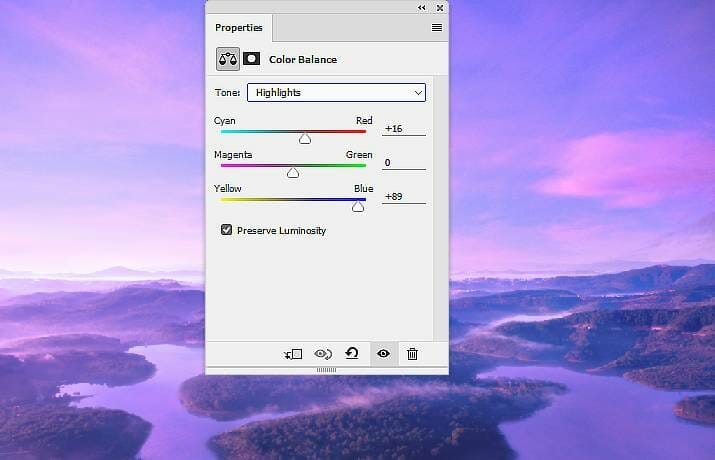
Create a Color Balance adjustment layer and change the Midtones and Highlights values to make the color and lightness of sky and its reflection match the landscape.
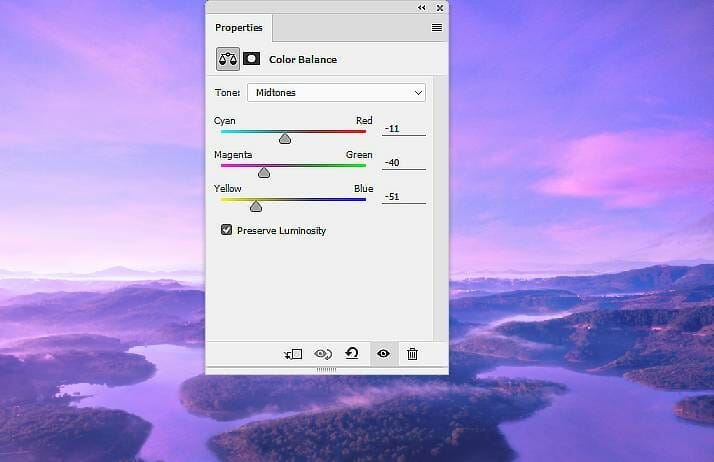
Step 10
Cut out the turtle and place him in the middle of the canvas.

Step 11
Make a Hue/Saturation adjustment layer (set as Clipping Mask) and change the Master, Yellows and Cyans settings:


Step 12
Create a Color Balance adjustment layer and alter the Midtones values:
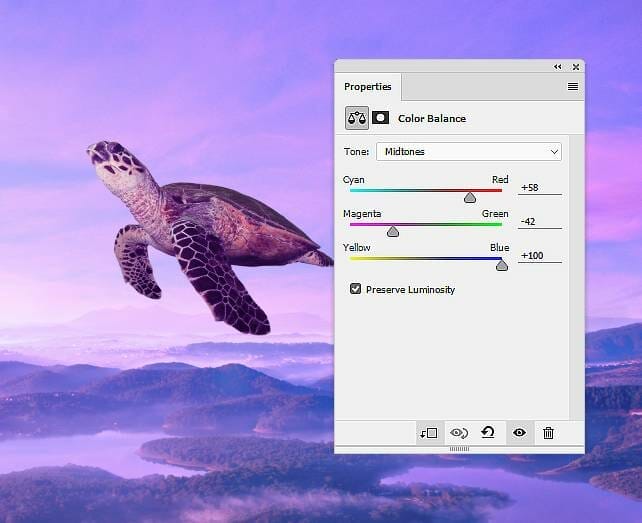
Step 13
Add a Photo Filter adjustment layer and pick the color #7928ff:
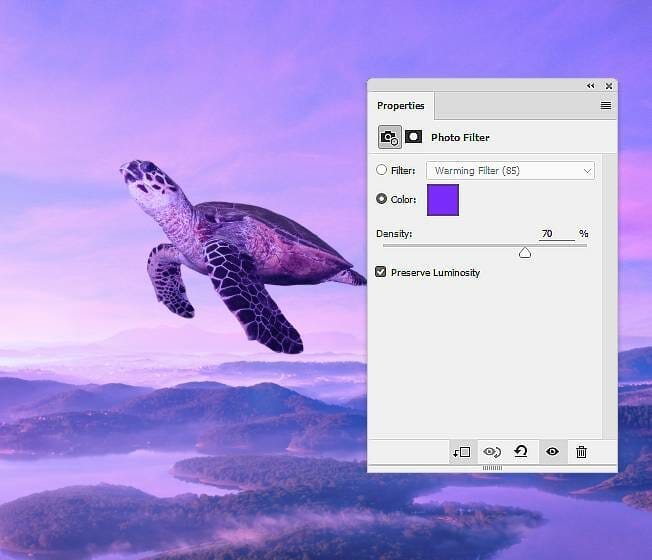
Step 14
Make a Curves adjustment layer to brighten the contour of the turtle to fit the main light source (from the left). On this layer mask, use a soft black brush to paint on the rest of the turtle to keep their lightness and contrast.

Step 15
Create another Curves adjustment layer to bring more light to the bright side of the turtle. The selected areas show where to paint on the layer mask.

Step 16
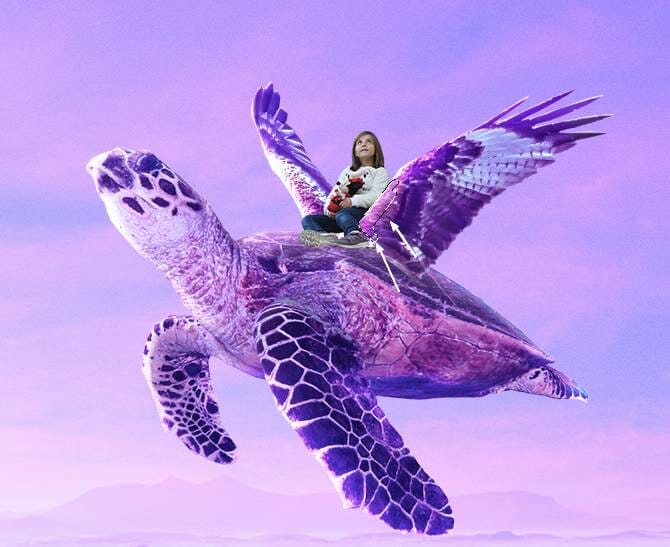
Open the wings image and isolate the wings only to add to the back of the turtle. Flip them horizontally by choosing Edit > Transform > Flip Horizontal. Add a mask to this layer and use a medium-hard black brush to erase some unwanted details to blend the wings with the back.


Step 17
Make a Color Balance adjustment layer to change the color of the wings:
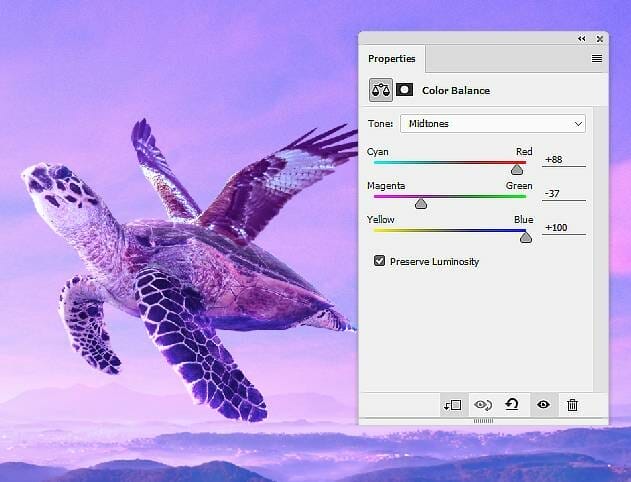

Step 18
Create another Color Balance adjustment layer to give more magenta to the wings:
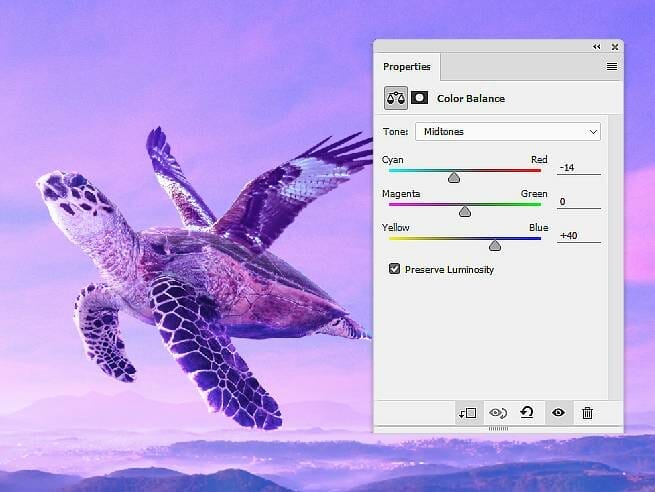

Step 19
Add a Hue/Saturation adjustment layer to change the color of the bottom of the wings a bit. Paint on the rest so it won’t be affected by this adjustment layer.
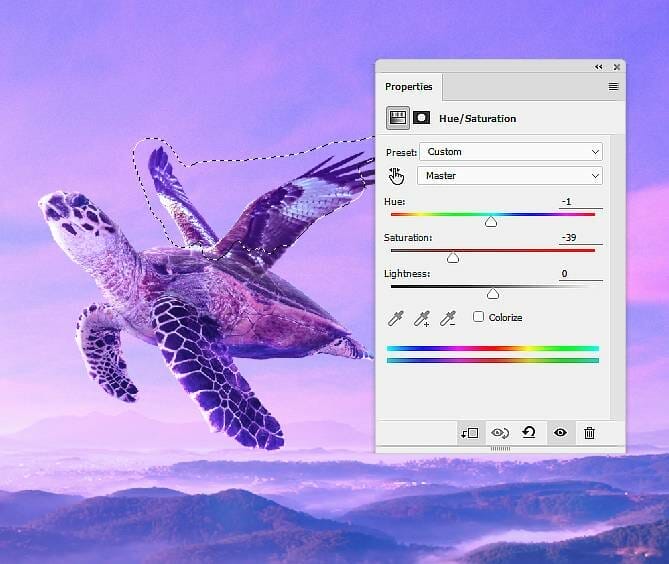
Step 20
Make a Curves adjustment layer to brighten the contour of the wings/feathers. On this layer mask, paint on the back side to keep it lightness and shade.

Step 21
Create a new layer and use a very small brush with the color #f9f9fd to paint highlights along the contour of the wings/feathers.

Step 22
Isolate the child and place her into the middle of the wings, remembering to flip her horizontally. Add a mask to this layer and use a small hard black brush to erase a part of her legs and body to hide them behind the wings.

Step 23
Create a Color Balance adjustment layer and change the Midtones settings:
3 responses to “How to Create a Fantasy Flying Turtle with Adobe Photoshop”
-
Hallo , please i wanted download psd of the tutorial ‘flying turtle ‘
But is not available.
any help please ?kind regards
[email protected]Thank you in advance
-
Thanks for letting us know, the link has been fixed!
-
-
link psd broken :(


Leave a Reply