

Make your artwork look like they're from an alternate universe. These Cyberpunk presets work with Photoshop (via the Camera Raw filter) and Lightroom. Download all 788 presets for 90% off.
Add drama to your photos with this photo-realistic rain effect. In this Photoshop tutorial, you will learn how to combine several Photoshop filters to add rain to your photo.
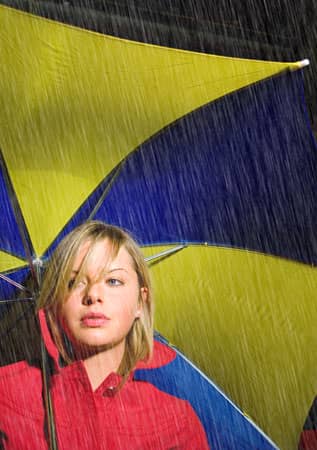
Before and After Star Rain Photoshop Effect
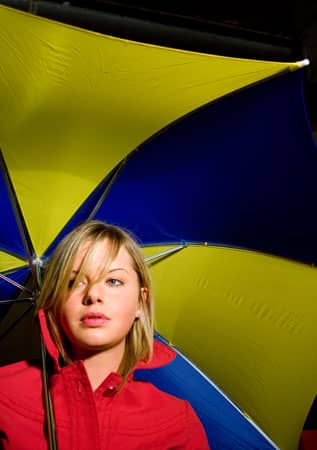
Original Image
Rain Photoshop Tutorial
The Process with Photoshop
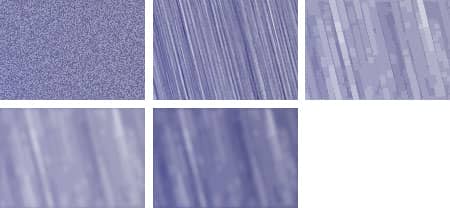
First, a new layer is created for the rain texture. To create the rain texture, we use the Noise filter to add random noise to the image. Then, the noise is blurred with a motion blur. If the photo is a high resolution image, the rain is thickened and blurred to make it look natural. Finally, the rain texture is tweaked for it's density and visibility.
Rain Photoshop Tutorial
Step 1
Open a photo into Photoshop. This is the image that will be used for this tutorial:
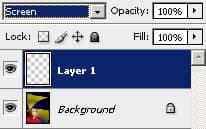
Step 2
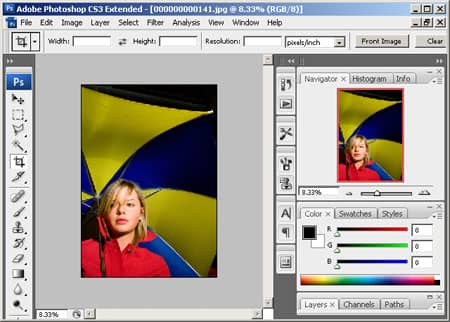
To begin, create a new layer (Layer> New> Layer) and change blending mode of the new layer to Screen. This new layer is where we will create the rain texture.
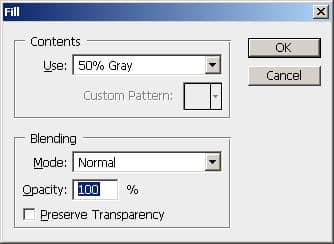
Step 3
With the new layer selected, press Ctrl+F5 to open the Fill tool or open the Edit menu and select Fill. In the Fill tool, select 50% Gray from the drop down menu and click OK.
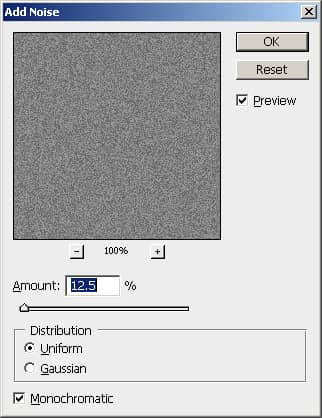
Step 4
Open the Filter> Noise menu and select Add Noise. In the Add Noise tool, leave the default settings, check the Monochromatic option, and click OK.
Step 5
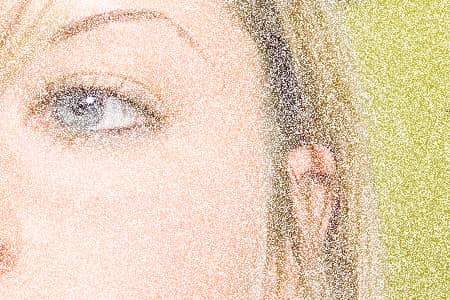
Press Shift+Ctrl+L to apply an Auto Levels or open the Image> Adjustments menu and select Auto Levels. This will make the speckles more visible to aid us in the next steps.
Step 6
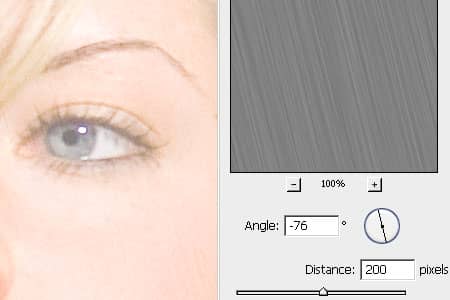
Open the Filter> Blur menu and select Motion Blur. In the Motion Blur tool, adjust the angle and distance to your preference. The angle will adjust the angle of the falling rain and the distance will affect the length of the rain.
Step 7
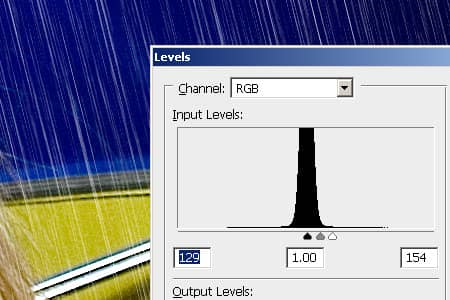
Now we're going to adjust the density of the rain. To do this, open the Levels tool (Ctrl+L or Image> Adjustments> Levels). In the Levels tool, drag the left and right sliders towards the center. Then, while looking at the image behind the Levels tool, drag the black input slider to adjust the density of the rain until you get the density you prefer.
Step 8
If you're working on a high resolution image, the rain may look too thin and sharp. To thicken the rain, we'll be using teh Maximum filter. If you don't want to thicken the rain, you may skip this step. Open the Filter> Other menu and select Maximum. Increase the radius slightly until you get the thickness you desire.
14 comments on “Rain”
hi
your welcome
This is bad
Thanks Obama
This is the best tutorial on adding rain I have seen. Thank you.
Dude, your hints are great!!! If you use them smart the picture changes really pro!!! Love your work! Thx man!
Why do the comments look like a bunch of 14 y/o who think they're funny?
dude shutup
lol PANCAKES HAHAHAHAAA
good..but i need some differend effect...
Squidward
I apologize for my last comment, I didn't realize there were 2 pages, It totally works, great tutorial ;)
I doen't look likein the first picture, this is bullshit
sup noobs