Download Lightroom presets and LUTs, absolutely free. Use the presets to add creativity and style to your photos.

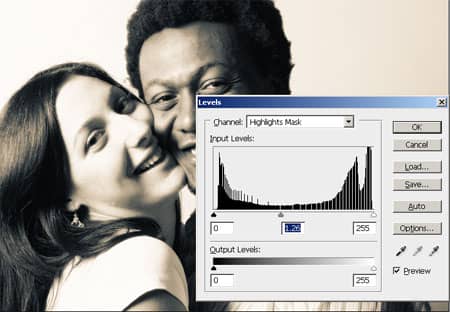
Step 7: Adjust the balance between the two colors
To adjust the balance, we'll be working on the layer mask of the highlights layer. Select the layer mask of the highlights layer then open the Levels tool (Ctrl+L or Image > Adjustments > Levels). Drag the middle input slider toward the left or right to alter the balance of the two colors. For example, in the image below, I gave the orange tint more strength so that the blue is only slightly visible.

Final Results
Original image

Split Toning Photoshop tutorial

You can also try out other color combinations instead of the traditional sepia/blue colors. Below are some examples of what can be done using this technique.


One comment on “Split Toning”
Nice job, thanks