
Make your artwork look like they're from an alternate universe. These Cyberpunk presets work with Photoshop (via the Camera Raw filter) and Lightroom. Download all 788 presets for 90% off.
![step-040[1]](https://cdn.photoshoptutorials.ws/images/stories/b92ae1f6d854_13010/step-0401.jpg?strip=all&lossy=1&quality=70&webp=70&avif=70&w=1920&ssl=1 "step-040[1]")
Step 41
Alt + click again " Background " eyeball iconr to torn on the visibility of all other layers. Make a new layer and paint inside selection using this color: #0c2c54. Double click the layer to enter advanced blending mode and use the settings shown below.

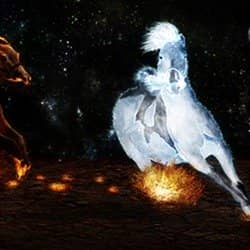
Step 42
Let's add some volume to our horse. Make a new curves adjustment layer and use settings like shown below. Ctrl+click Right Horse layer to load opaque pixels of our horse as a selection. Fill the mask with black and paint with a white brush along the edges. Dab a few times inside the selection too. The idea is that dark areas seem farther away while bright areas seem closer. This little trick will allow us to give a bit of 3D feeling to our horse.

Step 43
Add a new curves adjustment layer and use the settings like shown below. Add a layer mask and fill it with black. Ctrl+click Right horse layer to load it as a selection. Using a white brush dab a few times on the chest and the head area.

Step 44
Let's add some blue smoke from our ice horse nostrils. Import "Smoke brush " and choose color: #b6deec as our foreground color. Select brush "smoke" from the brush preset and set it's size to 175 px. Make a new layer and click once. Transform layer like shown below. Repeat for the other nostril.

Step 45
We will add some inner and outer glow to our horse. Also we are aware that below our horse is a source of heat so let's change his colors accordingly. To do that double click Right Horse layer to enter advanced blending mode and use settings like shown below.

Step 46
Select layer Right Horse and all the layers above him and press ctrl+G to group them. Name this group Ice Horse.

Step 47
Now we will make some ground for our horses. Open the file " Cracked earth texture " and press ctrl+A to select it. Press ctrl+C to copy it. Close the file and go to our open document. Press Ctrl +V to paste it. Press ctrl+T to enter free transform and resize it as shown below.

Step 48
Press Enter and place this layer below our two groups. Name this layer ground.

Step 49
Let's add some color adjustments to our ground layer. Add the next clipping adjustments layer:
2 comments on “Create a Spectacular Space Scene in Photoshop”
what are the settings for the fire horse color balance?
What are the settings used on color balance layer?