
Today I will show you how to create an amazing piece of life under a microscope :) and using only three resource! In this tutorial I’ll show how to transform 3D in a realistic DNA and create a whole picture of it. We pay attention to blending modes and work with a variety of tools and effects. I want to show you one of the creative solutions both in the establishment and in the decision. We will start to create this photo manipulation by transforming DNA. In this section you will learn about working with blending modes and adjustment layers. Then begin to create photo manipulation. In this part, we will work with a variety of tools and create a Bokeh brush. The final picture is to add adjustment layers and effects. You need any version of Photoshop and any knowledge.
Tutorial Resources
Step 1
Create a new document. Go to File > New or the short key Cmd /Ctrl+ N. A blank document with size of 2000 pixels wide and 3000 pixels high, resolution 200 Pixels/Inch.

Step 2
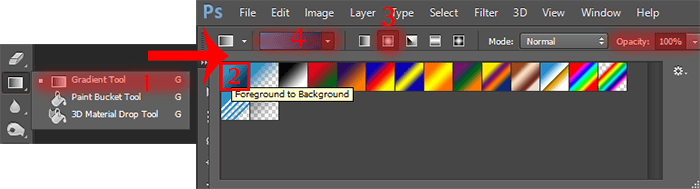
We did not immediately proceed to manipulation. First we will create a new kind of DNA and first need to prepare the background. Take a Gradient Tool (G) and set following settings: Form: “Foreground to Background”, Method: Radial, Opacity: 40%, Foreground color: # 3092bf and Background color # 093554.

Step 3
Create a New layer (Layer > New > Layer or Cmd/Ctrl+ Shift + N or use icon on Layer panel). Draw the gradient as shown in the image below.


Step 4
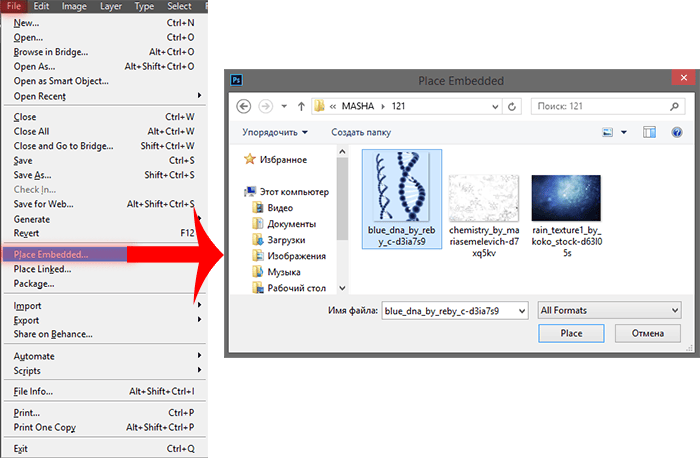
We now proceed to the DNA itself. Go to File > Place (Place Embedded) and select the image “blue_dna_by_reby_c-d3ia7s9”.
Step 5
Use a Rectangular Marquee Tool (M) to select a big DNA. Then add a Layer mask to remove small DNA.

Step 6
Use the Free Transform tool (Ctrl/Cmd+T or Edit > Free Transform) to resize the layer like shown in the image below.

Step 7
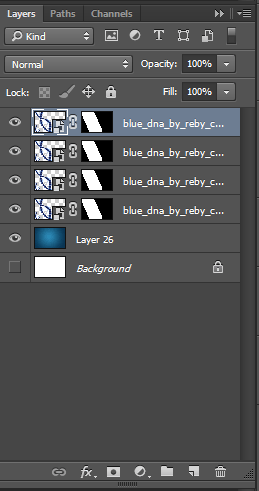
We shall now proceed to the most interesting. We will take the usual 3D and turn it into a real and live macromolecule! To do this, we need to Duplicate a DNA layer (Cmd/Ctrl+ J or Layer > Duplicate Layer) 4 times.
Step 8
Now we will apply a variety of effects from the upper layer to the DNA to the last. Let’s start from the upper layer and work our way to the last (it is desirable not to change the sequence). For the first layer, add several artistic filters to make the outer shell of the DNA. Go to Filter > Filter Gallery…
8 responses to “Create This Abstract Medical Image of DNA with Photoshop”
-

no
-
It’s a good thing that some images come with what’s written… Too many mistakes from picture to writting…
Even the size of the doc is wrongly written….. That’s just poorly written Tut…. -
some pic is not found, please repair it, thank you!
-
Nice one
-
What is RMB?
-
This is the right mouse button.
-
-
thx!
I’d like to learn more same techniques) -
Arne Zou, na das ist ja was für uns.^^
Leave a Reply