

Step 9
So, add the first filter “Dry Brush” in folder “Artistic”. Set the settings like shown in the image below and add a new effect layer. This effect layer make texture on DNA.

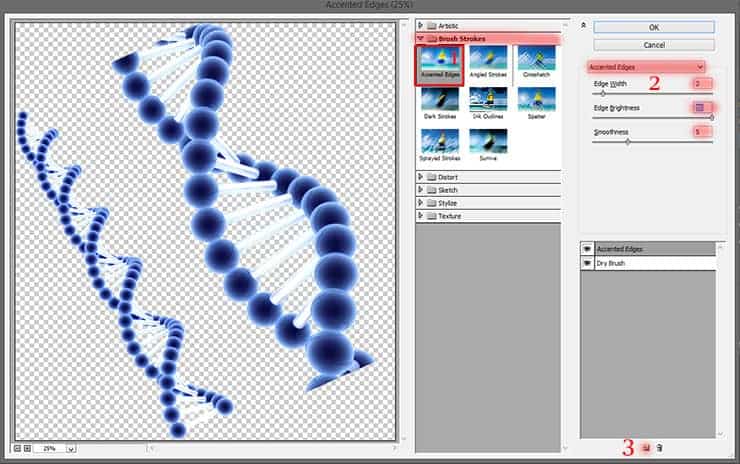
Step 10
Add a second filter “Accented Edges” in folder “Brush Strokes”. Set the settings and add a new effect layer. This layer mare more detailed and deep texture.
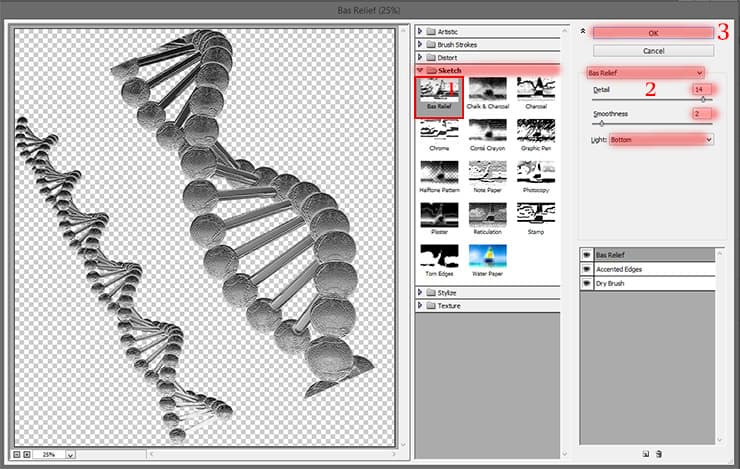
Step 11
And the last filter is “Bass relief” in folder “Sketch” Set the settings and press Ok to apply filters. This filter will make the molecule in the form of bas-relief, but do not worry, we will not leave it like this.
Step 12
Change Blending mode to “Linear Burn”, set Opacity: 46%. Linear Burn mode, the brightness of the original image is reduced by the amount of darkness (brightness deviation from white) image correction. In terms of the curves – a shift in the curve on the value of the correction image of darkness.


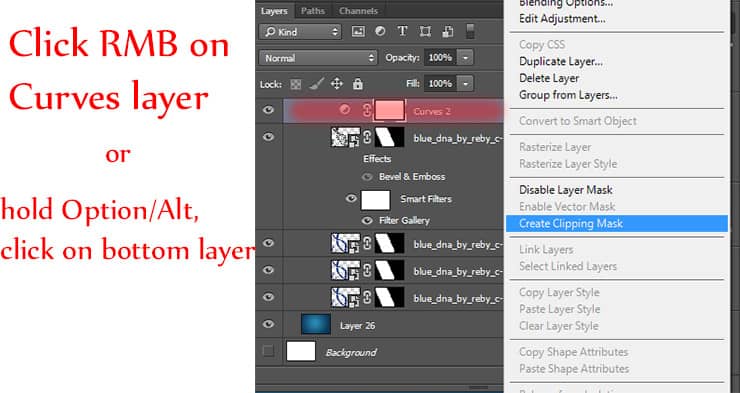
Step 13
Therefore, the image looks a bit dark, but add to it adjustment layer “Curves” (Layer > New Adjustment Layer > Curves… or click on Adjustment Layer icon on Layer panel). Set values to each point as shown in the image below. This layer, we lighten the image, while maintaining its texture.


Set this layer as Clipping mask (click on Curves layer RMB and select “Create Clipping Mask” or use Option/Alt+ Cmd/Ctrl + G or click on the icon of a square with an arrow, as shown in the previous image).
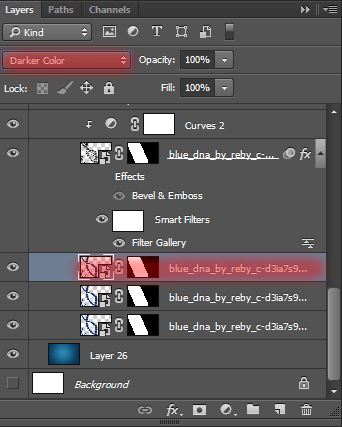
Step 14
Now, proceed to next layer with DNA. For it, set a Blending mode “Darker Color”. Similar to Blending mode “Darken” (Compares two source values and replaces light pixels values of the dark), except that it works on all layers at once, instead of one. When you mix the two layers will remain visible only dark pixels. In our case, this layer will be the basis for the centers in every sphere of DNA.

Step 15
Now, for the remaining two layers DNA, set a Blending mode “Luminosity” and Opacity: 50%. This Blending mode opposed to “Color”. Combines Luminance (light) of the upper layer and Hue (color) and Saturation (color variations) of the lower layer. It turns out that glow, which we did in the previous two layers amplify and create one almost transparent distance between the center of the molecule and the glow edge. Because blue background and the previous layer (which just increased the dark areas in the center), the center of our molecules have become smoother and more expressed.
8 responses to “Create This Abstract Medical Image of DNA with Photoshop”
-

no
-
It’s a good thing that some images come with what’s written… Too many mistakes from picture to writting…
Even the size of the doc is wrongly written….. That’s just poorly written Tut…. -
some pic is not found, please repair it, thank you!
-
Nice one
-
What is RMB?
-
This is the right mouse button.
-
-
thx!
I’d like to learn more same techniques) -
Arne Zou, na das ist ja was für uns.^^
Leave a Reply