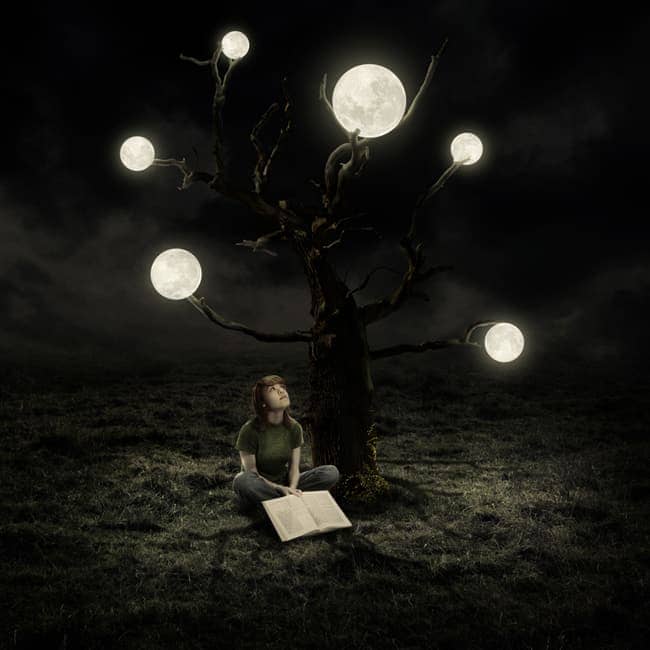


Luminar AI lets you turn your ideas into reality with powerful, intelligent AI. Download the photo editor and see how you can completely transform your photos in a few clicks.
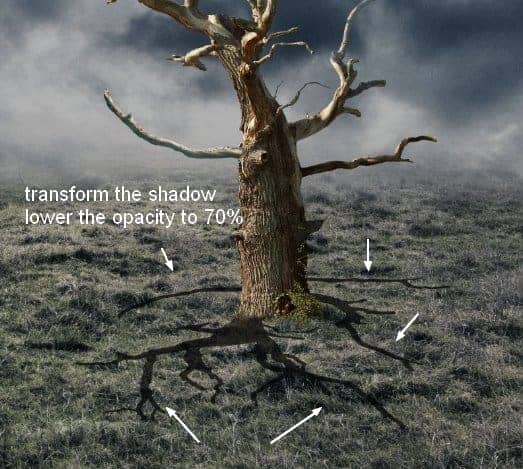
Fill this selection (Shift+F5) with black and convert it to a Smart Object. Flip it vertically (Edit > Transform > Flip Vertical) and use Cmd/Ctrl+T to transform this shadow and lower its opacity to 70%:
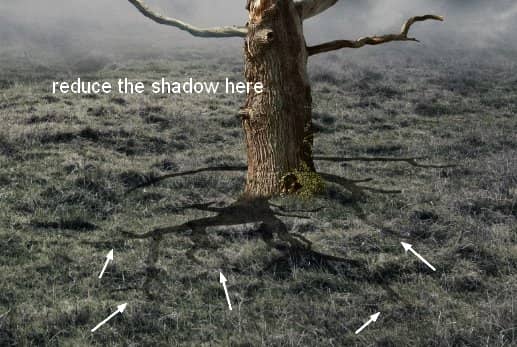
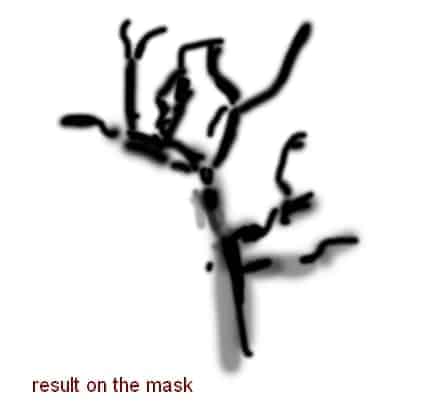
Use a layer mask to reduce the shadow of the further branches from the ground:
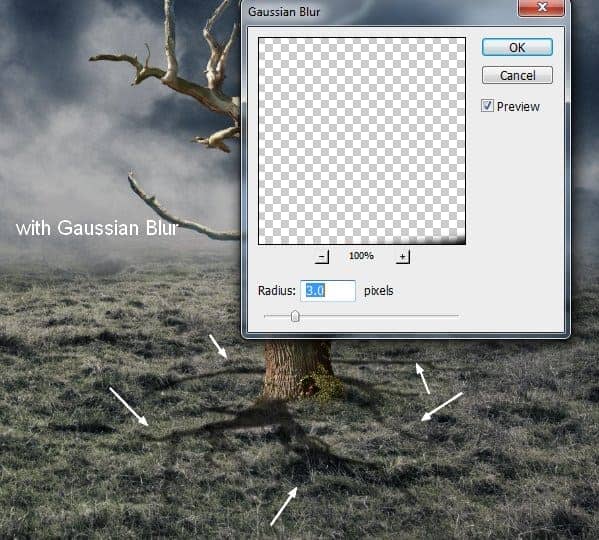
Go to Filter > Blur > Gaussian Blur and set the radius to 3 px:
Step 12
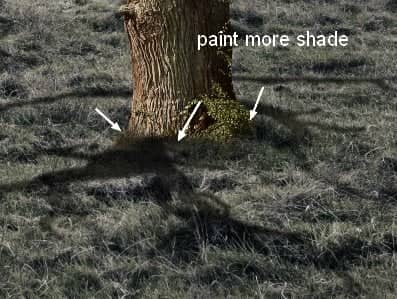
On a new layer (under the tree ones) use a soft black brush with the opacity about 60% to paint more shade around the tree bottom:
Step 13
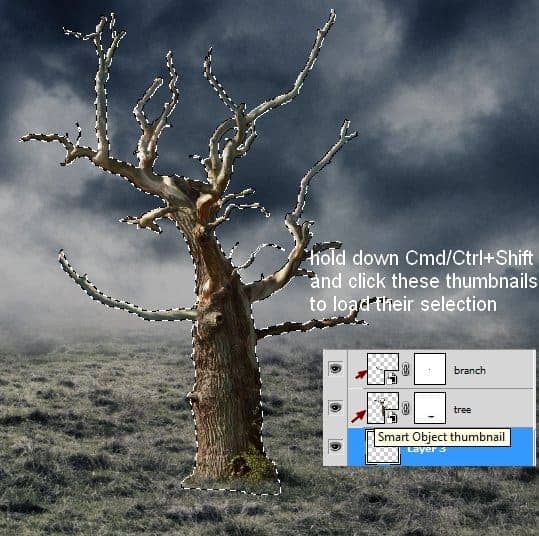
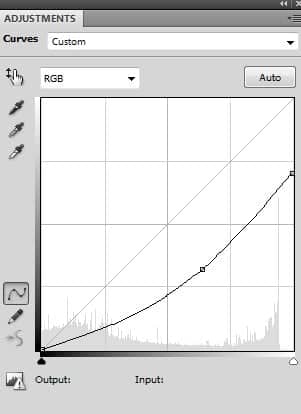
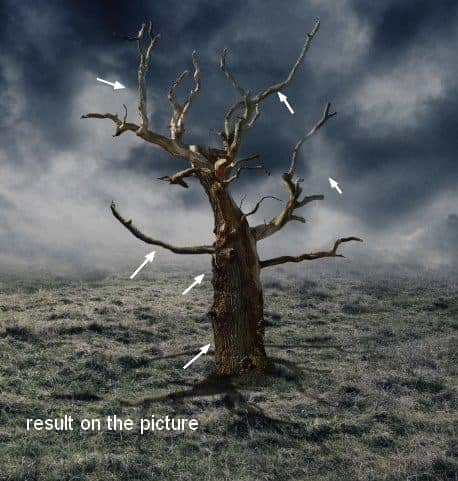
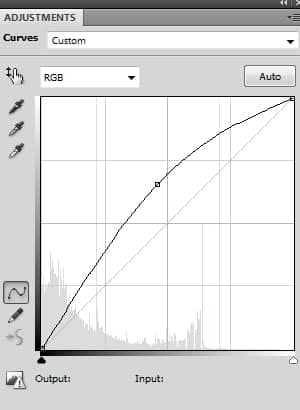
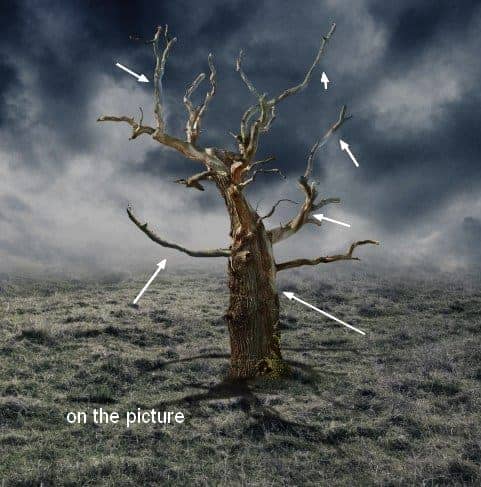
Select the tree, branch and shadow layers and press Cmd/Ctrl+G to make a group for them. Change the group mode to Normal 100%. Create a Curves adjustment layer above the tree layers and down the lightness:
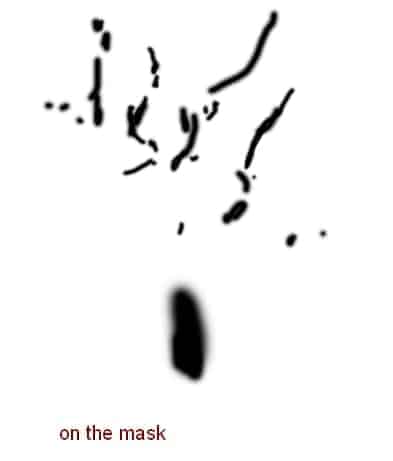
On this layer mask use a black brush to reduce the shade on the parts which are dark already:
Step 14
Make another Curves adjustment layer to brighten the dark parts a little:
On this layer mask use a black brush to reduce the lightness of the parts which are bright already:
Step 15
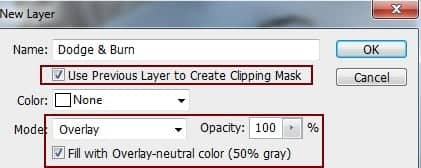
To fix the light on the tree trunk I made a new layer above the tree one, changed the mode to Overlay 100% and filled with 50% gray:
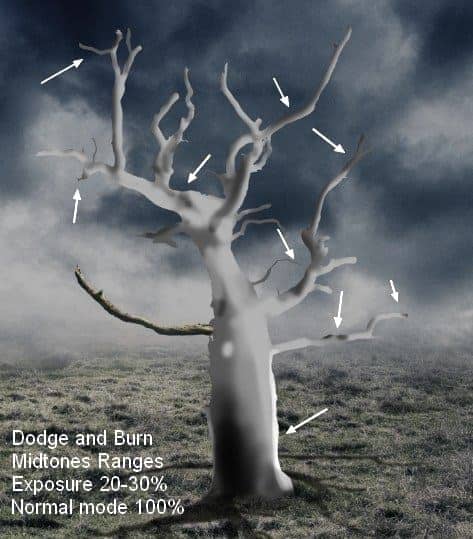
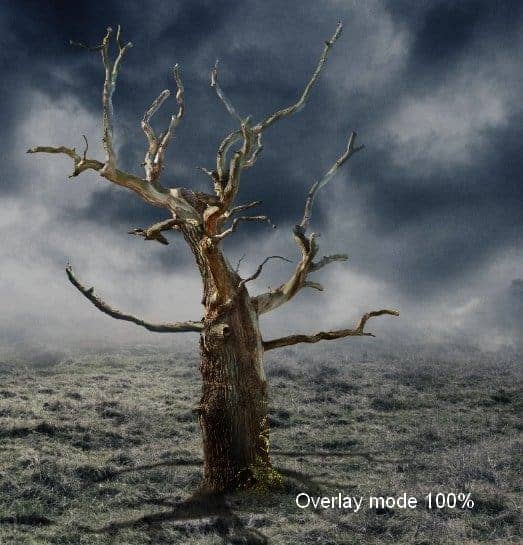
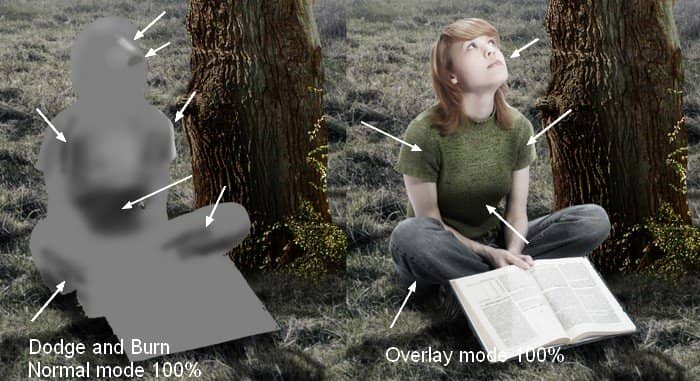
Use the Dodge and Burn Tool (O) with Midtones Ranges, Exposure about 20-30% to refine the light/shade on the tree. You can see how I did it with Normal mode and the result with Overlay mode:
Step 16
Place the mode image beside the tree root and remove the white background using a layer mask (you can use your own image):
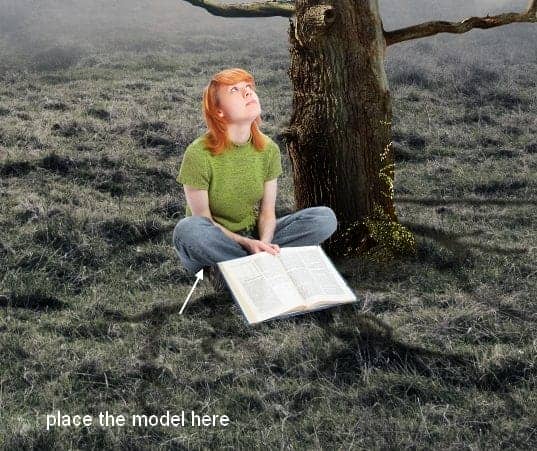
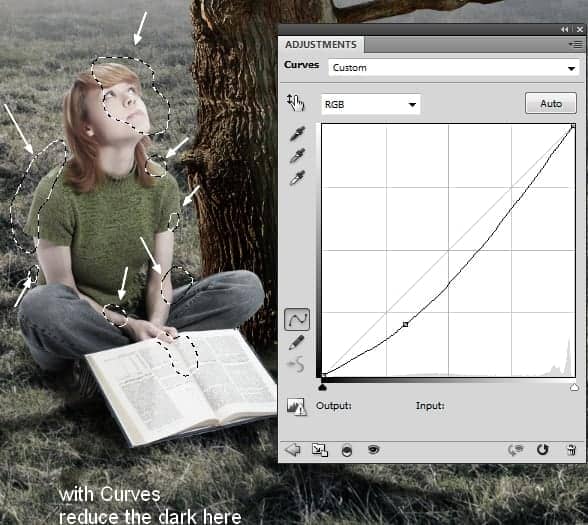
Make a new layer under the model one and use a soft black brush to paint the shadow for her:
Step 17
I used Hue/Saturation to reduce the saturation of the model :
Step 19
I made a new layer with the same settings like in the step 15. Use the Dodge and Burn Tool to refine the light/shade on the model:
Step 20
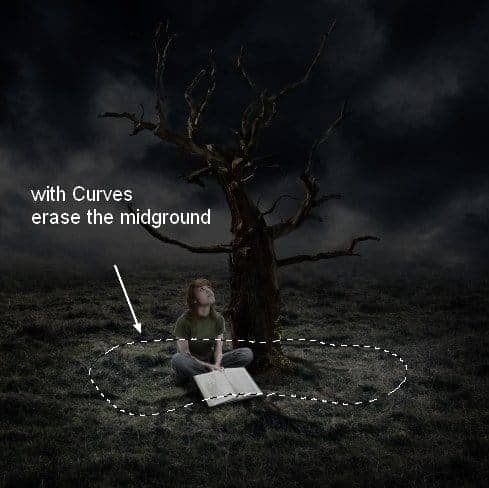
It's time to adjust the contrast and color of the whole picture and change the time from day to night. Create a Curves adjustment layer on the top:
On this layer mask use a soft black brush with the opacity about 20-25% to erase the midground:
Step 21
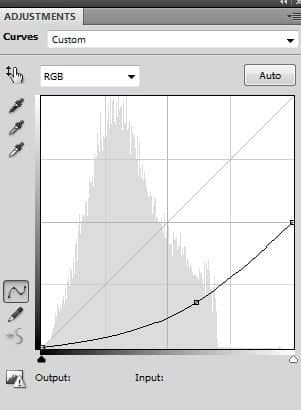
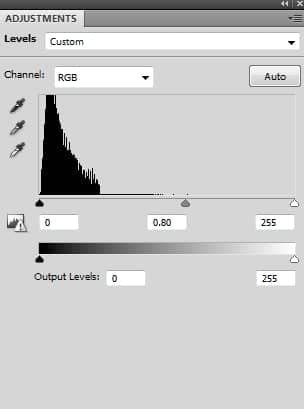
I used Levels to increase the picture contrast:
Apply brush masking on the layer mask (the midground and model):
17 comments on “Create a Surreal Artwork of a Tree with Moons in Photoshop”
What does it mean by "Curves (Clipping Mask)" in step 7
realy nice explained! thanks a lot =)
Always love your tutorials Jenny
Thank you for a lovely charming lesson. It's my pic http://j-p-g.net/if/2015/11/28/0852252001448714236.jpg
Thank you! Amazing tutorial.
Great tutorial.
i have seen better, but it could be worse. dunkey aka dunc. west side is my hood
realy good its alright
very nice ...good explanation
Thank you so much
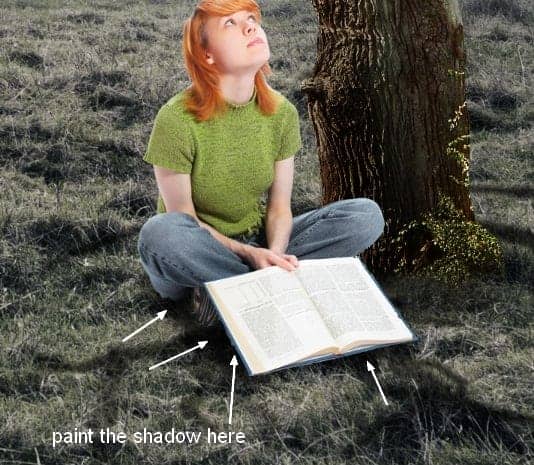
tutorial is good but shadow is missing on book
i dont understand not enough detailsssssss
Good tutor.
Perfect tutorial *-*
how
Thank you, I liked! My creation:
http://cartes-mireilled.eklablog.com/photomontage-surrealiste-d-un-arbre-avec-des-lunes-a117631138
Very good tutorials