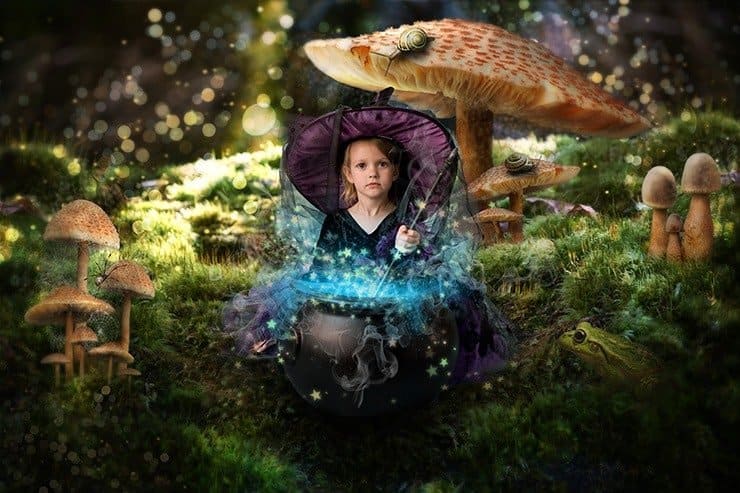
You want to make your child a memorable picture or want to make an amazing gift, or an interesting looking child photo manipulation, or want to create a magical and lovely image, or want to learn how to create the effect of phosphorescent stars? Then this tutorial is for you! This tutorial will show you from start to finish how to create this magical photo manipulation! Read this tutorial and learn how to create interesting effects create interesting and beautiful picture!
What you’ll be creating
The first step is creating background and adding textures. The second step is adding mushrooms and bugs The next step is to add the model and create the effect of magic and neon stars. In the final stage, we will add small details and special effects. You need any version of Photoshop, inspiration, attention, good mood!

Tutorial Resources
- Model – deathbycanon-stock
- Background – rustymermaid-stock
- Snails – gd08
- Spider – Camelfobia
- Mushrooms 1 – Dracoart-Stock
- Mushrooms 2 – Dracoart-Stock
- Mushrooms 3 – Dracoart-Stock
- Light texture – xnienke
- frog – hatestock
Spider Webs – frozenstocks(Alternative)- Nature bokeh – koko-stock
Step 1
Before you start, download all the material in one place. So it will be easier to work with them. Download resources in the best quality, using the “Download” button in the top-right corner of the page with resource on site DeviantART.com. Open Photoshop and start by creating! Create a new document. Go to File > New or the short key Cmd /Ctrl+ N. A blank document with size of 3000 pixels wide and 2000 pixels high, resolution 200 Pixels/Inch. I named the document “Queen of fungi”.

Step 2
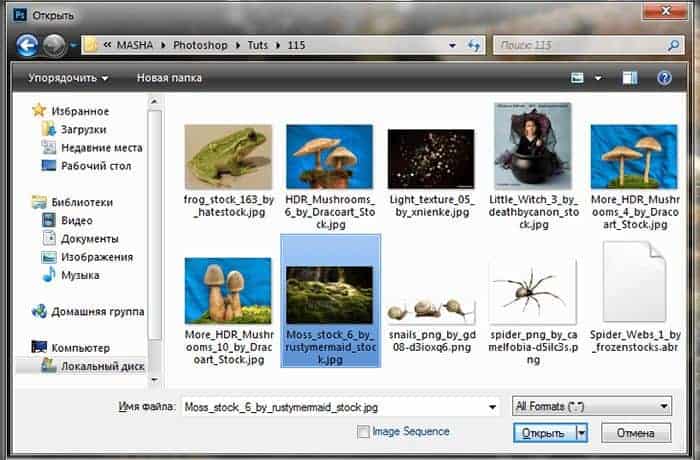
Now I have added a background picture. Go to File > Place and select the image “Moss_stock_6_by_rustymermaid_stock”.

The picture should be opened to all Working field size. If you do not, then go to the resource page and download it as it is written in the first step.

Step 3
Zoom bit image, as shown in Figure. Use the Free Transform tool (Cmd /Ctrl+ T or go to Edit > Transform > Scale).

Step 4
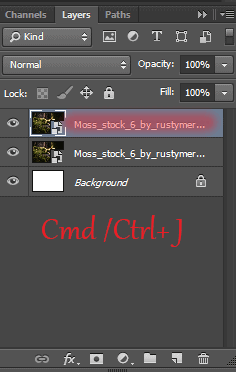
Duplicate this layer one time (the short key Cmd /Ctrl+ J or go to Layer> Duplicate Layer…).

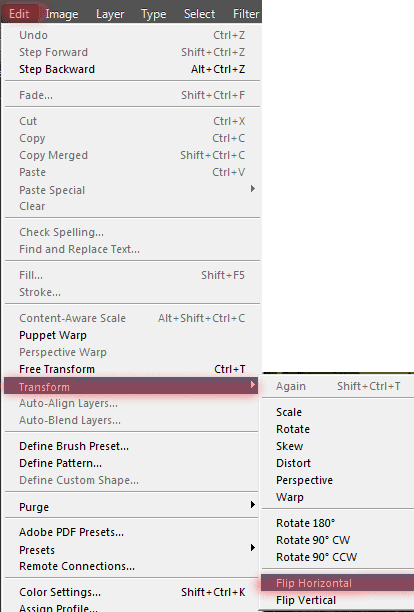
Now flip the duplicated image horizontally. Go to Edit> Transform> Flip Horizontal


Move not reflected horizontally (first layer background) down a bit as shown in Figure.

Step 5
Add a layer mask to this layer.

Select the Brush Tool (B) with there settings: Size: 100px, Hardness: 0%, Opacity: 100% – 50%, flow: 100%,
23 responses to “Turn Baby Photo into a Fairy Tale “Queen of Fungi” Composite”
-
did phone until I got to the star brush tutorial – that was it, the instructions were not in line with photoshop at all
-
Great tutorial!
-
Thank you for all your hard work and the wisdom you shared.
-
Thank you for all you hard work and the wisdom you shared :)
-
Why isn’t this tut visible? Post is two days ago but the comments dates are from 2014?
-
laborious lesson.It takes many time and a lot of effort to achieve a good result. Thanks for lesson
-
wove
-
Nice technique. Really useful…thanks for the post…
-
I like the idea of this tutorial, it’s very creative and the result looks great
-
Very creative and professional design.
-
Thank you very much! I do it.
-
спасибо за красивые уроки!!!!!!!!!!!!
-
Спасибо большое! Так приятно знать, что они понравились и ,надеюсь, полезны. Уже прочитали их? :) Скоро будут новые уроки! Если у вас будут вопросы, то пишите мне и я с радостью помогу вам.
-
-
Thank you for sharing this great tutorial well explained and I liked perform:
http://cartes-mireilled.eklablog.com/photomontage-magique-reine-des-champignons-a108935666-
Thank you very much! I am very pleased! I tried :) I really appreciate it! :D Unfortunately your link does not open. I would be happy to look your work!
-
-
Nice job
-
Thank you very much! I really appreciate it! :D
-
-
Really Nice.Thanks to share this Tutorial.
-
Thank you very much! I really appreciate it!
-
-
очень красивый урок!!!!!!!!
-
Спасибо большое! Мне очень приятно!:)
-
-
nice
-
Thank you very much!
-


Leave a Reply